
Self-Care for Your Guitar: A Maintenance Guide
Self-care for your guitar is just as important as self-care for yourself. We put together a guide to keep your guitar looking and sounding fresh.
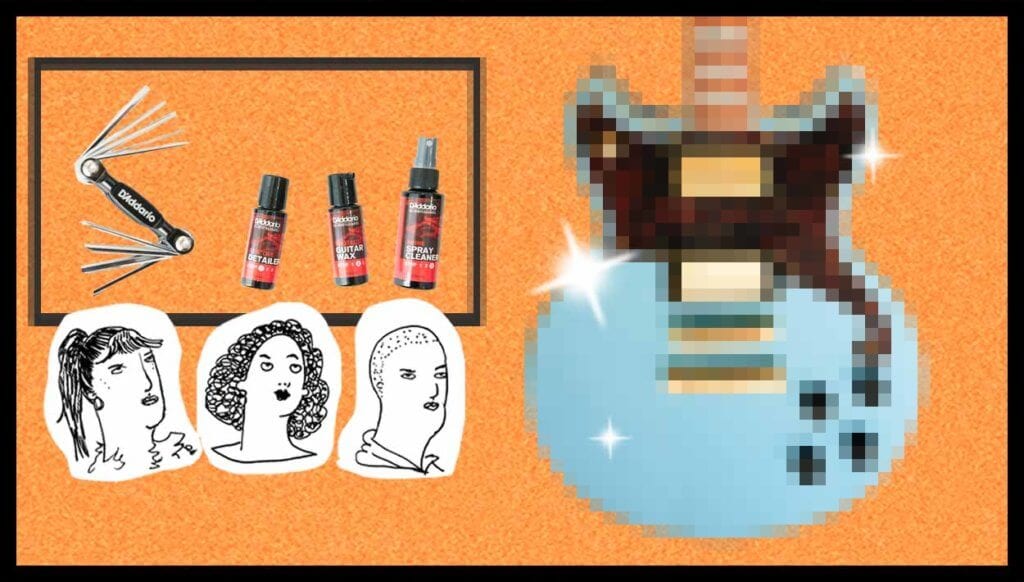
In the age of self-care, it’s just as crucial to carry this mentality over to your guitar. In the middle of playing shows, rehearsing, touring, and recording, there’s not much time to sit down and give that TLC to your precious instruments. With the help of D’Addario’s Guitar Maintenance Kit and Instrument Care Kit (all packaged neatly in a travel case), you can keep your guitar looking and sounding fresh when bustling through your busy musician life.
Here is a step-by-step guide to maintaining your guitar in a way that keeps the fretboard comfortable, the tone clear, and the body glistening like new.
First, Remove the Strings…
Using the mat and headstand neck cradle provided in each D’Addario kit, you’re able to set up a workspace just about anywhere. I set up mine on two chairs in my tiny apartment.
The first step is unwinding the strings until they are completely loose and mobile. Included in the kit is a 3-in-1 Pro-Winder, consisting of a built-in wire cutter, a peg winder, and a bridge pin puller (for acoustic guitars).
For a full clean up of the guitar, you will need to remove all the strings to get to the fretboard. Once the strings are loose, cut them with the wire cutters and pull out the strings from the back of the body if it’s an electric guitar, or pull out the pegs if it’s an acoustic.

Part 1: Cleaning the Guitar Body
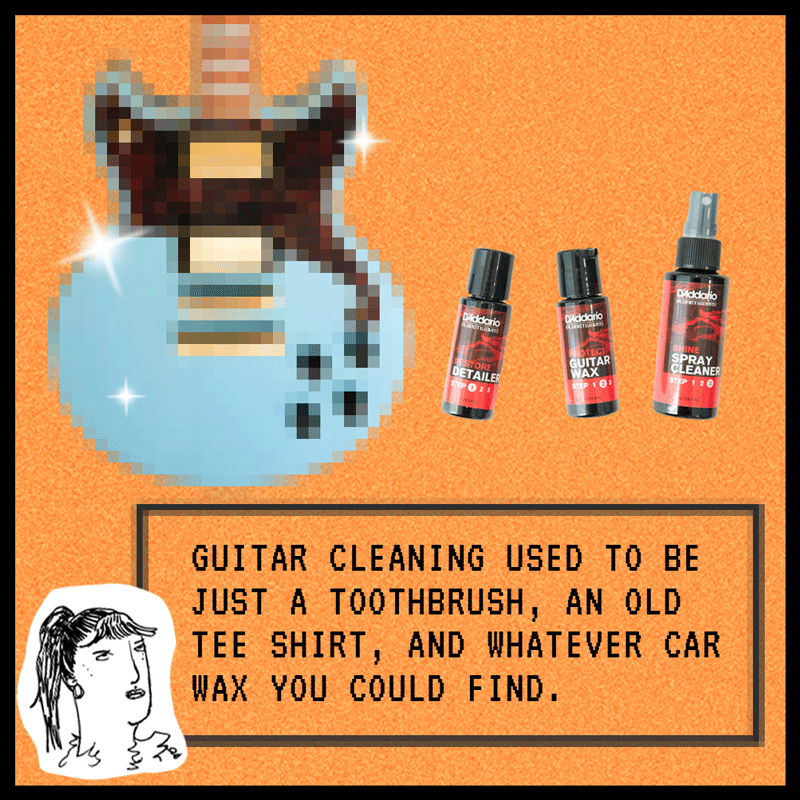
Guitar cleaning used to be just a toothbrush, an old tee shirt, and whatever car wax you could find. With the D’Addario Instrument Care Kit, there is a better three-step polishing system.
Step 1 – Restore Detailer
Using the rag provided in the kit, apply the wax to any clear coat finish. A formula of Carnauba wax protects the finish and leaves your guitar shining with mirror reflection.
Step 2 – Protect Guitar Wax
This product is designed to remove the grime build-up from finger oils and all around smudges. By polishing out swirl marks and even minor scratches, it brings a clear base back to your instrument.
Step 3 – Shine Spray Cleaner
If you aren’t going through and doing a deep clean of your guitar, you can use this product on its own as a quick wipe down. Erasing dust, fingerprints, and minor imperfections, it will also remove residue from polish from the first two steps, while also enhancing your instrument’s natural color and finish.
Part 2: Cleaning the Fretboard
Your guitar’s fretboard wood determines what product to use in between frets. If the finish is a clear coat, you can go ahead with step one (restore) and two (protect) over the frets. If it’s unfinished wood (most likely on acoustic guitars), you’ll want to use the hydration oil to condition and remove the finger grease build-up.
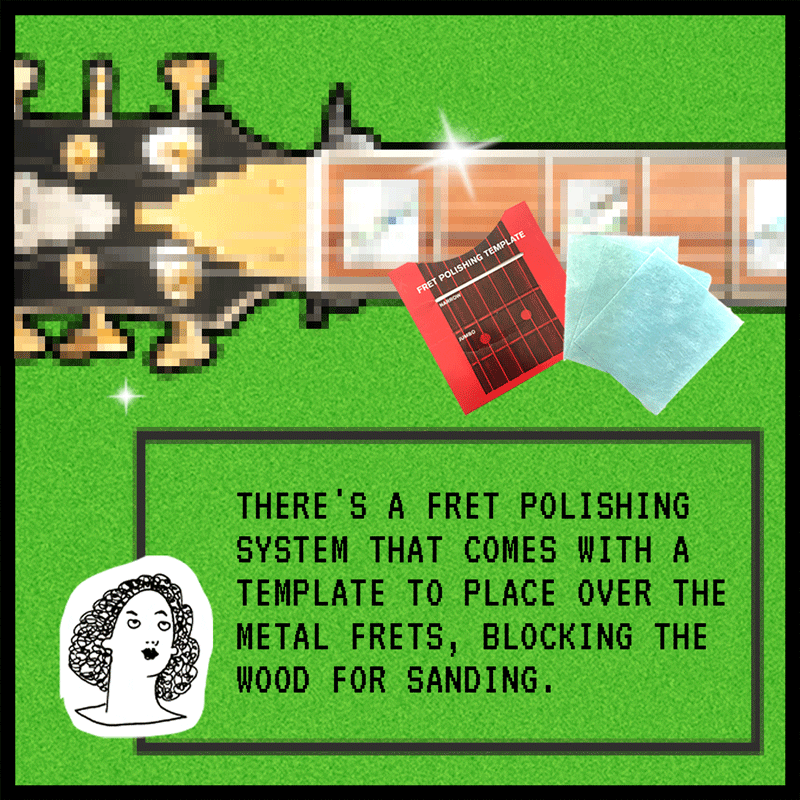
Hydration oil is included in the Instrument Care Kit for natural wood fingerboards. Use to polish up and clean in between frets, giving them an easy sliding ability for playing. There’s a fret polishing system that comes with a template to place over the metal frets, blocking the wood for sanding. Using the fine sandpaper included, you can remove grime and corrosion to bring back a shine to your frets.
Now, Restring…
Once you have cleaned and polished your guitar, it’s time to put on the new strings. First, pick the gauge of your choice. The thicker the strings, the beefier the tone.
Next, identify if you have locking tuners or the classic vintage-style tuners. The fewer times you wrap the string, the better the guitar holds tone.
Once the string is tight, it’s time to tune and stretch. Tune each string, and then grab and wiggle it back and forth. Retune and repeat until the strings settle and don’t detune. The Pro-Winder helps with this process as well.

Part 3: Setting Intonation
Note: This process can be difficult. Proceed with caution, or go see your local guitar tech.
The D’Addario Instrument Care Kit comes with a multi-tool that, among many uses, is used for setting intonation. Adjusting the length of the string by the saddles or tightening the truss rod sets the intonation, tuning the guitar to itself. Check if the 12th fret is in tune with the 12th fret harmonic. If the fretted note is lower than the harmonic, you will need to bring the saddle toward the headstock. If higher, then do the reverse. The truss rod adjusts the amount of action by how curved the neck is. Take a look down your neck and make sure it is straight. If you have any buzzing or dead notes, this could be fixed by adjusting the truss rod.
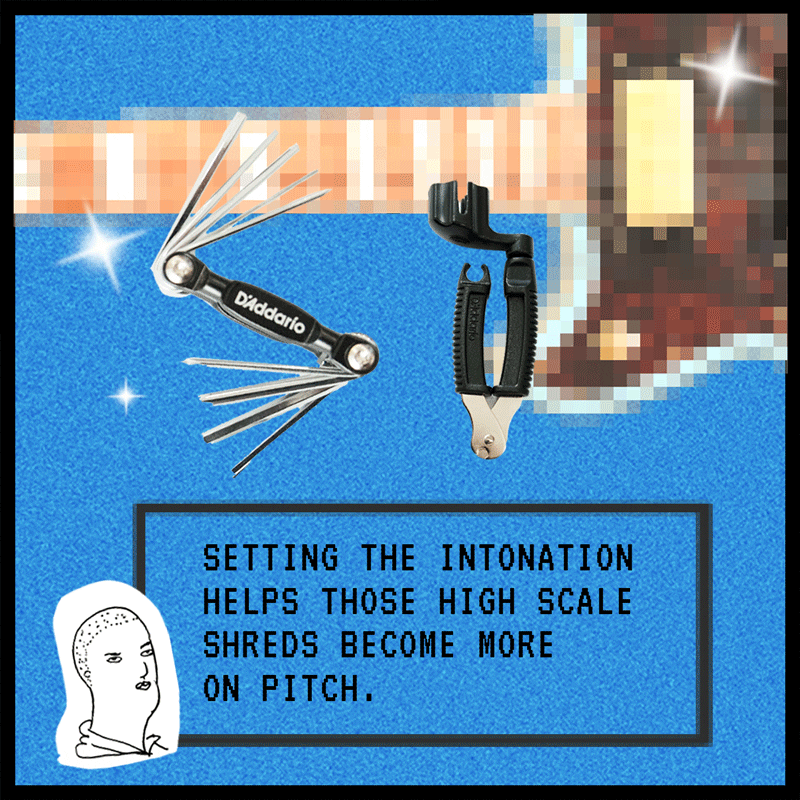
Maintaining your guitar helps with presentation and impacts tone. With new strings and a waxed fretboard, your playing will sound better and become more fluid. Setting the intonation helps you stay on pitch as you play across the neck. Compact and useful to have on hand for major and minor fixes, I recommend these D’Addario kits for on the road maintenance and everyday care.
D’Addario Guitar Maintenance Kit
- Pro-Winder, 3-in-1
- Headstand Neck Cradle
- Non-slip Protective Body Mat
- Multi-Tool
- String Height Gauge
- Lubrikit Lubricant
- Fret Polishing System
- NS Lite capo
- Travel Case
- Detailed Instruction Manual
D’Addario Instrument Care Kit
- Headstand Neck Cradle
- Non-slip Protective Body Mat
- 3-step Polishing System
- Microfiber Polishing Cloth
- Hydrate Fretboard Conditioner
- Fret Polishing System
- XLR8 String Cleaner/Lubricant
- Travel Case
- Detailed Instruction Manual

More posts
-
 By: Cynthia Schemmer
 -
Powered By: Fender
-
By: Cynthia Schemmer
-
By: Cynthia Schemmer
-
By: Leila Sidi
-
By: Leila Sidi
-
Powered By: Reverb
-
Powered By: Marshall Amps
-
Powered By: Positive Grid
-
By: She Shreds


Comments
No comments yet