Dual Action Truss Rod System: How A Neck Adjustment Goes A Long Way
A simple neck adjustment to your guitar might be all you need to get your tone sounding on point. We break down how to identify and adjust the issue.
In a perfect world, our brand new guitars would stay perfectly calibrated, leaving only room for perfect intonation, quick and clean fret action, and a crisp tone. However, over time, a simple neck adjustment might be necessary to assure your neck is as strong, playable, and straight as can be. Fortunately, the mystery behind properly adjusting your own guitar neck becomes less and less daunting the more you know about the overall process.
This year, PRS Guitars is celebrating their 35 year anniversary of manufacturing high-quality instruments out of Stevensville, Maryland, and they have taken great pride in honing their wood and necks over the years. The company dries the wood used in each of their guitars to under 10% moisture content (which varies by wood species), the natural balance wood eventually comes to if given decades to dry out—aka the level that the oldest, sweetest sounding wood maintains.
PRS also employs their own patented Double Action Truss Rod—the industry’s most fully adjustable neck system. The patented double action of the PRS truss rod allows for tightening or loosening to compensate for climatic conditions, giving your strings more or less relief, removing fret buzz, and tightening up your overall intonation.
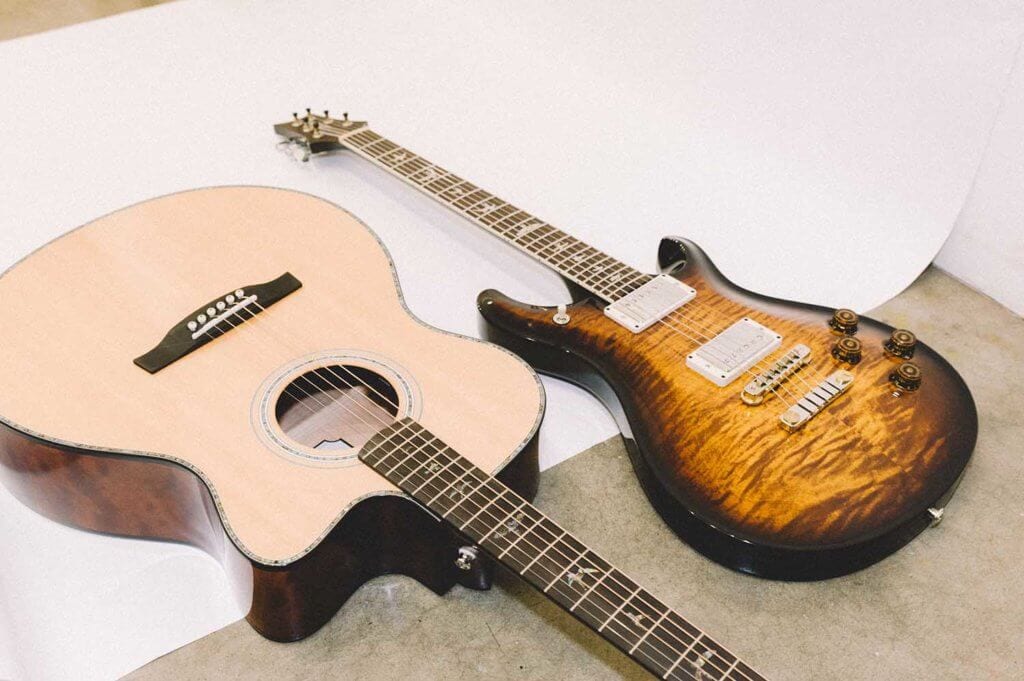
Setting up your own guitar has never been more accessible, thanks to PRS’s user-friendly platform. We’ll be using a McCarty 594 electric guitar and a SE A55E acoustic for this tutorial, and these new PRS guitars come with instructions, all the gadgets you may need for the job, and clear visuals to accompany you on your neck adjustment journey! Here’s to a company always striving to break the mold, who go above and beyond when it comes to quality and user-friendly craftsmanship.
What’s the Issue?
First things first: one should know that a truss rod is simply a singular steel rod running the length of your guitar, beneath the fret-board. It’s there to ensure the overall integrity and strength of your guitar’s neck, and to help with the effects of string pull and climate.
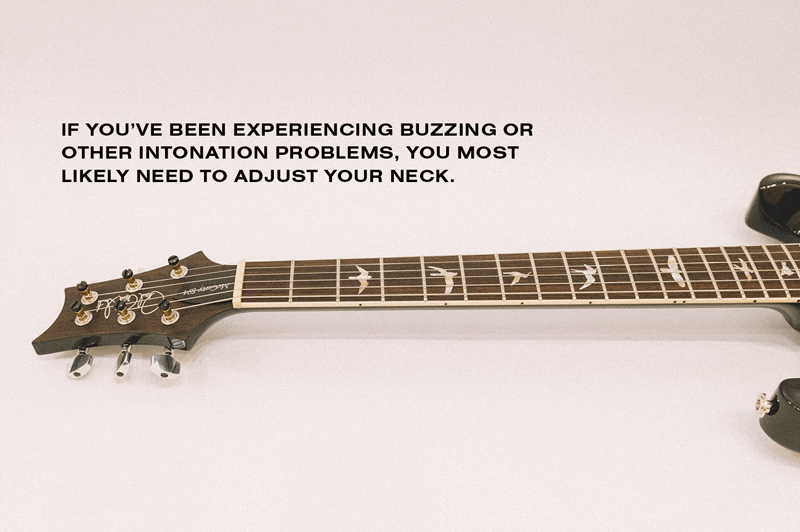
If you’ve been experiencing buzzing or other intonation problems, you most likely need to adjust your neck. Humidity and temperature changes are the primary causes for a bowed neck, and any piece of wood will be affected. A bowed neck will have unusually high action, coupled with awful intonation problems (like buzzing), especially higher up on the neck (5th fret and higher).
Here are two issues you might be dealing with:
- Back bow – buzzing on frets 1-5, and you’ll find that you need to raise your action exceptionally high to get rid of it.
- Front bow – buzzing through the middle frets (5-10) of the neck.
Test It Out
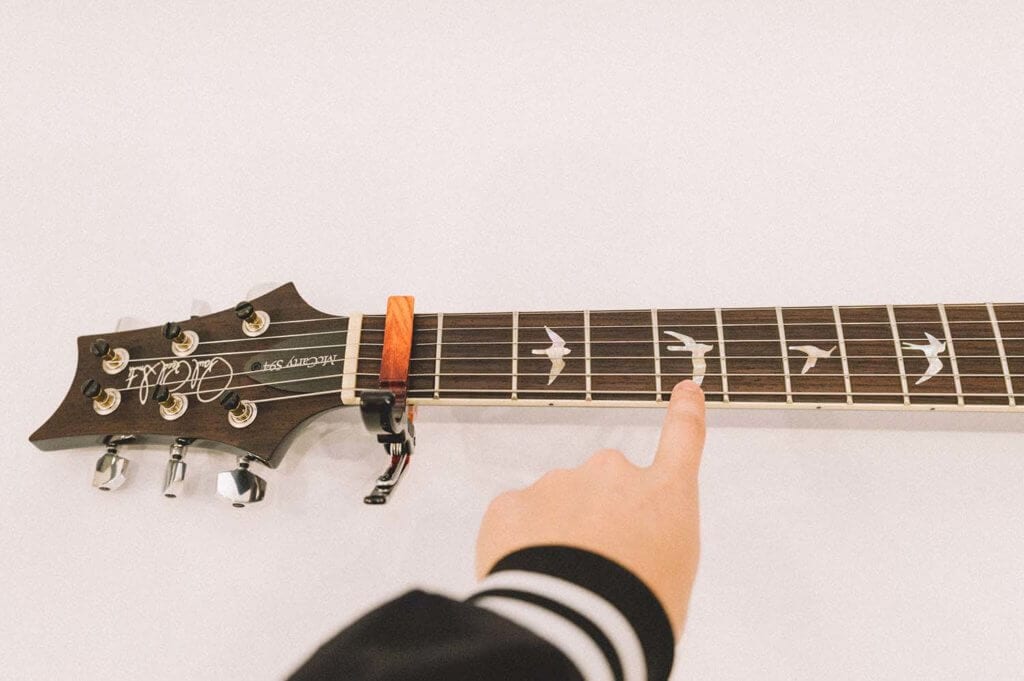
Hold down the strings at the first and last fret. (Pro tip: Use a capo to hold down the strings on the first fret so you have one free hand). Now, using your free hand, tap the string on the fifth fret to gauge how much bounce it has.
- If there’s a lot of bounce or a large gap, there’s a front bow issue.
- If there’s string buzzing with little to no bounce, there’s a back bow issue.
How to Make the Neck Adjustment Your Guitar Needs

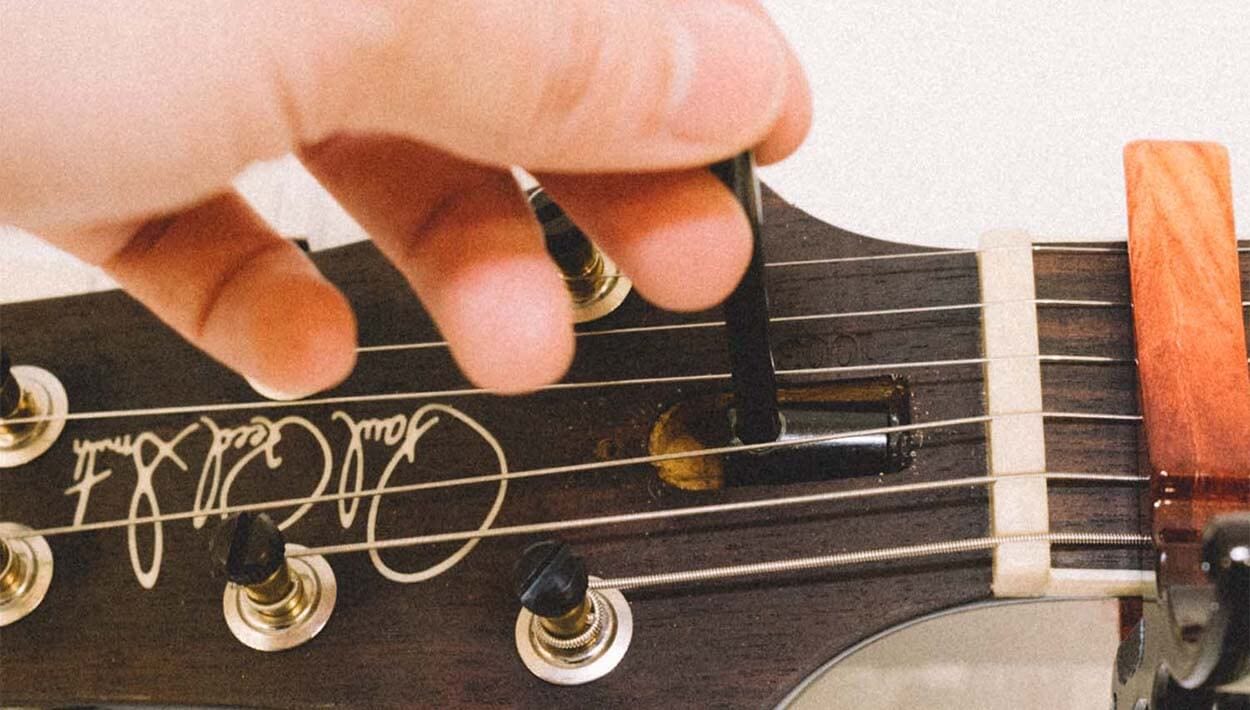
To access and make adjustments to the truss rod, keep the capo on the first fret and remove the truss rod cover located behind the string nut at the headstock. A simple turn in one direction or the other using the appropriately sized wrench will dramatically change the tonality and overall playability of your guitar. For our adjustment on our PRS guitar, we will be using a hex socket wrench, but different guitars need different truss rod wrenches. Be sure to check that you have the correct wrench for your guitar!
Tip: The smallest tweak can dramatically alter your guitar’s neck tension, so being very observant when making adjustments is key. Your truss rod will never need a full turn—more likely a ¼ to ½ turn will do the trick!
Leave your strings on and in your desired tuning so that the tension is “normal,” and then adjust according to your neck issues:
Back bow – Starting with a quarter turn, push the wrench away from your body (to the right) to increase the neck bow.
Front Bow – Pull the wrench ¼ to ½ turn towards yourself (to the left).

Now, make tiny adjustments in either direction until your strings sit properly when tested. Use a feeler gauge to achieve an exact gap of .007” between the bottom of your string and the 8th fret.
And don’t forget to tune your guitar around your new setup, as things are bound to have shifted after a successful adjustment!

More posts
-
 By: Cynthia Schemmer
 -
Powered By: Fender
-
By: Cynthia Schemmer
-
By: Cynthia Schemmer
-
By: Leila Sidi
-
By: Leila Sidi
-
Powered By: Reverb
-
Powered By: Marshall Amps
-
Powered By: Positive Grid
-
By: She Shreds


Comments
How does the dual action work compared to the single action truss rod? An explanation would be appreciated. Thanks, Mike
Comment by Michael Breeman on April 2, 2021 at 5:52 pmWant to adjust the neck on a sassafras charvel. I’ve put on 11 to 53 gage strings and an extra spring. Floyd Rose trem.
Comment by Richard L Garner on December 27, 2021 at 2:26 pmHi, after doing a neck adjustment and getting the magic 007″ at the 8th fret i find that to have obtained this the neck Allen key is mid way between full righty and full lefty basically hanging in mid air no resistance one way or the other, i have checked the Truss Rod and this is working correctly and normal, is it okay for it to be left as it is or will it work more loose and create problems, will altering the neck angle put the problem right or not, i must admit i have not come across this problem before, the string height for all 6 strings is set at 1/32″ at the 12 fret and works excellent, the guitar is a U.S.A. Fender Strat made in Corona Calif, i wonder if you could help me with this situation or if you have any input, Kind Regards, Thank you Dave
Comment by David Hallas on February 21, 2022 at 11:20 am