Effects, Chain Configuration, Troubleshooting, and DIY Pedalboard Series Pt. 1
This Summer She Shreds has hosted monthly workshops at our HQ in Portland, OR, based on the subjects of guitar, management, and recording. In May we focused on restringing your guitar, and June was all about pedals.


In this online version of the workshop that was originally led by Janie Black, and hosted by Kathy Foster, we’re going to learn a little bit about pedals. We’ll explore how people use them, what kinds of pedals exist, how to use more than one at once, what order to put them in, and hopefully a lot more! We will outline how to make a simple pedalboard, which will help you easily organize and transport your pedal chain without disconnecting all the cables and/or power supply! Troubleshooting signal path problems (buzz, noise, or bad connections) will also be covered, hopefully giving you some tools to problem solve through signal issues.
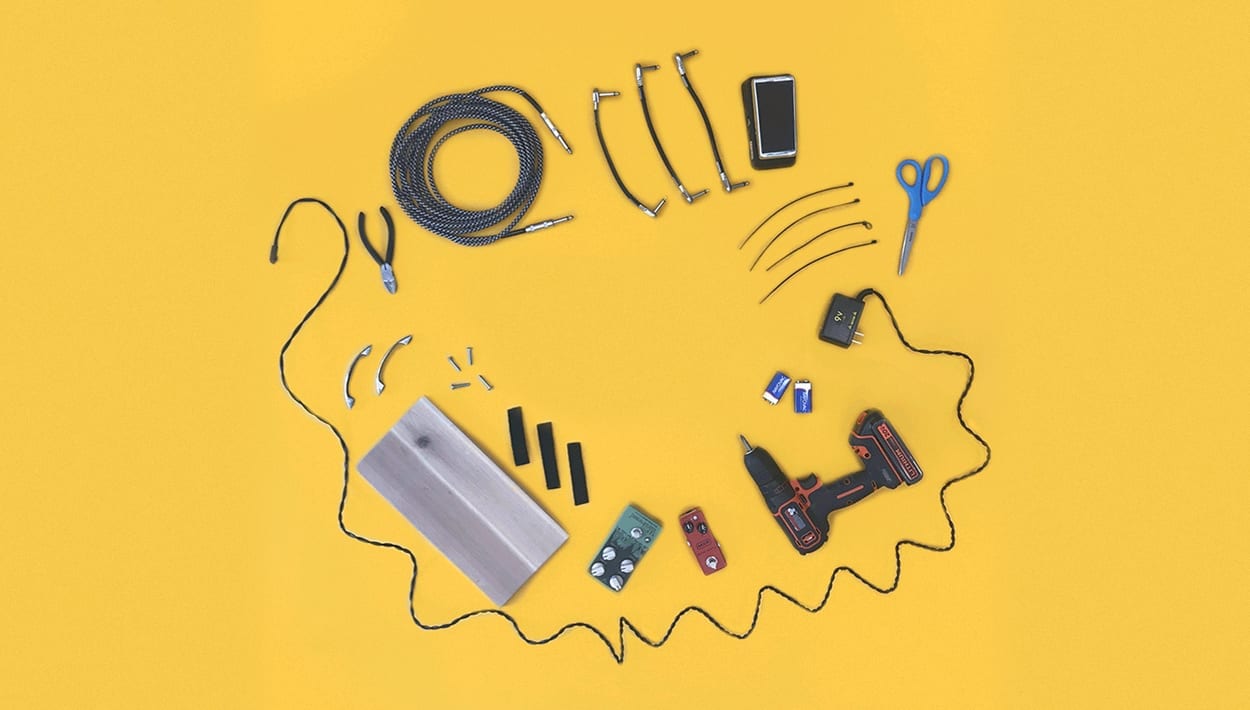
In this six-part lesson series, you will need the following tools to leave with a fully functional pedalboard that you organized and built yourself! If you choose to follow the series, make sure to tag us during your process!
You’ll need:
- A guitar and amplifier (duhhh!)
- Desired effects pedals
- Power supplies
- Batteries (9V, AA, AAA)
- Instrument cables
- Patch cables
- Velcro
- Small zip ties (I promise, they are essential for cable management).
- Duct tape (optional)
- Scissors
- Cable/wire cutters
- Screwdriver
- Sharpies (optional)
- Paper (optional)
- Superglue (optional)
- Wood board cut to desired dimensions
- Wood screws
- Two handles
First thing’s first:
Let’s go over some of the most common pedal types and what they do. Keep in mind that these are just some of the effects out there! There are so many different effects and more and more are being created daily.
Learn and experiment with these pedals to better understand the sound you’re seeking and the tools necessary to get you there.
Tuning pedal
Guides you in tuning your instrument and sometimes can act as a mute if pedal has the option to cut signal while being used.
Example: Boss TU-2
Equalizer (EQ) pedal
Helps to lower/cut or raise certain frequencies. Can also sometimes be used as a clean boost if all frequencies can be turned up slightly.
Example: Boss GE-7
Volume pedal
A popular type of pedal that changes the volume of signal when manipulated.
Example: Ernie Ball VP Junior
Compression (or compressor) pedal
“Compresses” the signal that your guitar produces by normalizing the dynamic range of the audio input signal based on a threshold value. Can also increase sustain by controlling how loud or soft your signal gets, without distorting your tone.
Example: MXR Dyna Comp
Noise Gate pedal
Comparable to a compressor, a noise gate controls the volume of an audio signal.
Example: Behringer NR300
Limiter pedal
Allows signals below a specified input level to pass unaffected while lowering the peaks of stronger signals that exceed this threshold.
Example: Boss LMB-3 (bass limiter)
Wah (or wah-wah) pedal
Alters the tone and frequencies of the guitar signal to create a distinctive sound, mimicking the human voice saying the onomatopoeic name “wah-wah.”
Example: Jim Dunlop Cry Baby Wah
Boost pedal
Boosts or cuts the signal from one level to another, set, level. Like a volume pedal, but without dynamic capabilities.
Example: ETC Electronic Spark Booster
Chorus pedal
Creates a richer, thicker sound that simulates the slight variations in pitch and timing that occur in a vocal chorus.
Example: Electro-Harmonix Small Clone
Reverb pedal
Creates the effect of reverberation.
Example: Electro-Harmonix Holy Grail
Phaser (or phase shifter) pedal
Split the signal of your instrument into two exact copies, shift the phase of one copy, and then recombine the two as a single signal, creating a rippling, Doppler-like effect in your sound.
Example: MXR Phase 90
Flanger pedal
Similar to a phase shifter, a flanger splits the signal into two copies, then one of them is delayed in time very slightly. The delay time also changes at a constant rate, which can be manipulated with a knob. It sounds kind of like a jet plane!
Example: Mooer Eleclady
Delay pedal
Records a copy of your signal and plays it back after a delay, creating a repeating, decaying echo effect.
Example: Line 6 DL4
Tremolo pedal
As an effect, tremolo is a modulation effect that creates a change in volume. The “tremolo arm” on your guitar is actually vibrato, which lowers and raises the pitch, creating variation in tone. Example: EarthQuaker Devices Hummingbird
Loop (looper) pedal
Allows you to record short pieces of audio and loop, or repeat, them indefinitely. Sometimes loop pedals will have layering functions, allowing you to record one or more pieces of audio over the original track.
Example: Boss RC-2
Ring modulator pedal
A signal-processing function performed by multiplying two signals, where one is typically a sine wave or another simple waveform and the other is the signal to be modulated. Honestly, just makes your signal sound “wobbly.”
Example: Moog Moogerfooger
Extra special type (to me at least)!
Dirt pedals:
Fuzz pedal
One of the first guitar effects ever engineered, fuzz pedals change the guitar signal by using transistors (germanium or silicon) to amplify the signal to a point where it starts to sound distorted, fuzzy, and has very long sustain.
Example: Jim Dunlop Fuzz Face
Overdrive pedal
Provides a gain boost to “overdrive” a tube amp into distortion, or to approximate the mildly distorted sound of a slightly overdriven tube amp.
Example: Ibanez Tube Screamer
Distortion pedal
Whereas overdrive aim to create the sound of tubes pushed to their limit, distortions do what their name says and distort the signal tone. To do this, they use a network of transistors and clipping diodes.
Example: Pro Co Sound RAT
A note on dirt effects: Fuzz, overdrive, and distortion pedals often sound pretty similar, but they reach the goal of dirtying up the guitar signal through different methods. Some may work better for your setup than others! For example, an overdrive like the Ibanez Tube Screamer may sound better when used with a tube amp and you may find that a solid state amp responds better to a distortion pedal like a RAT. The only way to know is to try out different stuff!

More posts
-
 By: Cynthia Schemmer
 -
Powered By: Fender
-
By: Cynthia Schemmer
-
By: Cynthia Schemmer
-
By: Leila Sidi
-
By: Leila Sidi
-
Powered By: Reverb
-
Powered By: Marshall Amps
-
Powered By: Positive Grid
-
By: She Shreds


Comments
Please notify me of the remaining 5 parts of the Series (effects chain, pedal board, etc)
Comment by Tony Long on July 17, 2018 at 8:35 am[…] supply can make your signal noisy, weak, or even kill your pedals. While part one focused on the types of effects, part two of our pedal series will focus on defining and identifying the power supply of your […]
Pingback by Pedals Pt. 2: Identifying Your Power Supply! on July 17, 2018 at 4:25 pm[…] official: you now know about effect types, power supplies dos and don’ts, cables and after this you will have been able to understand […]
Pingback by Pedals Pt. 4: Pedal Chain Configuration! on July 19, 2018 at 9:47 am[…] that you know about the types of pedals and how to power them, we’re going to get into the world of […]
Pingback by Pedals Pt. 3: Getting Real With Your Cables! on July 3, 2019 at 9:43 pm[…] If you haven’t already, take some time to get caught up with part 1, part 2, part 3, and part […]
Pingback by She Shreds Media on August 7, 2020 at 10:59 am