For our two-part series “Tones of the Unknown” in partnership with Reverb, the online music gear marketplace, Livvy of Mamalarky was sent a box of mystery effects pedals to explore. We have to admit, she got some real winners. Don’t worry, we’re only a little jealous. Here’s a deeper look at what she got in her mystery box.
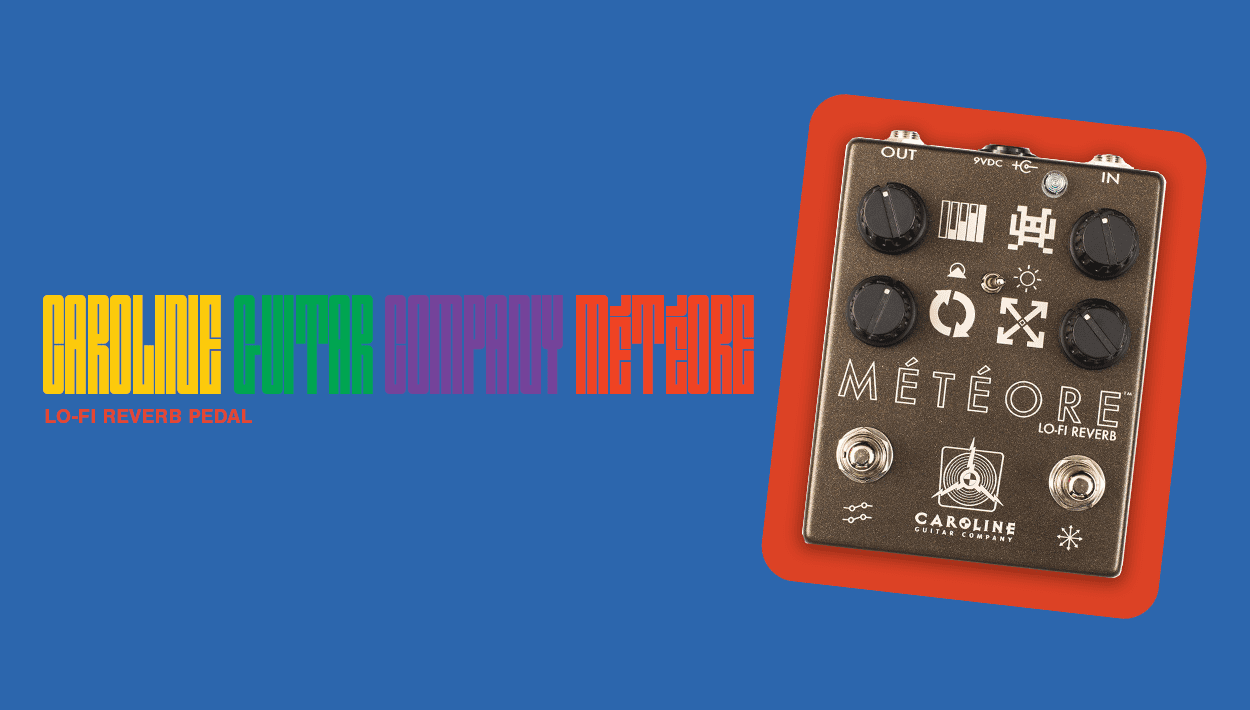
Despite having symbols instead of words to describe its control parameters, the Caroline Guitar Co. Météore is an easy-to-dial-in lo-fi spring reverb pedal. As Livvy says, the Météore “has a lot to say,” and can do everything from “gorgeous, understated, beautiful,” tones to complete havoc at the press of a footswitch—conveniently named havoc.
The “sun” and “mountain” settings Livvy describes are the bright and dark voicings of the effect, and the “space invader” is the attack control, which controls the amount of gain going into the preamp—the lo-fi heart of the pedal. The controls, especially the preamp, interact heavily with each other. For example, if you set the attack (that’s the preamp we talked about earlier) and the regen (the decay, or how long the reverb lasts) high enough, the pedal can enter self-oscillation without having to engage the havoc switch.
Even though Livvy already has a spring reverb in her amplifier, this pedal isn’t a redundancy. What really sets the Météore apart from a simple digital spring reverb emulator is its ability to impart gritty lo-fi character without overwhelming your sound (until you want it to). If you’re looking for a reverb pedal that can balance on the edge of clean reverb tones and descend into a whirlwind of feedback—and back again—the Météore can do that and more.
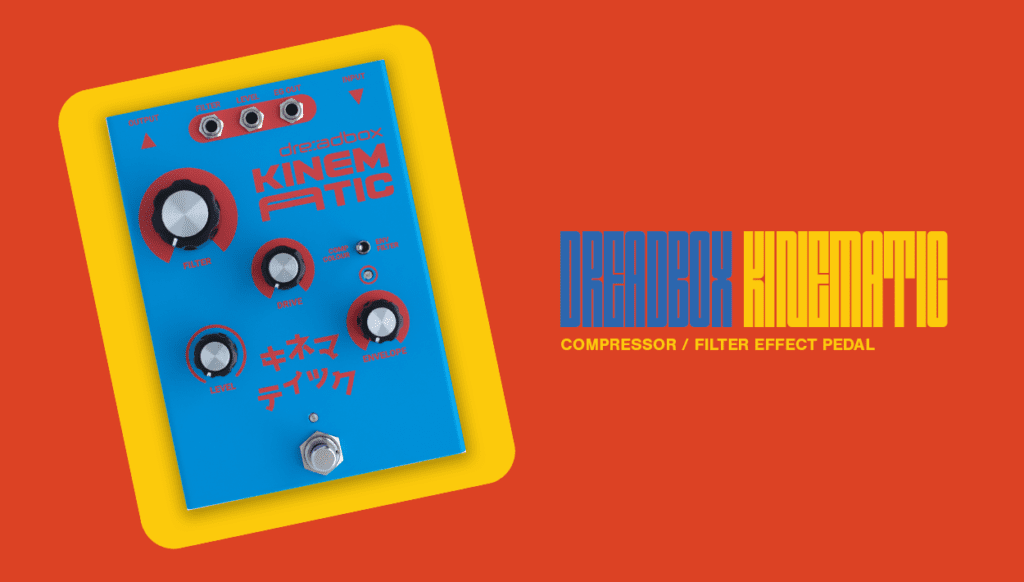
Named after the Greek word for motion, the “gnarly” Dreadbox KINEMATIC is a VCA-based compressor and envelope filter in one. And those eagle-eyed viewers might notice that it has three patch points, making it equally usable for Eurorack users and guitarists alike.
Livvy shows off both modes in her demo: the Comp Color mode (that’s the compressor) and the Envelope filter, which you move between via a toggle on the face of the pedal.
In the Comp Color mode, the pedal acts as—you guessed it—a VCA-based compressor with an extreme compression ratio. VCA stands for voltage-controlled amplifier, which is an analog compressor. Essentially, it’s an amplifier (in this sense, an amplifier is anything that amplifies audio signal) that alters its gain in proportional to a control voltage or modulator signal.
Knowing exactly how it works is probably less important than knowing that VCA-based compressors have extremely fast attack (that’s the intensity with which a note is plucked or strummed) and release (that’s the decay or how the note stops) parameters. Attack Magazine describes VCA compressors as “fast and punchy on rhythmic material” with the ability to “smooth out peaks without squashing everything in sight.”
The Dreadbox KINEMATIC also serves as a frequency booster and has up to 18 dB of boost potential. In other words, it gets LOUD.
The Envelope Filter mode is a 12dB low pass filter with an auto-wah. It has a slow envelope curve and it is weird, funky, and a ton of fun. Oh, and did we mention that it has an overdrive circuit and can also effectively function as a distortion pedal? The KINEMATIC has a lot going for it and is a real workhorse on a pedalboard.
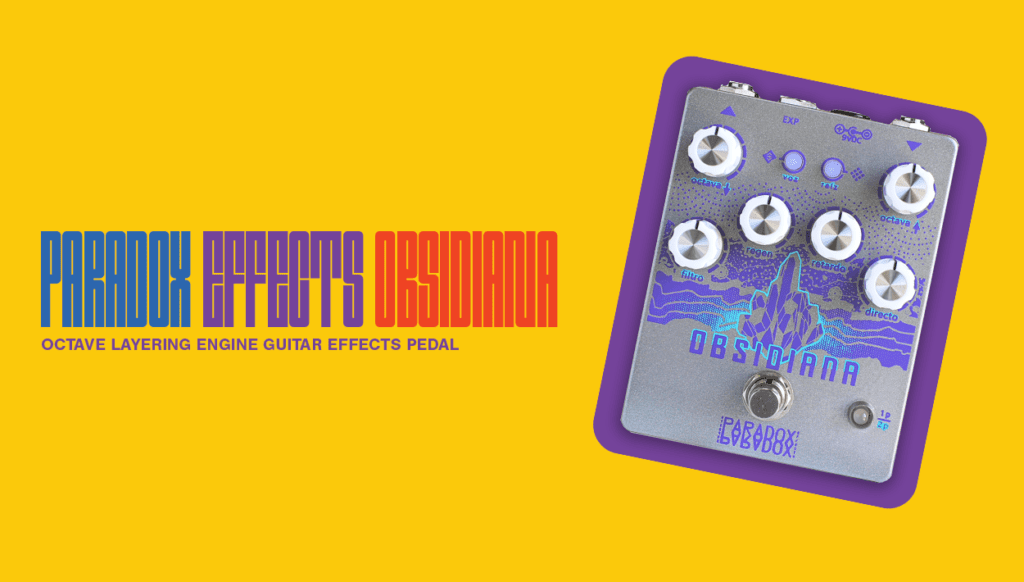
“I have a feeling this one is going to be strange in a very good way.” Paradox Effects makes some astounding pedals, and the Obsidiana Octave Layering Engine is toward the top of the list. As the name implies, it’s an octave pedal and its polyphonic nature ensures that it responds equally well to single notes and chords alike. Polyphonic means it can translate multiple notes at a time, unlike monophonic octave pedals which only allows one note to be played and sent and octave up or down at a time.
As you can hear from Livvy’s demo, the Obsidiana does more than simple octaves up and down. Firstly, it has two modes for filtering options: one pole low pass mode and two pole resonant low pass mode. The one pole low pass filter mode is a more traditional fixed low-pass filter—the filter knob is brighter to the right, darker to the left. For the two pole resonant low-pass filter mode, you get more resonant synthesizer-esque tones as you sweep the filter control.
But its most unique feature is the branching octave trails that build syncopated rhythms or layers of octaves and pitches. As Livvy says, “That’s kind of what my brain sounds like when I’m trying to fall asleep.”
At the top of the controls, you have octave up, octave down, a direct control for the wet/dry blend and filter as well as regen (controls feedback of the octave trails) and lag (varies by mode). Like the KINEMATIC, the Obsidiana is the type of pedal you can take a deep dive into.
Thanks to Reverb for sending out that Mystery Box and Livvy for showcasing those incredible pedals! If you’re looking to pick up any gear from Reverb, please be sure to use our affiliate links—it’s a great way to support She Shreds doing things you already do.
Building a great pedal board requires a little bit of planning and patience, but once you understand the basics, it becomes easier to put together the perfect rig for your needs. The defining qualities of a reliable pedal board go beyond just providing a better way to store your pedals: they make your setup time much faster, and keep your tone free of excess noise and interference. In this guide, we’re here to lay down the foundation that you’ll need to take the mystery out of putting together your first pedal board.
THE BOARD ITSELF
Size
Whether you’re buying your first pedal board or building from scratch, you’ll need to think about the pedals you’ll want to use in terms of space (don’t worry, we’ll get into specific pedals, too). Be sure to factor in room for at least one extra pedal; it might be a bigger investment, but having that extra space will be helpful when it comes to setting up everything neatly and adding wiring and a power supply. The extra space also comes in handy if you decide to add on extra pedals in the future, or if you just want to swap around pedals.
Dimensions
Now, consider the angle and height of the board in relation to how easy it will be to reach the pedals while playing standing up. If you already own the tools required in the plethora of DIY templates available online (including this tutorial we posted last year), then building your own board can be quite an affordable and rewarding experience. Over the years I have seen pedal boards made of everything from plain slabs of plywood, vintage suitcases, repurposed pieces of Ikea furniture, and the like. In every case, the owner had exactly just what they needed.
With that being said, if you’re not the handy type and prefer to buy a board, the Pedaltrain Nano+ is 18” and can be found for under $75 new (and even less) on Reverb. It’s just large enough to accommodate about five pedals and also comes with its own case.
CHOOSING A POWER SUPPLY
While most pedals can run on 9-volt batteries, doing so should only be a last resort or as a backup at a gig if your other power supply craps out. Replacing batteries is unsustainable, and a quick way to lose money if they’re not rechargeable. The two most popular power supplies for a pedal board are daisy chains and isolated power supplies.
Daisy chains like the TrueTone 1Spot adapter are very affordable (on average about $20-35) but they offer the least resistance to noise because every pedal shares a ground. Isolated power supplies like the Voodoo Labs Pedal Power 2 Plus are more expensive (around $100 and up) but are popular in professional setups because they’re less noisy than daisy chains—and there’s nothing more frustrating than a disorderly rig that ruins a performance!
CABLES
The trick to keeping a pedal board as noise-free as possible is to understand what causes noise and signal degradation in the first place. Power is roughly half of the equation, while the other half relies on cables.
Not all cables are created equal, and the cheap ones won’t do you any favors when it comes to performance. Mogami cables are not cheap, but they’ve become the industry standard because they are extremely durable and have a lifetime warranty in which you can exchange a broken one for a new one at any of their retailers or by mailing them back. If you’re on a tighter budget, bigger chain stores will offer lifetime warranties on their house brand cables, which tend to be cheaper. Be sure to equip your entire rig with the same type of cable, as mixing and matching brands and qualities is not ideal; the weakest cable will effectively cancel out the benefits of better cables, such as lower noise floors and better durability (since they all share the same signal path).
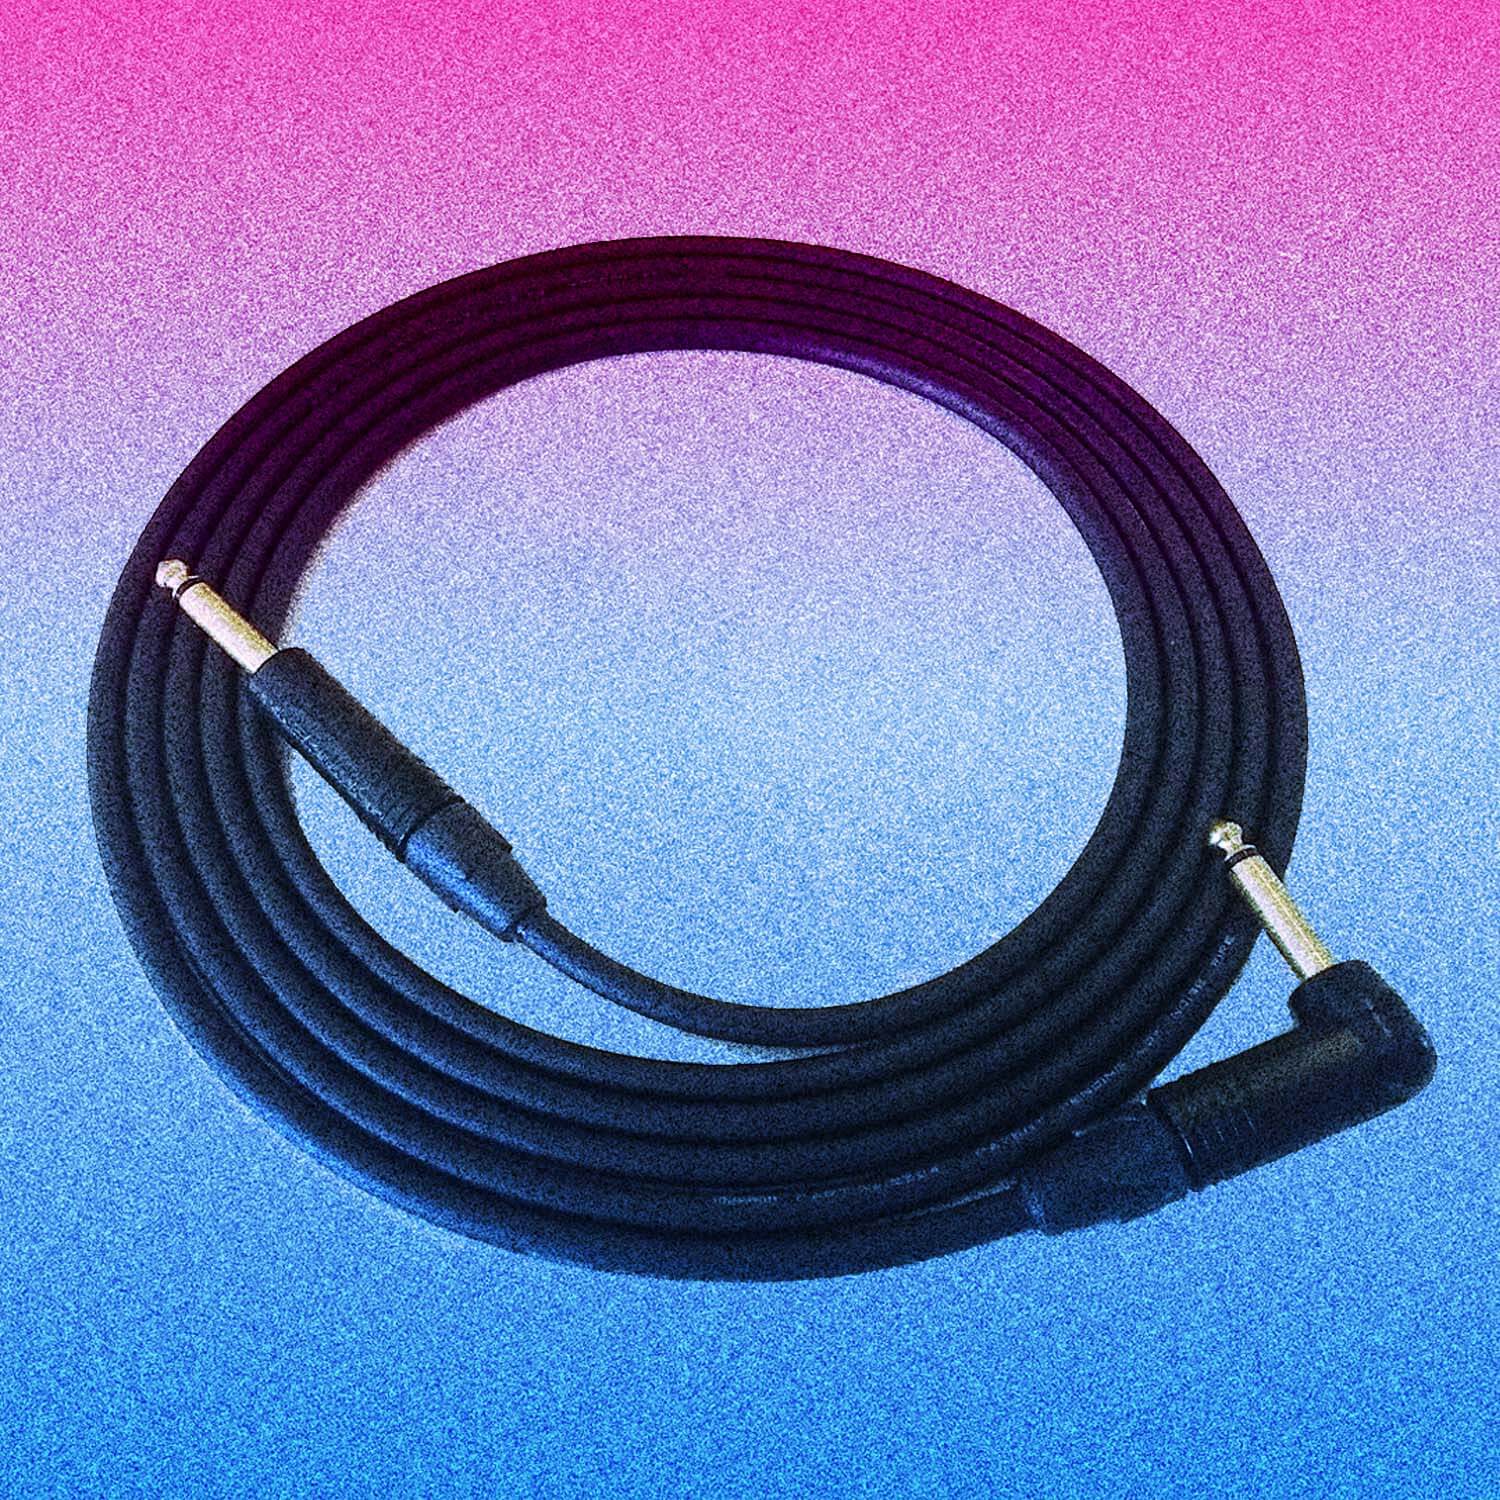
The ends of the connectors themselves can make a large impact on the amount of space taken up on the board. There are 3 types of connecters:
Straight connectors are the most commonly used to get from your guitar to your board, and then from the board to the amp. I don’t recommend them on the board itself because they take up far more space then necessary.
Right-angle connectors are perfect for many applications where space is a concern. The tips break at a L-shaped right angle and are recommended for connecting the pedals together throughout the board.
Pancake connectors are by far the most compact. They are also right-angle jacks, but the part of the plug that sticks out of the pedal are flattened like a pancake. Sometimes these can even save you enough room to squeeze in an extra pedal on an already cramped board.
CHOOSING PEDALS
The first step to building a pedal board is obtaining the pedals themselves, and shopping second-hand at places like Reverb is a great way to save money on used pedals (and in some cases, it can even be the spot to find rare and/or vintage pedals that are no longer in production). You may even find that it’s a great place to sell your own pedals when you grow tired of them and want to essentially flip them for something else you’ve been eyeing.
Listed below are some of the most popular and essential effects. Many guitar pedals hold their value, which makes it easy to trade them around and experiment without spending tons of money. Buying used saves you, on average, about 27-35% off the price of a new pedal, and most sellers on Reverb report getting around 85% of their initial investment on a used pedal after they sell it.
Tuner
I would suggest getting a good tuner with a display that you can easily see in both high and low lighting. On average, tuners go for $100 new and $60 used. Since they’re often first in line on most rigs, you’ll want to get one that’s known for keeping your tone pure and unaffected, such as a Boss TU-3, TC Polytune, or Peterson Strobe. Some tuners offer both buffered and true bypass switching, and in some cases may even have outputs for powering more pedals. It’s worth noting that if you’re visually impaired, you may want to consider a headstock tuner, which is a bit closer to the eyes.
Overdrive
The Ibanez TS9 Tubescreamer, which goes for an average of $60 on Reverb, is one of the most popular overdrive pedals of all time. Initially, these were popular with blues guitarists who favored the ability to send any clean amp into a smooth overdrive, rich with sustain. This not only allowed players to achieve a cranked up tube amp sound at lower volumes, but it also enhanced the sound of amps that were already on the verge of breakup. Although the pedal on its own will not provide enough gain to push an amp into full on distortion (aka hi-gain), surprisingly, it’s very common to find these pedals on the rigs of modern metal guitarists. Taking advantage of the Tubescreamer’s ability to maintain its clarity, a lot of these players are using this pedal to tighten up the low end frequency response that sometimes causes a guitar to get lost in a mix. Typically this is done by turning the level of the pedal all the way up and the drive all the way down. The tone knob is dialed in the most pleasing spot to the players ears. The resulting sound is quite subtle on its own, but using this setting with a cranked up hi-gain amp like a Peavey 6505 and the effect is immediately felt—and this, along with a noise gate, is what practically defines today’s modern metal sound. The secret to getting a good sound with a Tubescreamer is to get an idea of how the level and tone knobs interact with each other; in general, the pedal will sound better with the output cranked higher than the drive knob. The position of the tone knob itself plays a large impact in the overall character of the sound which can range from thick and syrupy to quite bright but not quite ice picky.
Fuzz vs. Distortion (If You Can’t Have Both)
Unless you only want to play clean (or rely solely on what you can get out of your amp), getting a distortion pedal is practically mandatory. The type of distortion pedal you choose has a huge impact on your sound. Fuzz is a bit more retro and perfect for capturing the wild electric guitar sounds of most ‘60s and ‘70s rock. In some cases, fuzz pedals are popular with players who are drawn to the bold wave-like sound that the Nano Big Muff Pi (average at $60 used on Reverb) provides, whereas players that are seeking a tighter sound might go for something like a Boss DS-1, which can be found used for an amazingly affordable average of $35.
Reverb & Delay
These two effects are used to add a sense of depth to guitar tone. Reverb emulates a sense of space, like a concert hall, while delay simply repeats the signal from your guitar for a short period of time. Used together, you can get some stunning results, but some players may feel they only need or the other.
The MXR Carbon Copy is an analog delay that is extremely popular due to its warm, lush sound. On average, they go for around $95 used, which is a great price. Delay can also be used to add a more rhythmic feel to single note passages or giving a guitar solo a little something extra to stand out.
The Electro Harmonix Nano Holy Grail Reverb is a natural choice for someone looking for a simple yet versatile reverb. These pedals sell for around $70 on Reverb and offer emulations of both spring and hall reverbs, as well as a unique setting called “flerb,” which introduces a slight flanging effect.
Modulation
Modulation effects—otherwise known as chorus, phasers, flangers, and tremolo—can be used to add a little bit of movement to both clean and distorted tones. Usually, just having one of these types of pedals can add a lot of variety. I would recommend trying each of the following before purchasing to see what you like: the Boss Super Chorus ($50 used), the MXR Phase 90 ($45 used), the MXR Micro Flanger ($65 used), and the Boss TR-2 Tremolo ($65).
PUTTING IT ALL TOGETHER
The final thing to consider when putting your board together is the layout of the pedals. Industrial strength Velcro from your local hardware store is both affordable and practical, allowing you to quickly move things around as needed while still safely securing the pedals in place. You’ll want to experiment with your pedals in different configurations to find out what sounds best in what order, but generally, effects that alter the gain are placed early in the chain, and effects like modulation are placed last. There is no right or wrong way to go about doing this, so you’ll want to trust your ear on this one, but you may find better results by following this order (from right to left):
Tuner
Filter-based effects like wah-wah
Overdrive, distortion, and fuzz
Modulation effects: chorus, phasers, and flangers
Volume pedals
Ambient effects: reverb and delay
Tremolo
Loopers
Top Important Things to Consider:
How many pedals you plan on using
The amount of power each pedal draws
How much space each pedal will take up once cables and power are installed
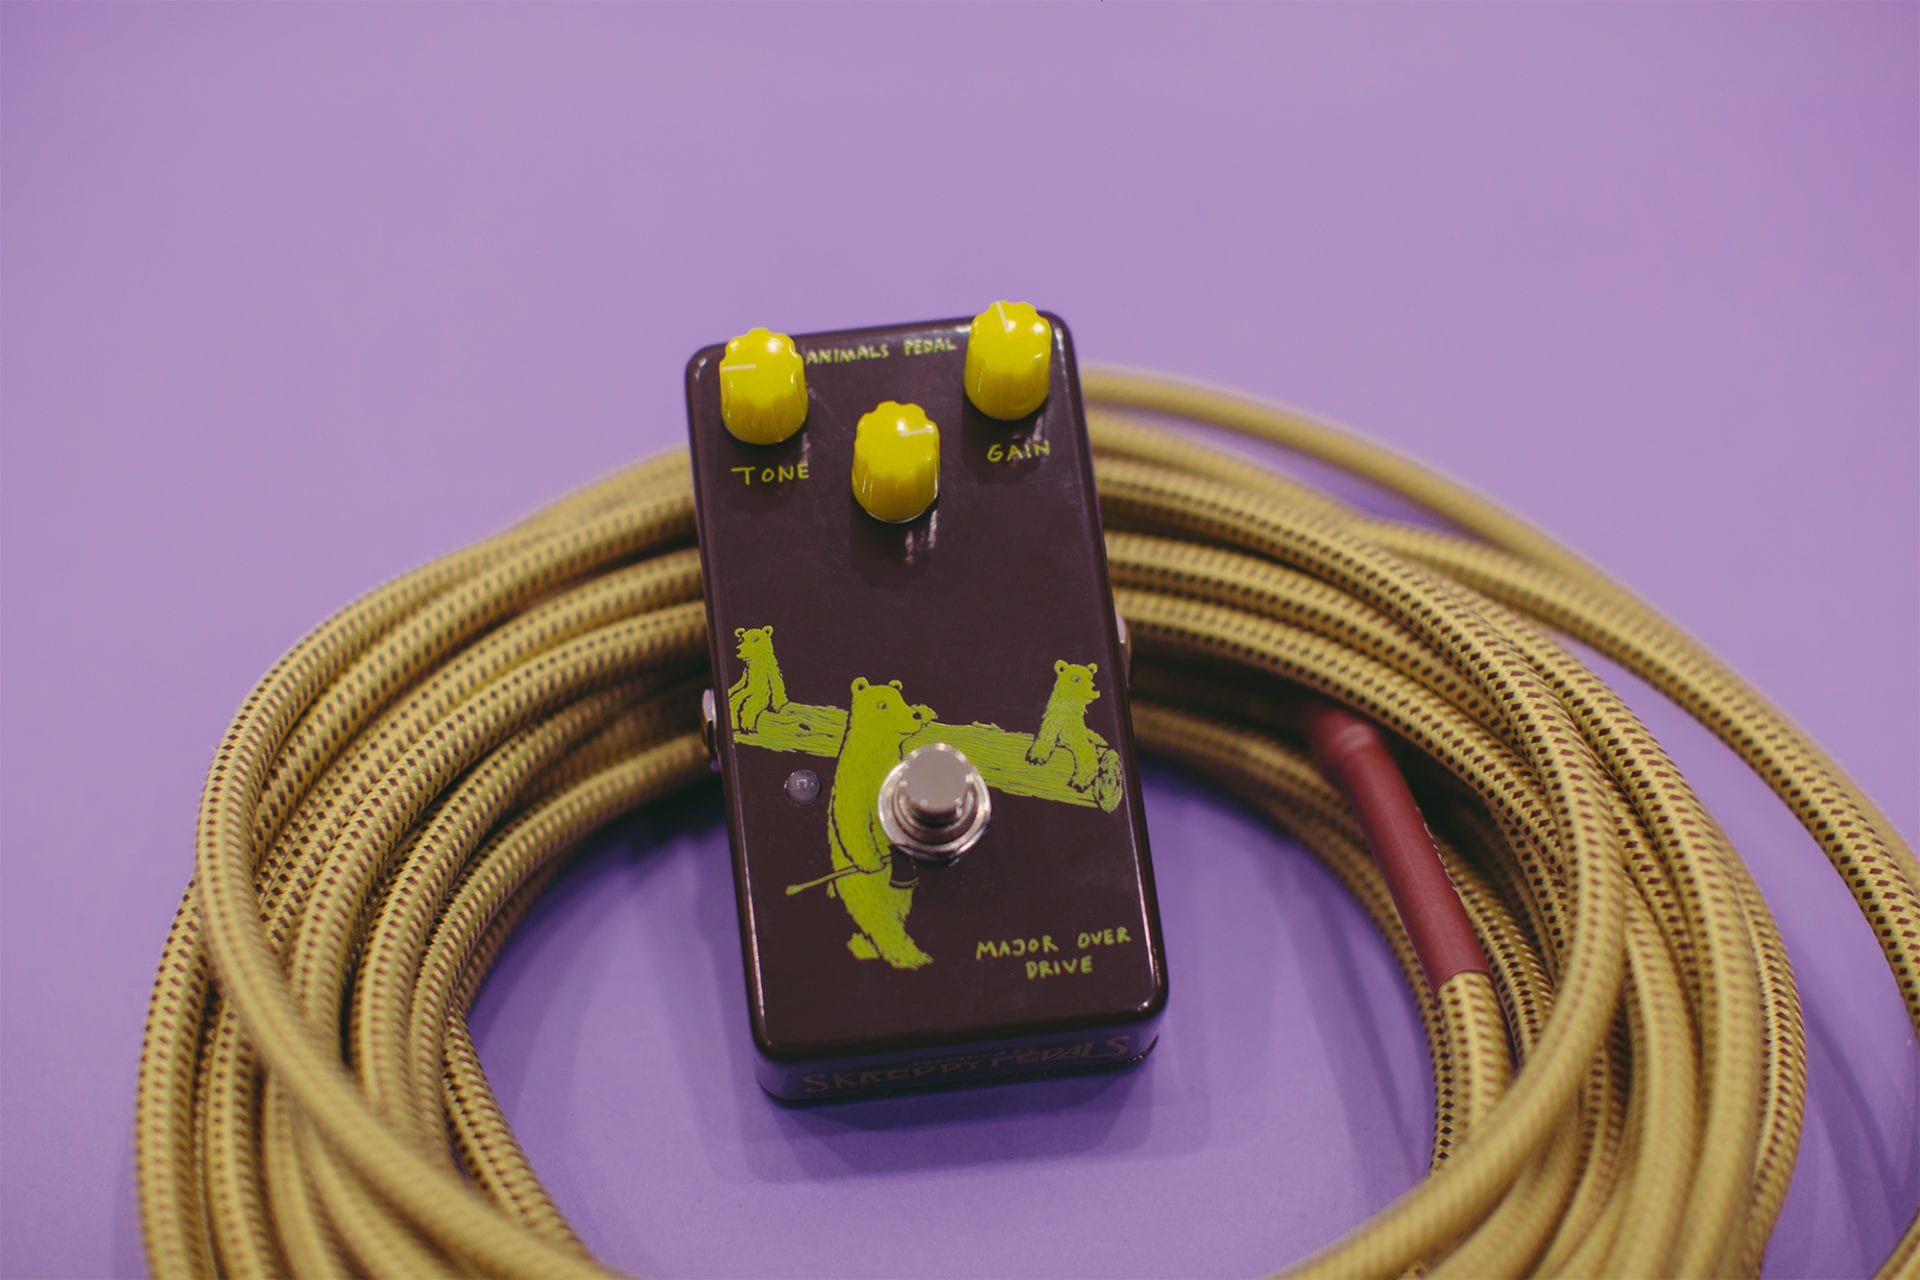
This boutique style pedal by Animals Pedals is accessible, visually artful, and a wonderful addition to any pedal board!
Formerly known as Nine Volt Pedals, Animals Pedals was founded in Japan in 2015 by LEP International Co. These uniquely decorated pedals made their premiere in the US in 2018, after spreading rapidly across Japanese markets. Welcome to the US, guys! We are all in favor of finely crafted, unique, boutique style pedals that are at least a bit more accessible to everybody financially, and involve local visual artists and pedal makers in the process. A recent collaboration with Marc Ahlfs of Skreddy Pedals, has resulted in a line of near tonal clones of his famous Fuzz/Distortion/Overdrive pedals. They have very similar, if not the same components, and even the same names, such as the “Rust Rod” and “Rover”.
And I fell in love again
She Shreds had the opportunity to try out the line of pedals, but for this review, we’re going to focus on “The Major Overdrive”. This pedal is one of oh so many overdrive pedals on the market today. What makes this pedal stand out and stick to my heart besides the affordable boutique vibes, Skreddy mastery, and adorable bears painted on the front? It’s the way that the guts (soul and tones) of this pedal are warm, sleek, solid, and earthy brown, reminiscent of the vintage tube amps of the 60’s and 70’s. It brings out the buttery mids and low end that exist in my Gibson SG, with a tone knob to keep the high end squashed and squawky, the way i like it best. The overall controls are simple and classic including a Tone knob to control the higher frequencies, a Gain knob to set the amount of grit, or breakup in your signal, and Volume.
Specs:
9V power
Featured artwork by Jonas Claesson
True by-pass switching
High quality Skreddy transistors and design specs
3 control knobs (Tone, Gain, Volume)
Retail: $119
Used: $60-75
Your riffs can break and shine
Using the Animals Major Overdrive mostly as a boost to push the tubes in my amp harder, created a super clean, precise, attack with a gritty warm ending (Volume cranked, a slight amount of Gain). There exists a dynamic sensitivity in this sweet spot only an analog unit can provide…the more you dig in, the more intense the breakage. With the slight amount of compression happening, the tone gives way to an almost chorus-like mid range boost, similar to the warm gain of the Electro-Harmonix “Soul Food”. If you desire a more steady broken distorted sound, and a boosted tone change to bring in and out, turn up the Tone and Gain, peeling back on the Volume a bit. This allows a smoother, more saturated and steady crunchy tone to come through, perfect for rhythm riffing behind vocals, or tucked back leads with clarity and plenty of character.
Pick the perfect spot in your chain…
Analog overdrive naturally extends the tails, intensity and depths of other effects in your pedal chain, so order is very important to consider when adding this new friend to your family of pedals. Something I loved trying in this situation was creating a messier sound, placing the delay/reverb before overdrive. The result is a warm, compressed tone in the sonically pleasing shape of sine, with an extra long tail, and extra depth, and a load of information that distorts and eventually ends up washing out into nothing…If you prefer a more one dimensional tone that is a bit cleaner, less washed out, more intense, and has a brighter top end, you can try placing the overdrive BEFORE the delay/reverb. In this case, the harmonics pumped out of your instrument are directly affected, leaving less room for over-saturation. Play around until you find the sweet spot, it’s your tone and you can make your own rules.
The Animals Major Overdrive is a golden addition to any pedal board. It’s classic, and super solid analog circuitry keeps things organic and warm, working to authentically intensify your sound in a very pure and dynamic way.
One lucky winner will get a brand new EarthQuaker Warden Compress pedal custom painted by Yvette Young from Covet.
Custom painted pedal? By Yvette Young of Covet? Yes please! We’re partnering with Triple Crown Records to give away a one-of-a-kind-never-has-and-never-will-exist-again custom painted EarthQuaker Devices Warden Compression pedal, hand painted by issue 15 featured artist, Yvette Young.
This pedal is all art, power, and loads of gain and sustain on tap. See the full range of specs here.
UPDATE 10/1/18 Congratulations to our contest winner, Hannah Tobin!
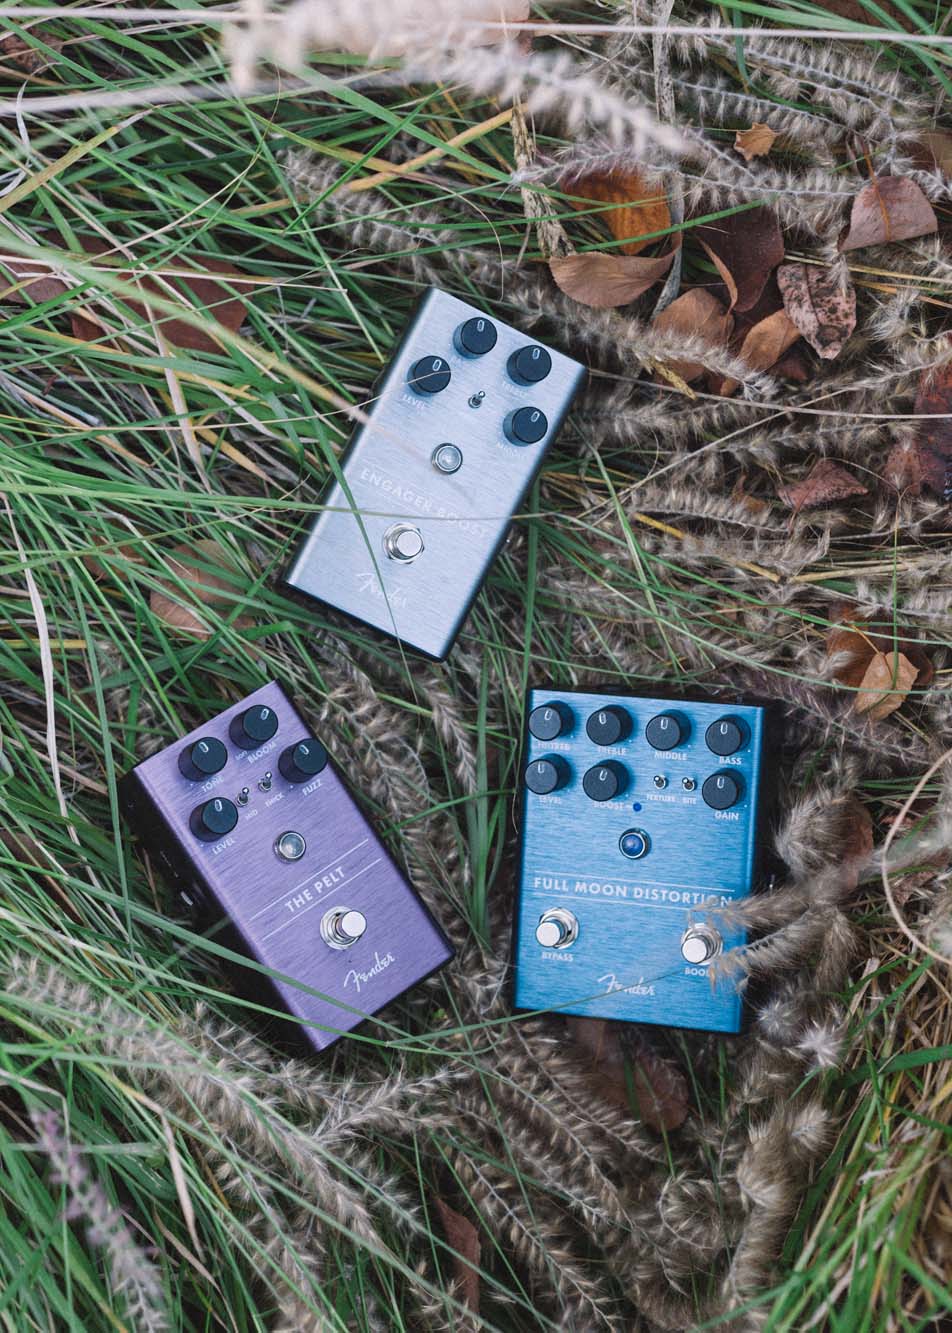
Fender’s new lineup of effects pedals gives musicians sonic transparency and tonal flexibility.
Fender’s three new pedals give a diverse set of sounds keeping professional and studio musicians in mind. Check out their latest lineup: Engager Boost, Pelt Fuzz and Full Moon Distortion.
ENGAGER BOOST
Out of all three of the pedals in our review, this one was by far the most surprising. According to the manual, the Engager boost was designed to be useful anywhere in the signal-chain, but I personally found it best at the front of mine. The on-board EQ is perfect for adding bit warmth while still maintaining some clarity on your overall tone. Thanks in part to its ability to cut or boost the highs, lows, and mids by +/-20DB. The frequency switch lets you select either 400Hz or 800HZ which is perfect for things like thickening up a single coil pickup and pushing the “sweet spot” of an overdrive. 20 DBs of clean boost is more than enough to either help a guitar solo cut through a mix or truly send any tube amp into overdrive. With that being said, I could honestly see this pedal becoming an “always on” kind of thing for the guitarists out there who really like to enhance their clean tone. Speaking of tone, this pedal is true-bypass with a selectable buffer. This is an extremely useful feature to add to a pedal because long cable runs and massive pedal boards with tons of stomp-boxes can truly degrade your guitars signal before it hits your amp; resulting in a less than pleasing sound. Buffers were introduced to help combat that by boosting the guitar cables signal so it could maintain a consistent level of performance throughout the signal-chain. On the flip side of that, if you have too many buffered pedals on your board, then they can get a little messy as they all stack on top of each other and can sometimes introduce more noise and less output. Overall it’s a good balance of both buffered and true bypass pedals along with quality cables and a clean power source will help keep the noise down to a minimum on any board. Thankfully this pedal simply lets you choose either/or making it a welcome fit on any board designed for the road.
Switchable true bypass/buffered operation
+20 DB Clean boost
+/- 20 DB 3-band EQ with 400HZ/800HZ frequency switch.
$89.99 retail
THE PELT FUZZ
It’s always refreshing to see a new fuzz pedal that is not a clone of anything else enter the market. The Pelt Fuzz has a unique voice that when pushed to its extremes is reminiscent of what I imagine it feels like to play through a Tesla coil. Although there are a wealth of tonal shaping options on the pedal that lends itself to sculpting the overall texture of the fuzz, it truly excels at creating synth-like leads perfect for single note runs a la Annie Clark. The volume and tone controls of your guitar have a very large impact on how this pedal responds to the dynamics of your playing. This allows you to push the fuzz on the pedal and roll your volume knob back to clean it up. The mids can be run flat as well as cut, or boosted via the 3 way switch. Extra low end can be pushed through or tightened up with the “thick” switch. The tone knob controls the highs while also affecting the character of this fuzz to a large degree. “Bloom” is the most interesting feature on this pedal due to how it affects the attack of fuzz when you dig in hard with a pick. At it’s mildest settings we are in classic silicon fuzz territory but the further to the right it’s pushed the more compressed it gets resulting in modern squishy synth-like sounds with loads of sustain.There is plenty of makeup gain to prevent you from getting lost in the mix during a live performance which can happen with a lot of fuzz pedals if you scoop the mids.
Silicone transistor based fuzz circuit
Voicing switches
“Bloom” knob for adjusting the attack of the fuzz
$129.99 retail
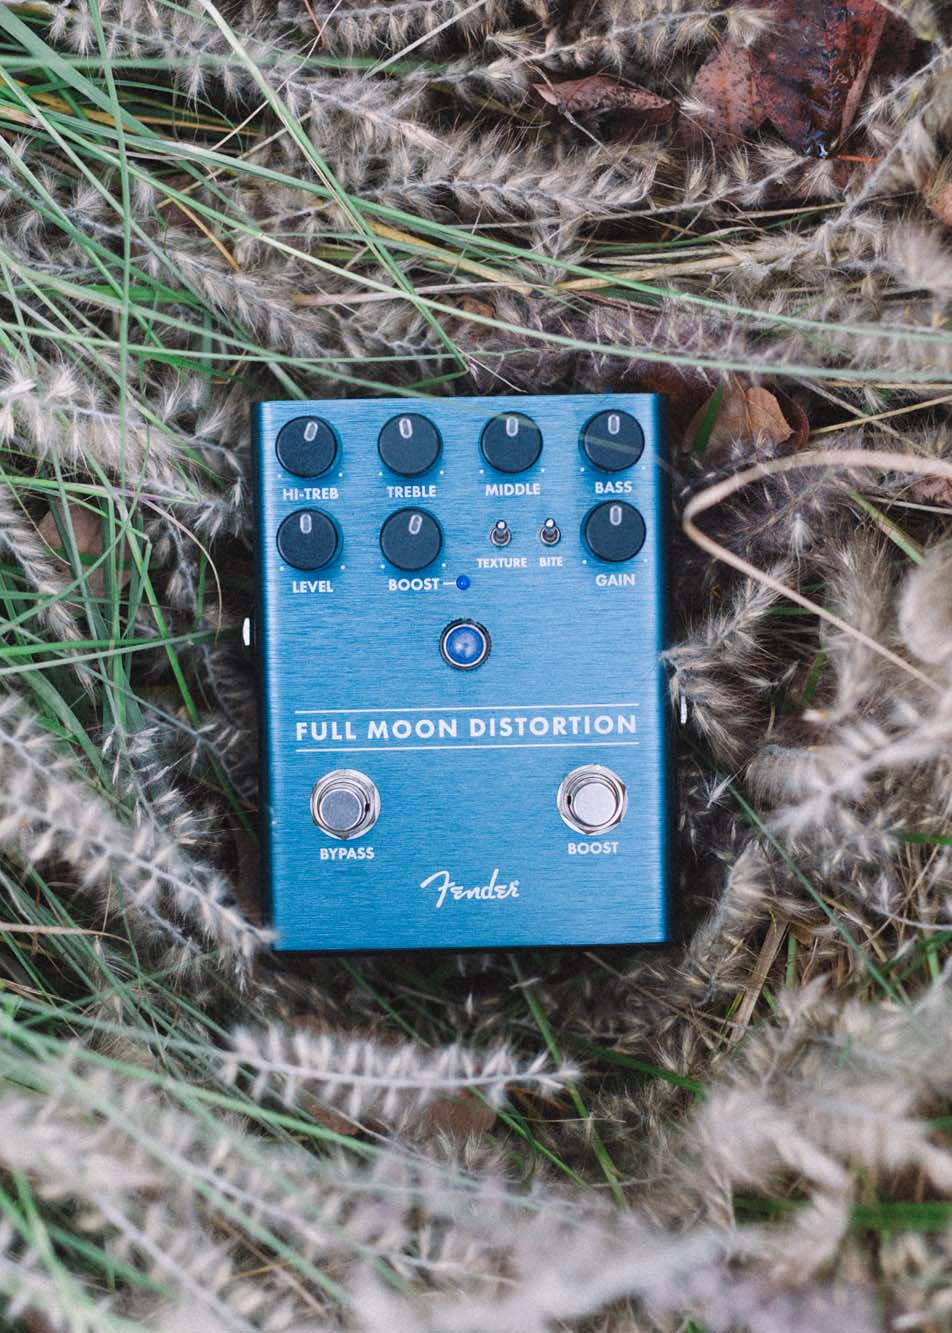
FULL MOON DISTORTION
The Full Moon Distortion is Fenders hi-gain entry from the new lineup which can deliver anything from classic rock to thrash. It’s for players who are looking for an aggressive sound with a bit of clarity but not necessarily seeking out the ultra hi-gain tone of say an amp, like the EVH 5150. It’s worth noting that this pedal plays well with single-coils but can be saturated even further with hum-buckers. Use the Texture switch to choose either symmetrical or asymmetrical clipping, the difference in clipping could be compared to the difference in tone between an Ibanez TubeScreamer and a Boss SD-1. The EQ on the this pedal is quite powerful and the sweepable highs can be cut or boosted along with lows and mids for extra flexibility. The bite control shifts the mids and the harmonics of the distortion which significantly alter it’s timbre. The boost switch and corresponding knob has up to 12DBs of make up gain which you could use to make a solo a little louder or to compensate for the perceived volume loss when scooping the mids.
High gain distortion
Boost switch with up to 12 DB output
Three band EQ with sweepable highs
Switchable symmetrical and asymmetrical clipping
$149.99 retail
Does it Synth?
Guitar players are not the only ones love pedals and they becoming more popular than ever among keyboard and synth players! I found the Engager Boost to be perfect for adding some warmth to synthesizers with digital oscillators like my Novation Ultranova both while recording. The Pelt proved to be quite the fun layer to add to the Ultranovas sawtooth legato during a solo. The Full Moon Distortion completely transformed my brass patch into something magically lo-fi and gritty that would be right at home in a video game influenced indie punk band.
All Three Pedals Feature:
Switchable backlit LED knobs
Extra bright Fender amp jewel light
Heavy duty anodized aluminum chassis with mono 1/4” offset mounted jacks.
9 Volt Quick-change magnetic battery compartment
9 Volt DC center negative 110ma or less
LED Low battery indicator
All new circuits designed by Stan Cotey
So your rig is making a weird noise? What do you do? There are so many components in a guitar or bass rig: the amp, the speakers, the guitar, and alllll those pedals and cables and power supplies. So many opportunities for weird buzzes and disconnections to happen! Even weird things, like your cellphone or the room or environment you’re in, can cause weird noises.
60-cycle hum, sometimes called a ground loop: This is a normal hum that occurs often when using single coil pickups! This hum can change depending on the electrical grounding of a building or venue, the size of a room, where you are in said room, etc., but in most causes it shouldn’t be that annoying of a sound. If this hum is too annoying for you, you should consider switching to a guitar that has double coil, or humbucker pickups. These types of pickups got their names because they “buck” that annoying 60-cycle hum!
Tube amp noise: tube amps, like most analog electronics, have something called a “noise floor.” This is a hum or hissing sound when you turn a tube amp on. This hum should never drown out or interfere with your playing, so if the hissing is distracting to you after you start playing, chances are it isn’t just the analog noise floor of your tube amp. Tube amps can cause a lot of problems in your guitar/bass rig, even though they sound so good normally. Loose tubes can cause some noise, but BAD tubes can really ruin your sound. Bad tubes can make all kinds of weird sounds, from just making you sound quiet to making weird rattling or harsh echoing sounds. When your tube amp starts making these types of sounds and you’ve decided it isn’t any other factor in your rig that could be causing them, it’s time to take your amp in to get checked up. Servicing your tube amp regularly, much like you service a car, may make it so you aren’t surprised by major repairs or problems like this! Find a good amp tech in your town and get your amps looked at if you want to avoid these problems!
Cables: Like I said before, cables are important and good working cables are very important. If your cables aren’t working well, you might encounter some noisy signals.
Speakers and cabs: There are a lot of components to a guitar/bass rig and speakers and speaker cabinets are important ones. Sometimes speakers come loose from the cabinet shell and the screws need to be tightened! These loose screws and rattling speakers can cause a lot of noise. Speakers that are the wrong wattage – like using a 60-watt speaker for a 100-watt amp – can also cause weird problems and noise. Lastly, broken or ripped speakers can sound horrible! When a speaker is broken, there is most likely a rip or tear in the cone that makes a weird buzzing sound when played too loud. Ripped speakers can sometimes be repaired, but sometimes have to be fully replaced.
Vintage or Germanium pedals: Most of the pedals made in present times are very good at staying noise-free, but if you have an affinity for vintage pedals, this may end up causing a lot of weird noise and interference in your signal path. As well as old pedals, pedals make with Germanium diodes – popular in fuzz pedals – may cause a lot of noise! If these pedals are giving you trouble, it might be time to take them out of your live rig and save them for recording projects and other fun stuff where hiss and noise isn’t as stressful.
Other pedals and power supplies: Lastly, having a big pedalboard adds a lot of factors to your signal chain. Make sure all your pedals are in working order and your power supply is quality and that will help you to have a clearer signal!
When you’re having noise problems and you don’t know what part of your rig is causing it, the best way to narrow it down is to check all the components. I like to do it in this order:
Plug your guitar directly into your amp. If you’re still getting noise, it’s most likely from the guitar, amp, or the single cable you’re using to connect the two and not your pedalboard.
Check your cables. Use a cable tester or just keep plugging cables into a working amp and running signal through them. Also, move the cables around— especially the ends near the jacks—to see if there’s any loose connections.
Check your power supply. Make sure you’re using the correct power supply for everything and that the mAs match. Sometimes, daisy chains cause more noise and using a power brick would fix the noise problem.
Use a power conditioner. Sometimes these look like normal power strips. Power conditioners improve the quality of power that is delivered to each unit that takes electricity. Improving and cleaning up the power source can reduce noise greatly.
Use a ground lift adaptor. These adaptors take away the ground pin from an electrical plug, making it just two-pronged. Taking away a ground can sometimes also cause problems, too, so this should just be a temporary solution.
Plug in all pedals separately. Just what it sounds like, run every pedal in your chain individually to figure out where the problem is. Just as time consuming as it is effective.
Try using batteries. If your pedals take batteries, try using those instead of a power supply. If this eliminates noise, then maybe it’s your power supply that’s the noise problem.
This Summer She Shreds has hosted monthly workshops at our HQ in Portland, OR, based on the subjects of guitar, management, and recording. In May we focused on restringing your guitar, and June was all about pedals.
If you’ve never heard the term pedalboards before, it can refer to the entire board AND the pedals affixed to it, or just the blank board itself. They allow you to secure your pedal chain to something portable so when you move it you just have to plug and unplug it from the power source or the wall!
Note: If you haven’t already, take some time to get caught up with part 1, part 2, part 3, and part 4!
Lots of companies make boards that you can buy, like Pedaltrain or Boss. Some of these have power supplies and other features built in with carrying cases. These might be a good option for you if you don’t have access to woodworking or crafting supplies.
You can also just use a simple wood board for a pedalboard, though—which is what you’ll be creating in this lesson! Sometimes it’s nice to add a slight slant to the board you’re building, like a wedge under the back edge, if you have two rows of pedals so you can more easily reach the pedals on the row furthest from you! Pedalboards can be whatever you want them to be, though, I’ve even seen people use skateboard decks with the wheels removed as boards.
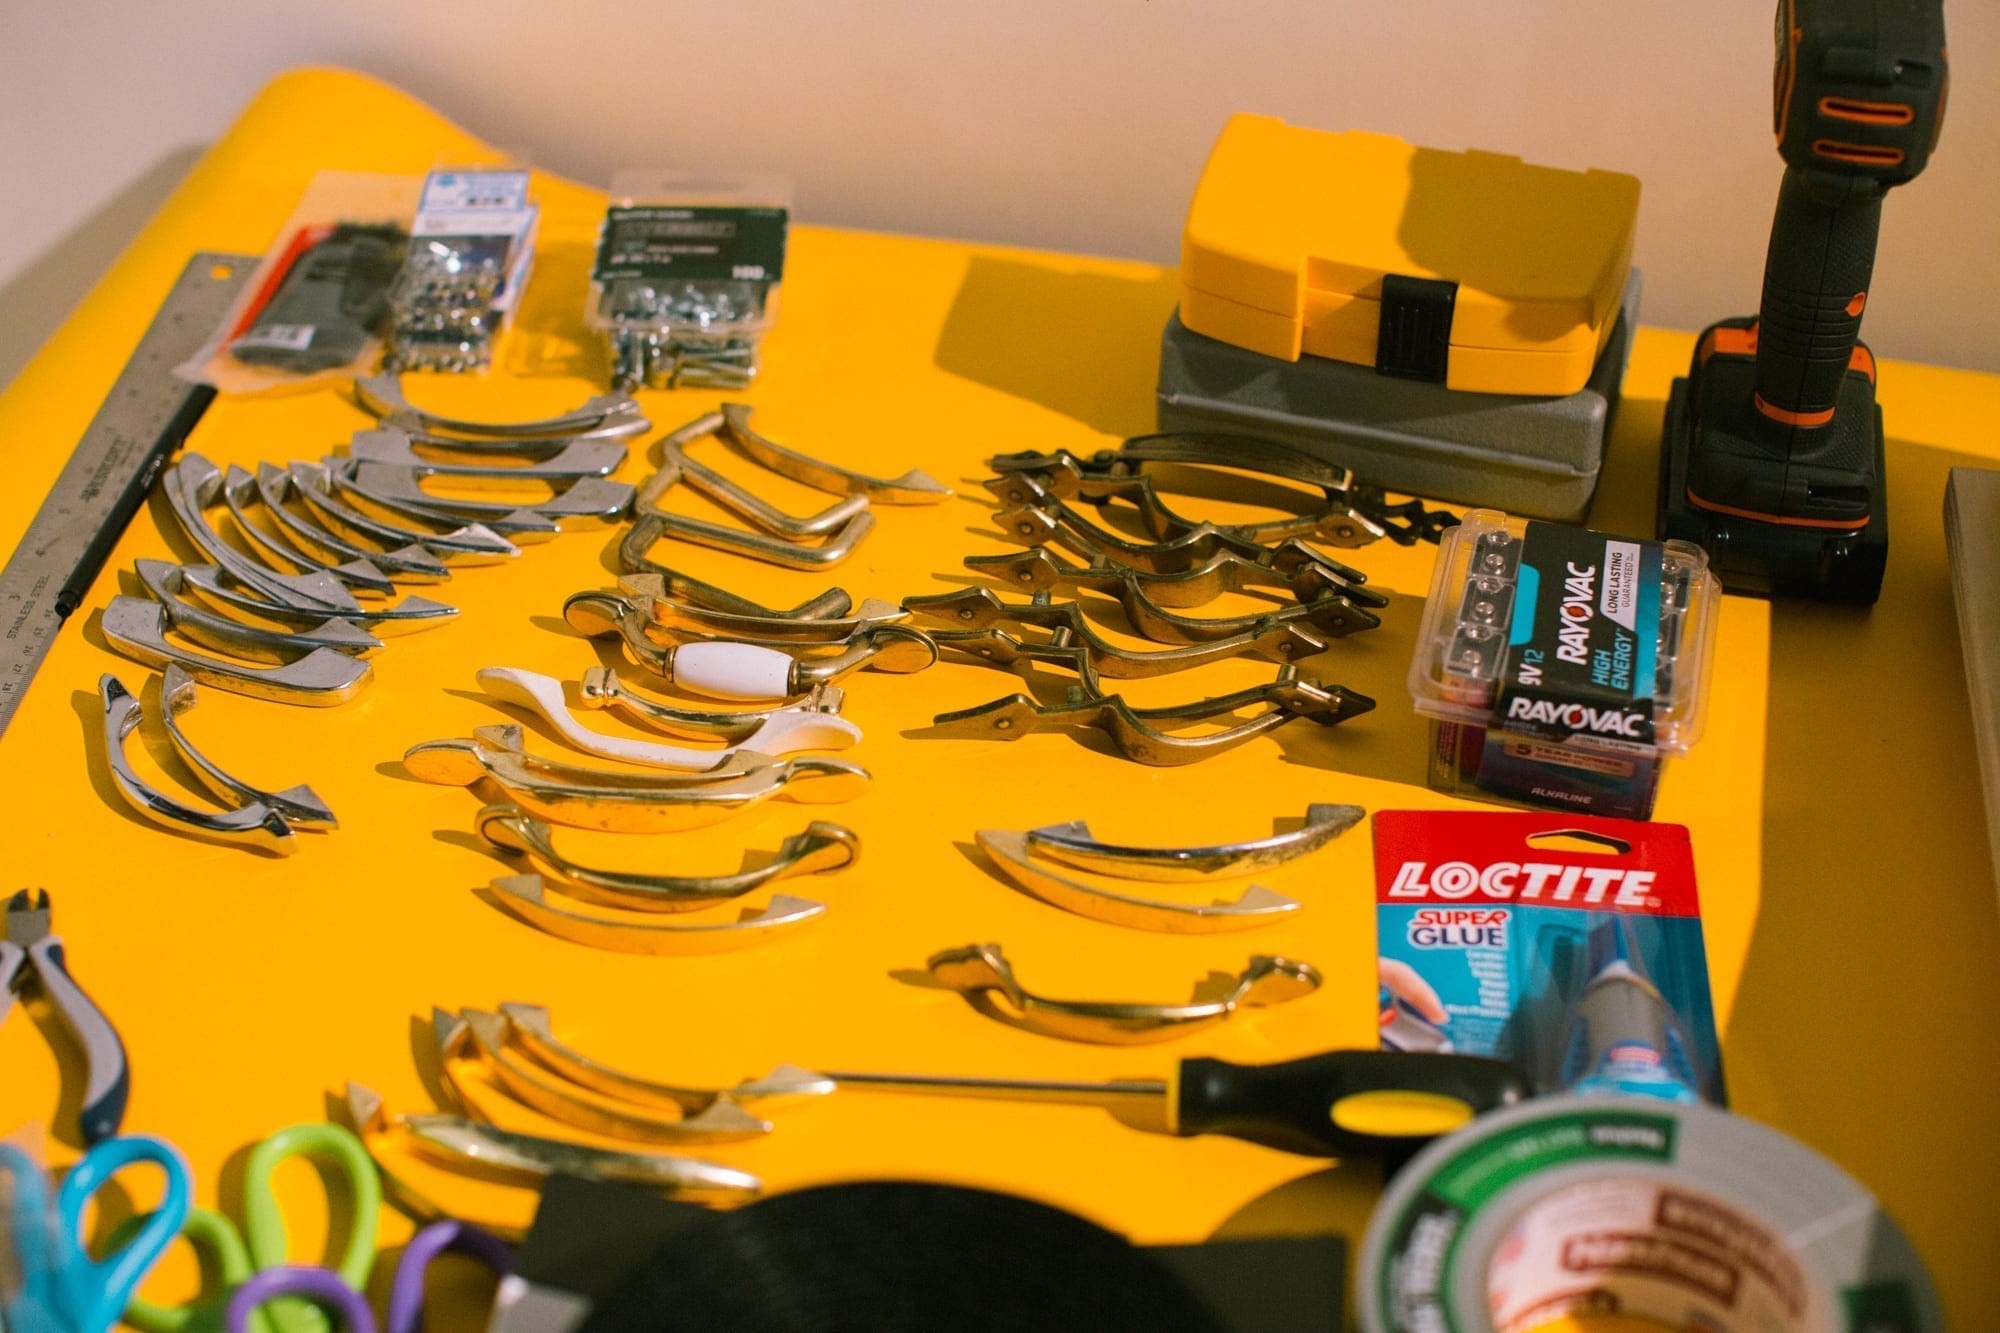
You will need:
A piece of wood sized for your pedals
Handles we got ours from a recycled wood center but anything like this will work
Screws in this lesson we will use zinc plated #8-32×1″ machine screws
Drill and the appropriately sized drill bits and head for your screws
Velcro you can find rolls of velcro at any home improvement store
Scissors to cut the velcro if necessary
Zip ties to organize your cables
Pick the dimension of your pedalboard
For this lesson we will use a 6″ x 2′ of thick 3/4″ plywood donated by ADX. Any type of wood will do,though, and other sizes include:
6”x2’ (fits 5 standard since Boss or MXR type pedals, single row)
12”x2’ (fits 10 standard pedals, two rows)
6”x1’ (fits 3 pedals, single row)
12”x1’ (fits 6 pedals, two rows)
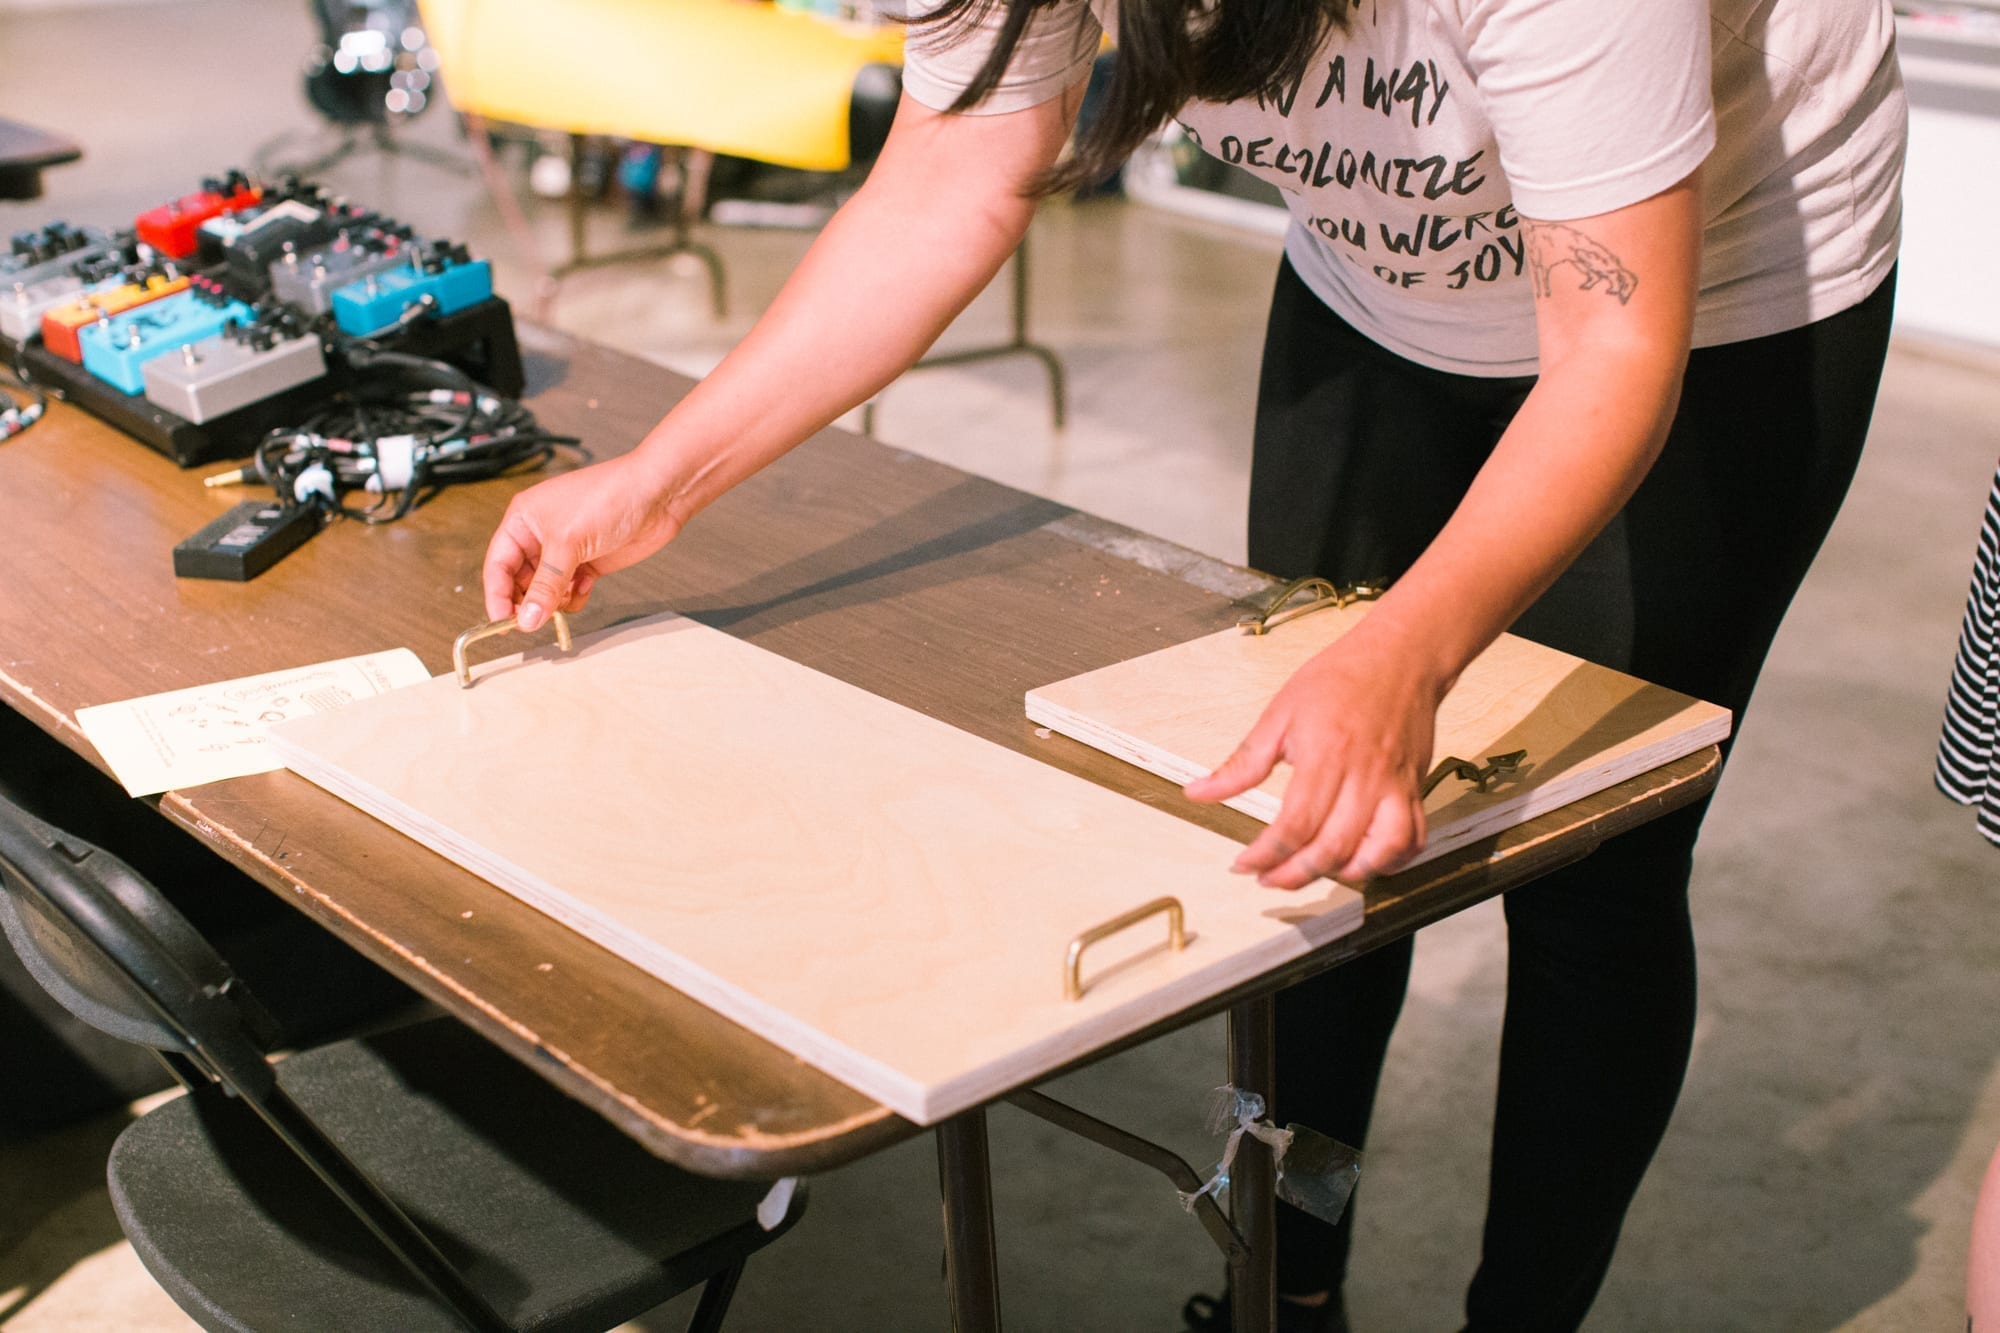
Add the handles on your pedal board
First: Get your drill and your drill bit (we’re using a drill bit sized 11/64) to make a hole through the wood before inserting the screw otherwise the screw might not go through the wood on its own.
Second: For where to place the holes, measure the distance from the center of each hole on the handle, then make marks on the wood with a pencil to know where to drill the holes. Mark and drill the first hole, then check the measurement to make sure you get the exact spacing before drilling the second hole.
*Note: We used 3/4″ thick plywood. The screw length needs to be exact for the type of handles we used, which depends on the thickness of the wood and the depth of the screw hole on the handle! We used 1″ screws.
Add your velcro
Ok SO, adding your velcro and how to do it truly depends on the aesthetic and *vibe* you’re looking for. Personally, I love for as much of the wood to show as possible so I won’t be telling you to cover your entire board with velcro. However, I also want to be able to move my pedals around and therefore I won’t be distributing the velcro in calculated pieces.
First: if you have a thick roll of velcro like the image above, measure the space between your handles with an inch of space on both sides (for your patch cables to fit!), and cut that amount from the roll of velcro.
Second: Simply take your scissors and cut that strip in half then place the two strips on your board with info room between them to evenly hold down your pedals.
Decide on your pedal configuration
If you haven’t already go back to lesson 4 and get that on lock!
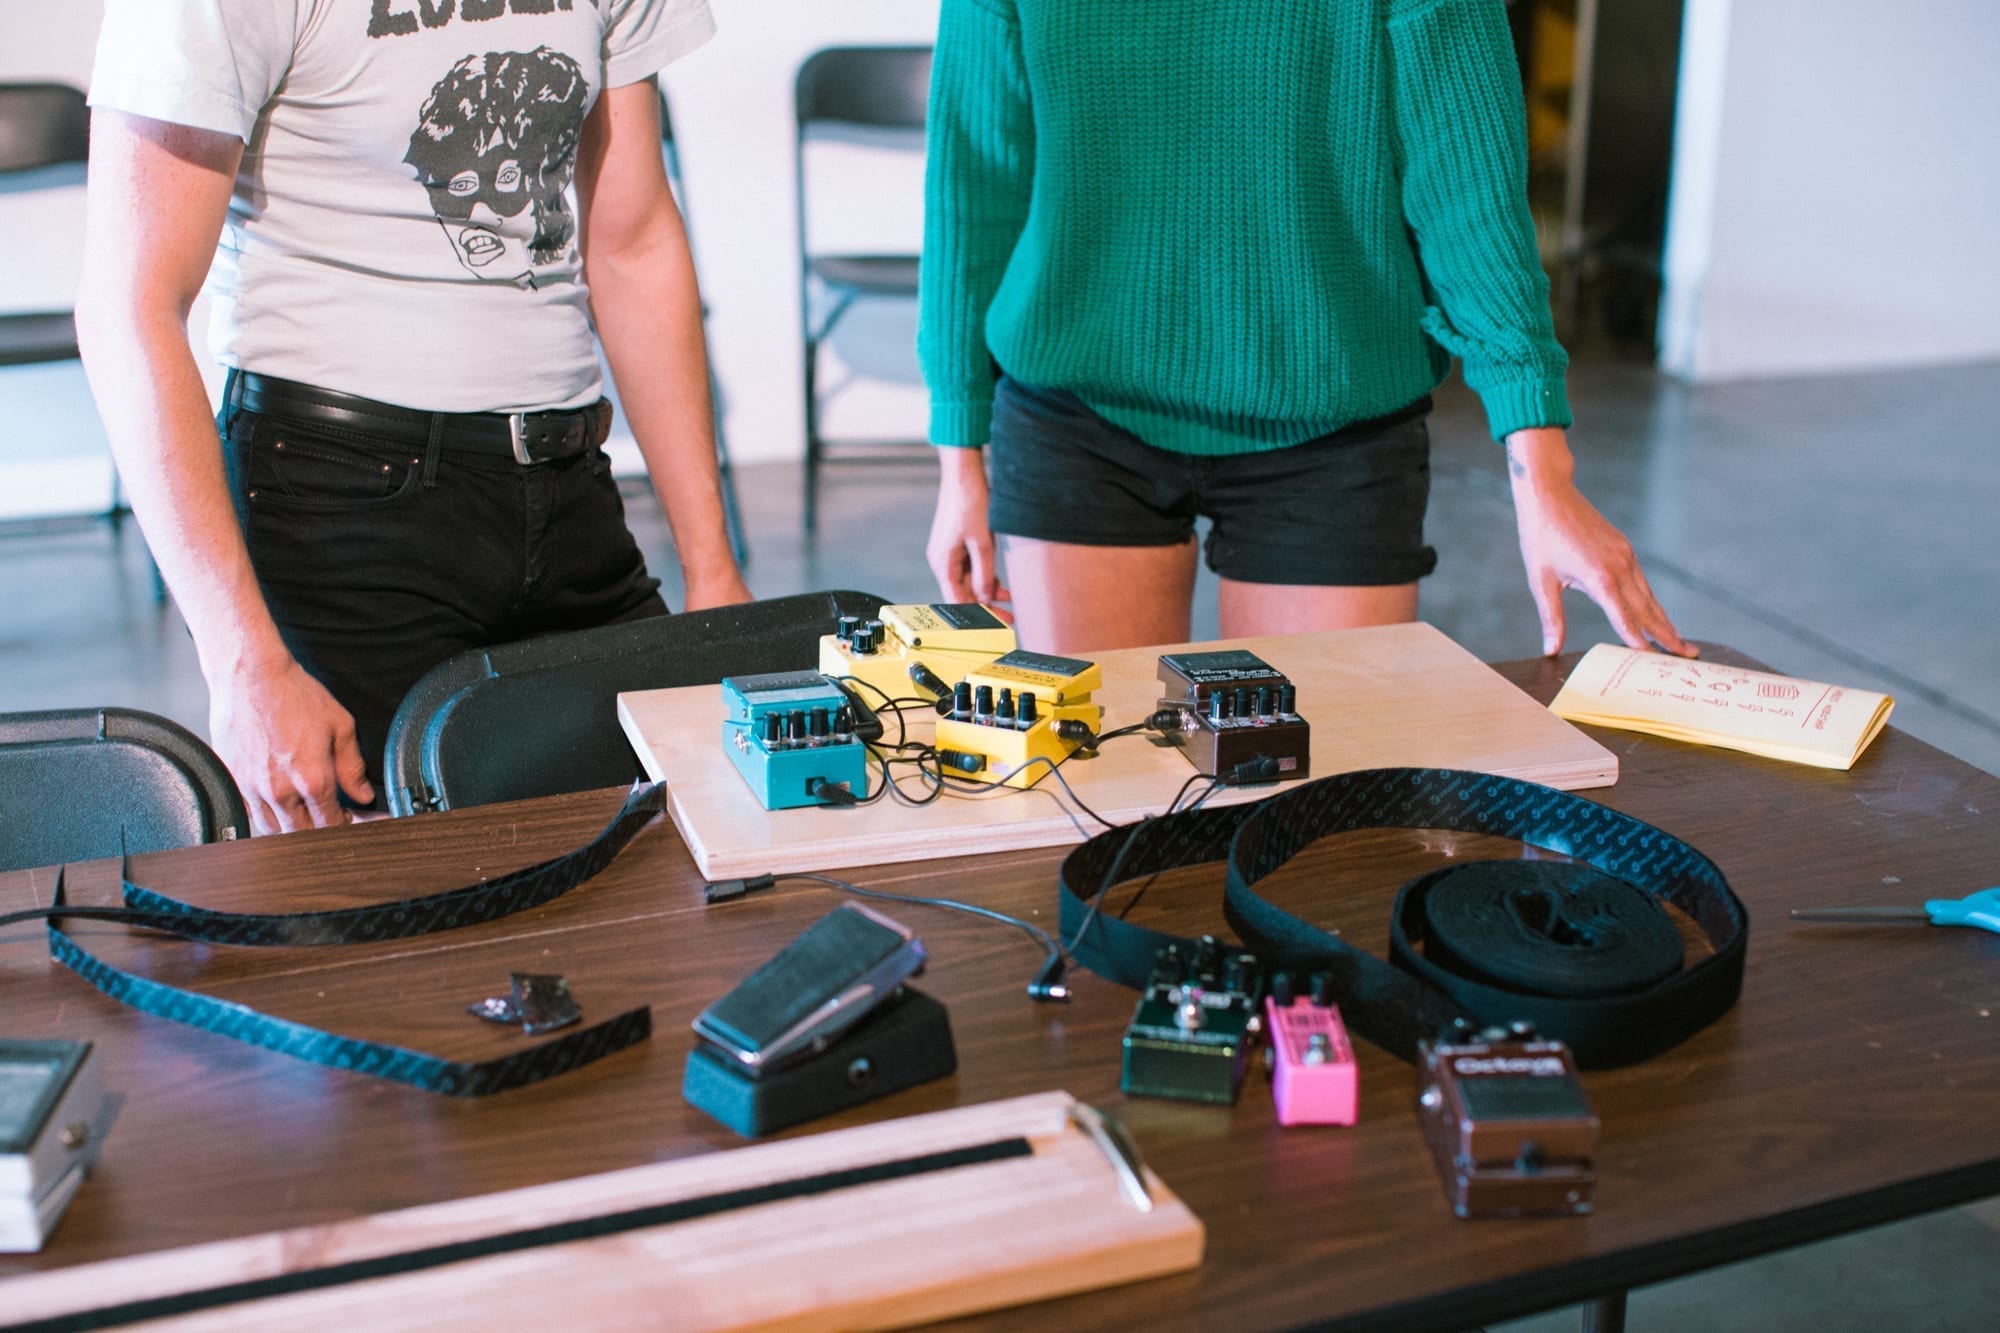
Add your pedals, cables and connect with your power supply
To make sure you have the appropriate cables and power supply check out part two and part three!
Zip tie your cables to organized perfection
Usually I find that velcro works best because you can change your pedal chain order more easily that way. Zip ties are great if your pedalboard has slats and you don’t want to get sticky velcro on your pedals. ALSO: Zip ties work great for cable organization on your pedalboard!
Gather your patch cables and power supplies into clean loops and bundles and tie them together with the zip ties for a cleaner look.
Just make sure to keep some wire cutters around to easily remove the zip ties in case of cable failure during your live show.
Because this is about pedals and pedalboards, I won’t go very deep into rack gear, but I like to remind musicians and gear nerds that it’s there nonetheless.
Rack mount effects units are very similar to effects pedals in that they can be put into the signal path (such as the path between a guitar and amp) and effect the signal. They come in all the same varieties as effects pedals – reverb, tuners, EQ, etc. – but they are long rectangular units with wings on each end that have holes so you can screw them into racks, both portable and bigger more permanent studio setups. Many rack effects units allow for control pedals to be plugged in so you can still control the unit with your feet, too. These can be a good option for players who want all their effects in a rack that is easily portable and safe from whatever crazy stuff goes on onstage or around where you’re playing.
This Summer She Shreds has hosted monthly workshops at our HQ in Portland, OR, based on the subjects of guitar, management, and recording. In May we focused on restringing your guitar, and June was all about pedals.
It’s official: you now know about effect types, power supplies dos and don’ts, cables and after this you will have been able to understand the placements of your pedals on your board better!
Let’s be honest: there’s really no right way to order your pedals, no matter how adamant people on the internet can get on the subject. That being said, pedals work in different ways depending on where they are in the chain.
The more traditional way to order a pedalboard is sometimes said to be:
Feel free to reference pt. 1 of our series to understand the effects below.
In this instance, you can either put the volume pedal before the chain, allowing you to cut signal before it goes to any pedals, or after the chain, allowing the signal to be affected by all pedals before you cut signal to the amp.
The important thing to remember is that whatever pedal you put AFTER another pedal is going to affect the pedal before it. So a good way to pick a pedal order is to think about what pedals you want to affect each other and how.
A Good Example for This Is a Looping Pedal!
Say you have a chain that consists of Looper, Delay, and Distortion.
If you set up your chain Looper -> Distortion -> Delay:
Scenario 1
Any loop you made would be affected by the pedals following it. That means that if you make a clean loop of a chord progression it would only be clean until you engaged any of the pedals following the looper. If you turned on the distortion, it would distort the loop that you had originally recorded clean.
Scenario 2
If you, however, put the looper at the end of this chain:
Distortion -> Delay -> Looper
you could record a clean loop and that loop would stay clean even if you engaged the other pedals. In this instance, you could use distortion and delay on the loop only while it was being recorded, but not after. This is a good way to use a looper—at the end of the chain—because that allows you to make clean, non-effected loops and then add distorted or delayed leads and riffs over the clean background chord progression you recorded on the looper!
A note on tuners:
Because tuners need to hear your instrument very clearly in order to tune it effectively, tuners are best placed at the front of your chain. This way, the guitar isn’t going through any other pedals before it gets to your tuner. This rule is flexible if you find another way that works best for you, though! Many people use tuners as mutes, which work better at the end of your chain, and some pedals, like volume pedals, may have an output especially for a tuning pedal!
A note about effects loops:
Many amps have effects loops in the back, this should just look like an input and output, both labeled “effects loop.” Effect loops work by putting effects, in this case pedals, in between the preamp and power amp of the guitar amplifier. These can work great if you want the signal from your guitar to your amp to have less interference! Pedals like reverb and delay work especially good in the effects loop, while dirt pedals often work a little better in the guitar-to-amp signal chain.
Like power supplies, cables are super important to your signal flow. Get cables that will last a long time and won’t break easily or create more noise in your chain! Also a lot of nicer cables companies offer lifetime warranties. This means that when and if your cables break, you can most likely send them in to get repaired or to get replacements.
What You Need
¼” (quarter inch) cables: long cables to go from guitar to pedal(s) and then pedal(s) to amp
Patch cables: shorter cables to go between pedals
Having your cables go out on you is a really good way to kill your momentum when playing music with friends or preforming. You can tell your cables are going bad if you lose signal (and the signal lost isn’t coming from a problem in your amp/guitar/pedals). Also, if there are any obvious breaks in your cable, chances are they’re not gonna be functional for much longer. There are a few ways to keep your cables from breaking quickly, though:
NO: Make sure to wrap them correctly! Wrapping your cables tightly through or around your hand. and around your elbow is bad form. This can make your cables break a lot quicker.
YES: Try looping your cables in lose coils and letting the cables guide you in the direction they want to be looped in.
NO: Don’t squish them! Try not to let heavy things, like amps on casters or drum pieces, sit on your cables. This will also make it easier for you to move around when your guitar is plugged in, as well as keeping your cables safe.
YES: Keep your cables in a safe place! When storing your cables, keep them out of the way so they don’t get jostled around too much. It’s also a good idea to have a good transportation system if you’re bringing cables to and from venues or other rehearsal spaces often.
A good tool to have around is a cable tester! Many of the cable testers on the market not only test quarter inch instrument cables, but also many other types of cables. You can find them starting at $30 or so new, which is worth it to eliminate the stress of having bad or breaking cables.
Fixing Broken Cables
Sometimes a broken cable can be fixed easily! If you have access to a soldering iron and some solder, cable repair can be a fun adventure. Many better made cables have metal protectors over the ends (right above the jack) that easily unscrew (you may notice these covers getting loose sometimes when you use cables often).
Unscrew these covers and pull them back away from the jack.
There should be two wires attached to the two little arms sticking out from the back end of the jack on the end of your cable.
If one or two of these wires is flying free, you can easily solder it back into place and—hopefully—fix your cable! If these aren’t disconnected, then you have another problem on your hands.
A note on pedal couplers:Pedal couplers are hard metal adaptors that go between pedals without any malleable cable piece in between the end jacks. I don’t generally advise people use couplers because they can put unnecessary pressure on pedal inputs and break input jacks easily.
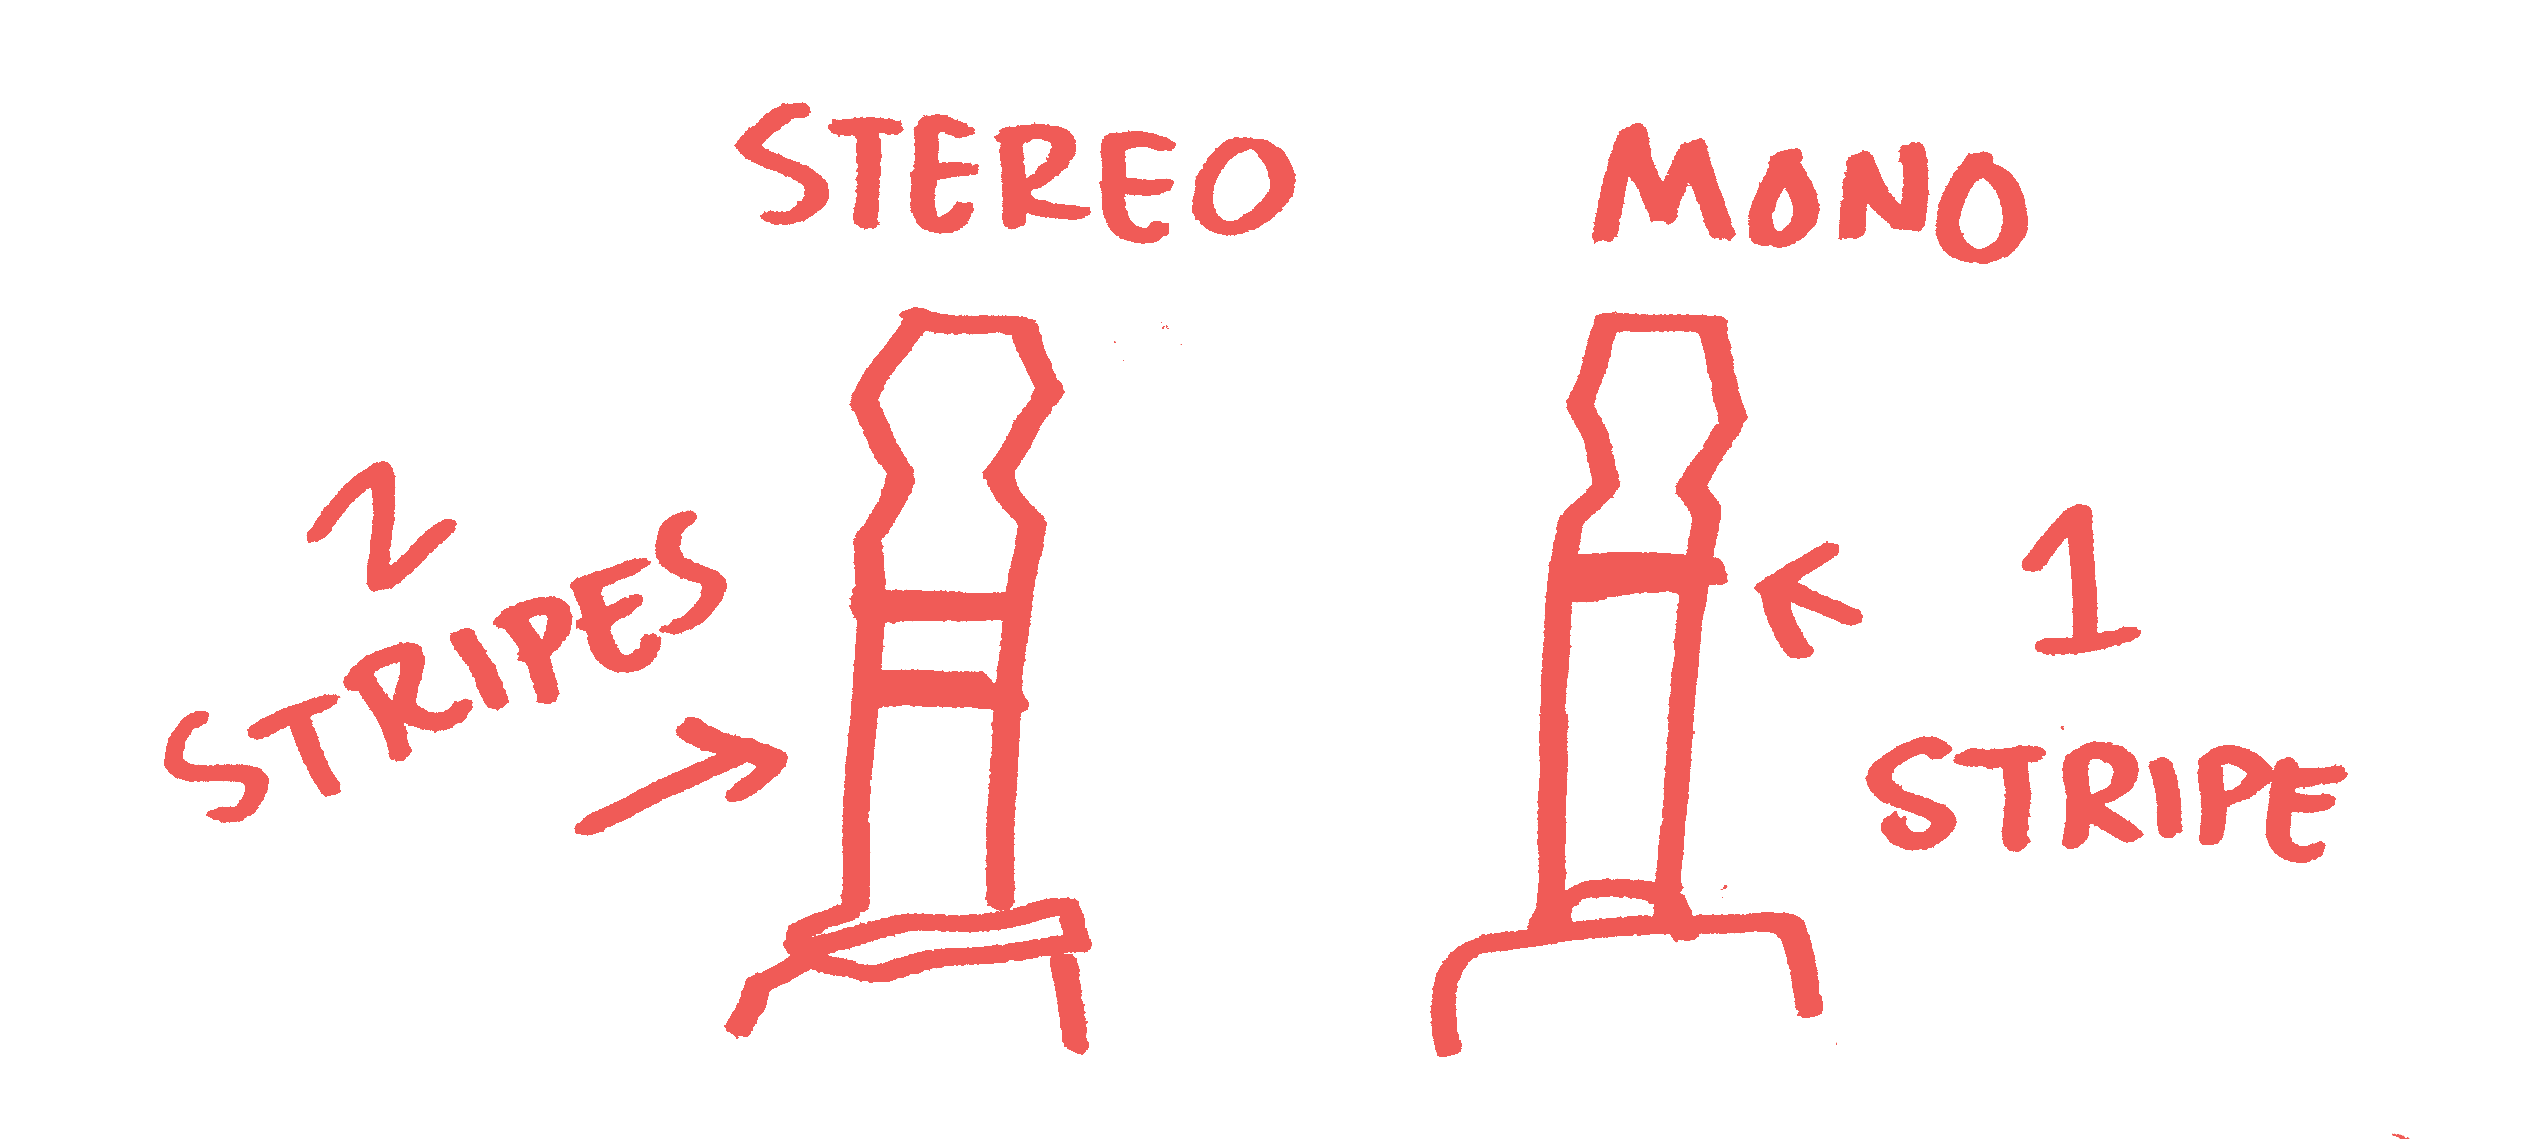
How to Tell Mono From Stereo Cable Jacks
Another term that might come up when talking about cables is TRS, this stands for Tip Ring Sleeve. TRS quarter inch cables will have a jack that has two little bands on it! Separating the jack into a tip section, a small ring section, and a sleeve, which is the rest of the jack down to the end.
These two bands allow the cable to be stereo, which means the sound it carries can be directed into two separate signals or speakers instead of one. Most instrument cables aren’t TRS and only have one little band around the jack! So the jack doesn’t have that small ring portion that is sectioned off between the two bands. This makes them mono, so the signal that is sent through that cable is a single signal instead of a split signal.
They look a lot like instrument cables! But speaker cables carry an electrical charge. These cables are used to connect your guitar amp head to your speaker cabinet or a power amp or powered mixer to a set of speakers. These carry a charge because the speakers used in these setups are what is called passive, which means they can’t power themselves independently. The power amp or amp head powers them and runs the electrical charge through the speaker cable! Speaker cables are easy to spot because they are often just labeled “speaker cable” on the side. DO NOT USE FOR PEDALS!
Power supplies are maybe the most important part of your effects arsenal! A bad power supply can make your signal noisy, weak, or even kill your pedals. While part one focused on the types of effects, part two of our pedal series will focus on defining and identifying the power supply of your pedalboard.
Different pedals take different power supplies and it’s important to check what power supply a pedal needs before using. Using the wrong power supply by mismatching volts or polarities can damage or break your pedals or make them not work correctly! Here are a few things to check:
Is it AC or DC?
Power supplies come in AC (alternating current) or DC (direct current). Some pedals use AC and some use DC! You can find which voltage your pedal requires by visiting the products site page but most pedals use the standard 9-volt DC adapter.
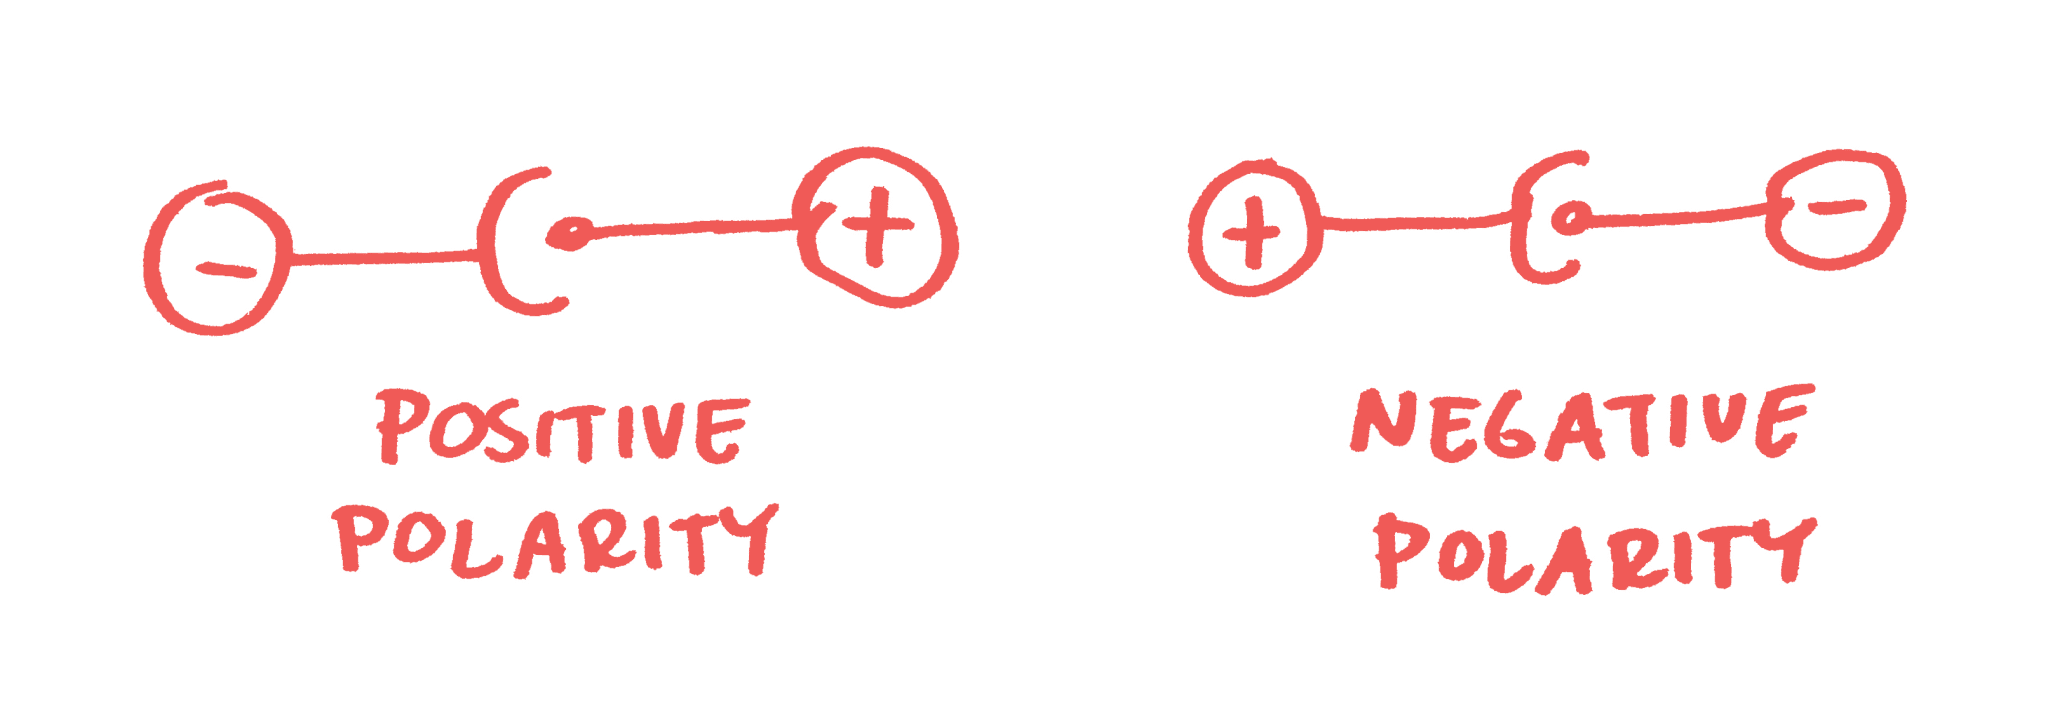
Negative or positive?
DC power supplies can either be a negative or a positive polarity, sometimes called a center. Make sure to check which one you need before using a DC power supply on a pedal! Here’s a picture of a negative vs. positive label:
Volts
Power supplies come in different voltages, so make sure to check that! If a pedal requires an AC adaptor that’s 12 volts, using a 9 volt AC adaptor can be harmful to it.
Amperes
Pedals can require a different amount of amps, in this case milliamps (usually shortened to mA on adaptors and pedals). This is sometimes written on the back of the pedal and if it’s not there, you can do a quick internet search. Many pedals don’t require that many milliamps and will be fine, but it’s good to double check.
Some pedals take different size and shape tipped adaptors also! This is easy to figure out: if it doesn’t fit, it doesn’t fit. Find an adaptor with a tip that’s compatible to your pedal power input!
A popular power supply that works with a lot of pedals is the Truetone 1 SPOT power supply. This power adaptor is a 9V negative center DC adaptor that can power up to 1700mA.
Historically, many pedals were just powered with batteries (usually 9V, but I’ve also seen some powered with other types of batteries). This is a great option if you don’t mind being on top of having extras around in case your pedal starts running low on juice. Batteries keep the signal clean and take away any weird interference power supplies might bring into the mix. If you’re only using one or two pedals, this might be the best option!
Powering a bunch of pedals at once can be tricky! Think of those huge shoegaze pedalboards you sometimes see! How do they do it? There are a few ways…
These bricks plug in and have multiple outputs for all your pedals. You can get different cables to match the inputs of your pedals and some power bricks even have different voltage outputs so you can power your 9V pedals through the same power supply brick as your 12V pedals! These also have seperate outputs for each power cable, making it so each pedal is powered separately and you usually don’t have to worry about reaching the power supply’s mA cap like you would with a daisy chain setup.
Example: Voodoo Labs Pedal Power
These adaptor chairs attach to the end of a traditional power adaptor, adding multiple plugs to the adaptor.
Example: Truetone 1 SPOT Multi Plug (attaches to 1 SPOT adaptor)
A good thing to remember is those milliamps from earlier. If you add up all the mA’s of your pedals together and it even comes CLOSE to the mA rating of your power adaptor, it’s time to think of a new way to power all those pedals! Or else you could risk them not working, being noisy, or even breaking completely. If you’re using a daisy chain style power supply attached to something like a 1 SPOT (1700mA limit) and all your pedals use close to 1700mAs in power, you should consider switching to a power brick.
In this online version of the workshop that was originally led by Janie Black, and hosted by Kathy Foster, we’re going to learn a little bit about pedals. We’ll explore how people use them, what kinds of pedals exist, how to use more than one at once, what order to put them in, and hopefully a lot more! We will outline how to make a simple pedalboard, which will help you easily organize and transport your pedal chain without disconnecting all the cables and/or power supply! Troubleshooting signal path problems (buzz, noise, or bad connections) will also be covered, hopefully giving you some tools to problem solve through signal issues.
In this six-part lesson series, you will need the following tools to leave with a fully functional pedalboard that you organized and built yourself! If you choose to follow the series, make sure to tag us during your process!
You’ll need:
A guitar and amplifier (duhhh!)
Desired effects pedals
Power supplies
Batteries (9V, AA, AAA)
Instrument cables
Patch cables
Velcro
Small zip ties (I promise, they are essential for cable management).
Duct tape (optional)
Scissors
Cable/wire cutters
Screwdriver
Sharpies (optional)
Paper (optional)
Superglue (optional)
Wood board cut to desired dimensions
Wood screws
Two handles
First thing’s first:
Let’s go over some of the most common pedal types and what they do. Keep in mind that these are just some of the effects out there! There are so many different effects and more and more are being created daily.
Learn and experiment with these pedals to better understand the sound you’re seeking and the tools necessary to get you there.
Tuning pedal Guides you in tuning your instrument and sometimes can act as a mute if pedal has the option to cut signal while being used. Example: Boss TU-2
Equalizer (EQ) pedal Helps to lower/cut or raise certain frequencies. Can also sometimes be used as a clean boost if all frequencies can be turned up slightly. Example: Boss GE-7
Volume pedal A popular type of pedal that changes the volume of signal when manipulated. Example: Ernie Ball VP Junior
Compression (or compressor) pedal “Compresses” the signal that your guitar produces by normalizing the dynamic range of the audio input signal based on a threshold value. Can also increase sustain by controlling how loud or soft your signal gets, without distorting your tone. Example: MXR Dyna Comp
Noise Gate pedal Comparable to a compressor, a noise gate controls the volume of an audio signal. Example: Behringer NR300
Limiter pedal Allows signals below a specified input level to pass unaffected while lowering the peaks of stronger signals that exceed this threshold. Example: Boss LMB-3 (bass limiter)
Wah (or wah-wah) pedal Alters the tone and frequencies of the guitar signal to create a distinctive sound, mimicking the human voice saying the onomatopoeic name “wah-wah.” Example: Jim Dunlop Cry Baby Wah
Boost pedal Boosts or cuts the signal from one level to another, set, level. Like a volume pedal, but without dynamic capabilities. Example: ETC Electronic Spark Booster
Chorus pedal Creates a richer, thicker sound that simulates the slight variations in pitch and timing that occur in a vocal chorus. Example: Electro-Harmonix Small Clone
Reverb pedal Creates the effect of reverberation. Example: Electro-Harmonix Holy Grail
Phaser (or phase shifter) pedal Split the signal of your instrument into two exact copies, shift the phase of one copy, and then recombine the two as a single signal, creating a rippling, Doppler-like effect in your sound. Example: MXR Phase 90
Flanger pedal Similar to a phase shifter, a flanger splits the signal into two copies, then one of them is delayed in time very slightly. The delay time also changes at a constant rate, which can be manipulated with a knob. It sounds kind of like a jet plane! Example: Mooer Eleclady
Delay pedal Records a copy of your signal and plays it back after a delay, creating a repeating, decaying echo effect. Example: Line 6 DL4
Tremolo pedal As an effect, tremolo is a modulation effect that creates a change in volume. The “tremolo arm” on your guitar is actually vibrato, which lowers and raises the pitch, creating variation in tone. Example: EarthQuaker Devices Hummingbird
Loop (looper) pedal Allows you to record short pieces of audio and loop, or repeat, them indefinitely. Sometimes loop pedals will have layering functions, allowing you to record one or more pieces of audio over the original track. Example: Boss RC-2
Ring modulator pedal A signal-processing function performed by multiplying two signals, where one is typically a sine wave or another simple waveform and the other is the signal to be modulated. Honestly, just makes your signal sound “wobbly.” Example: Moog Moogerfooger
Extra special type (to me at least)!
Dirt pedals:
Fuzz pedal One of the first guitar effects ever engineered, fuzz pedals change the guitar signal by using transistors (germanium or silicon) to amplify the signal to a point where it starts to sound distorted, fuzzy, and has very long sustain. Example: Jim Dunlop Fuzz Face
Overdrive pedal Provides a gain boost to “overdrive” a tube amp into distortion, or to approximate the mildly distorted sound of a slightly overdriven tube amp. Example: Ibanez Tube Screamer
Distortion pedal Whereas overdrive aim to create the sound of tubes pushed to their limit, distortions do what their name says and distort the signal tone. To do this, they use a network of transistors and clipping diodes. Example: Pro Co Sound RAT
A note on dirt effects:Fuzz, overdrive, and distortion pedals often sound pretty similar, but they reach the goal of dirtying up the guitar signal through different methods. Some may work better for your setup than others! For example, an overdrive like the Ibanez Tube Screamer may sound better when used with a tube amp and you may find that a solid state amp responds better to a distortion pedal like a RAT. The only way to know is to try out different stuff!
There are many tremolo pedals on the market that offer some level of control via the use of a separate expression pedal. But finding a tremolo that’s housed inside of an expression pedal is virtually unheard of. That alone is reason to celebrate what Ernie Ball has done with the latest addition to their Expression Series.
Tremolo holds an auspicious place in the history of modern music. The DeArmond Tremolo Control, introduced in 1946, was one of the earliest effects available to musicians.
At its core, “tremolo” refers to any technique involving rapid repetitions of a single note, which is usually used to create a sense of urgency in a song. The first electronic interpretations of that sound were achieved by rapidly increasing and then decreasing a signal’s amplitude, which resulted in a doppler-like effect that was quickly integrated into many early guitar amps. It did not take long for the effect to creep into nearly every song on the airwaves, taking a prominent place in the emerging R&B/rock ‘n’ roll music of the mid ’50s through early ’60s. Tremolo is still an element in many modern-day hits and emerging underground acts, such as Shannon and the Clams, Gabriella Cohen and the Ratboys.
AT A GLANCE:
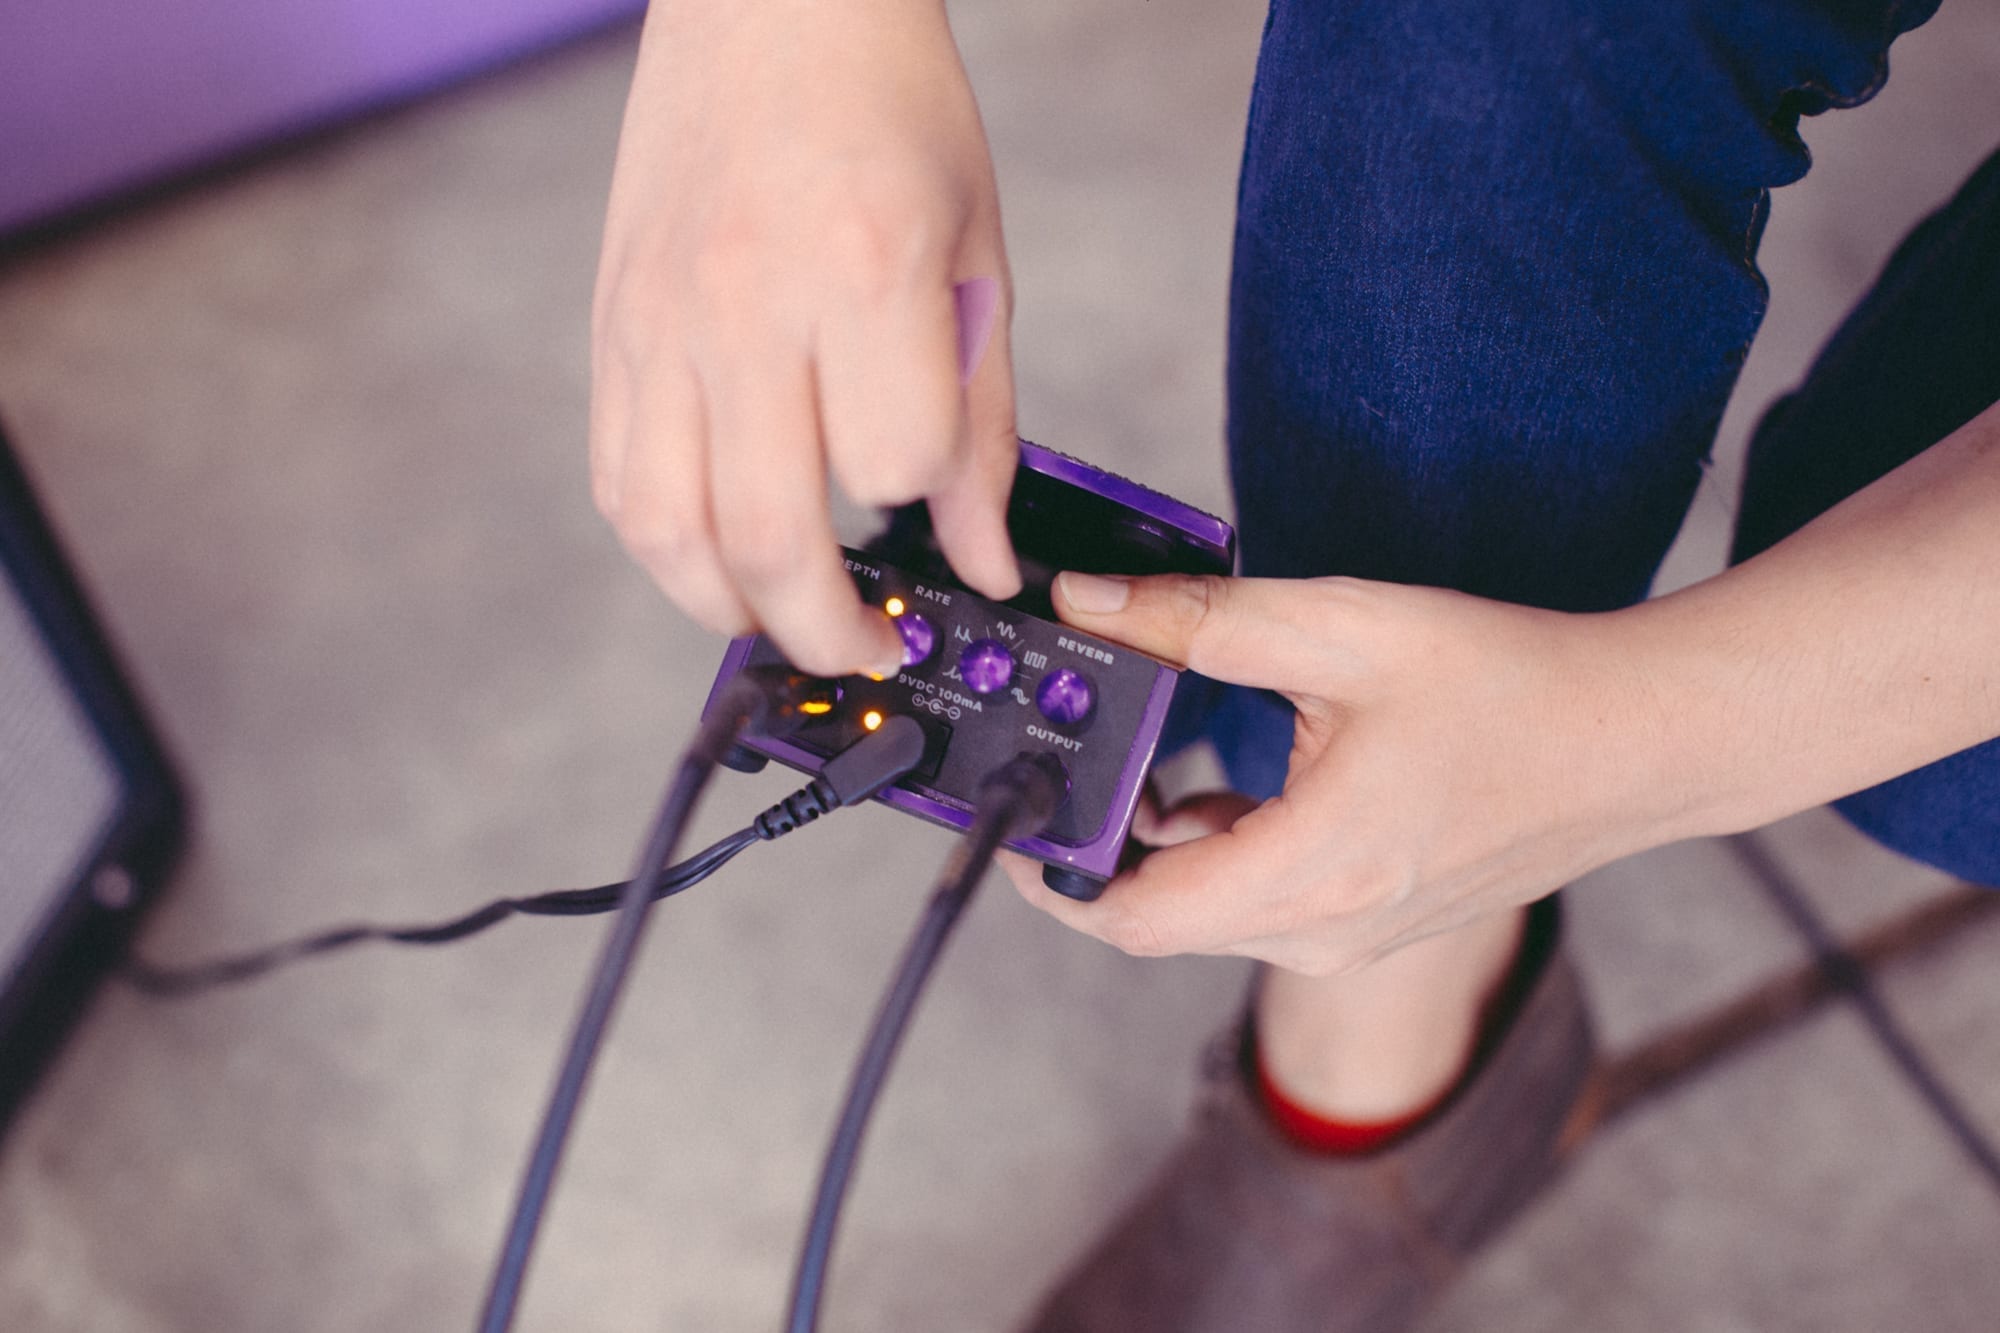
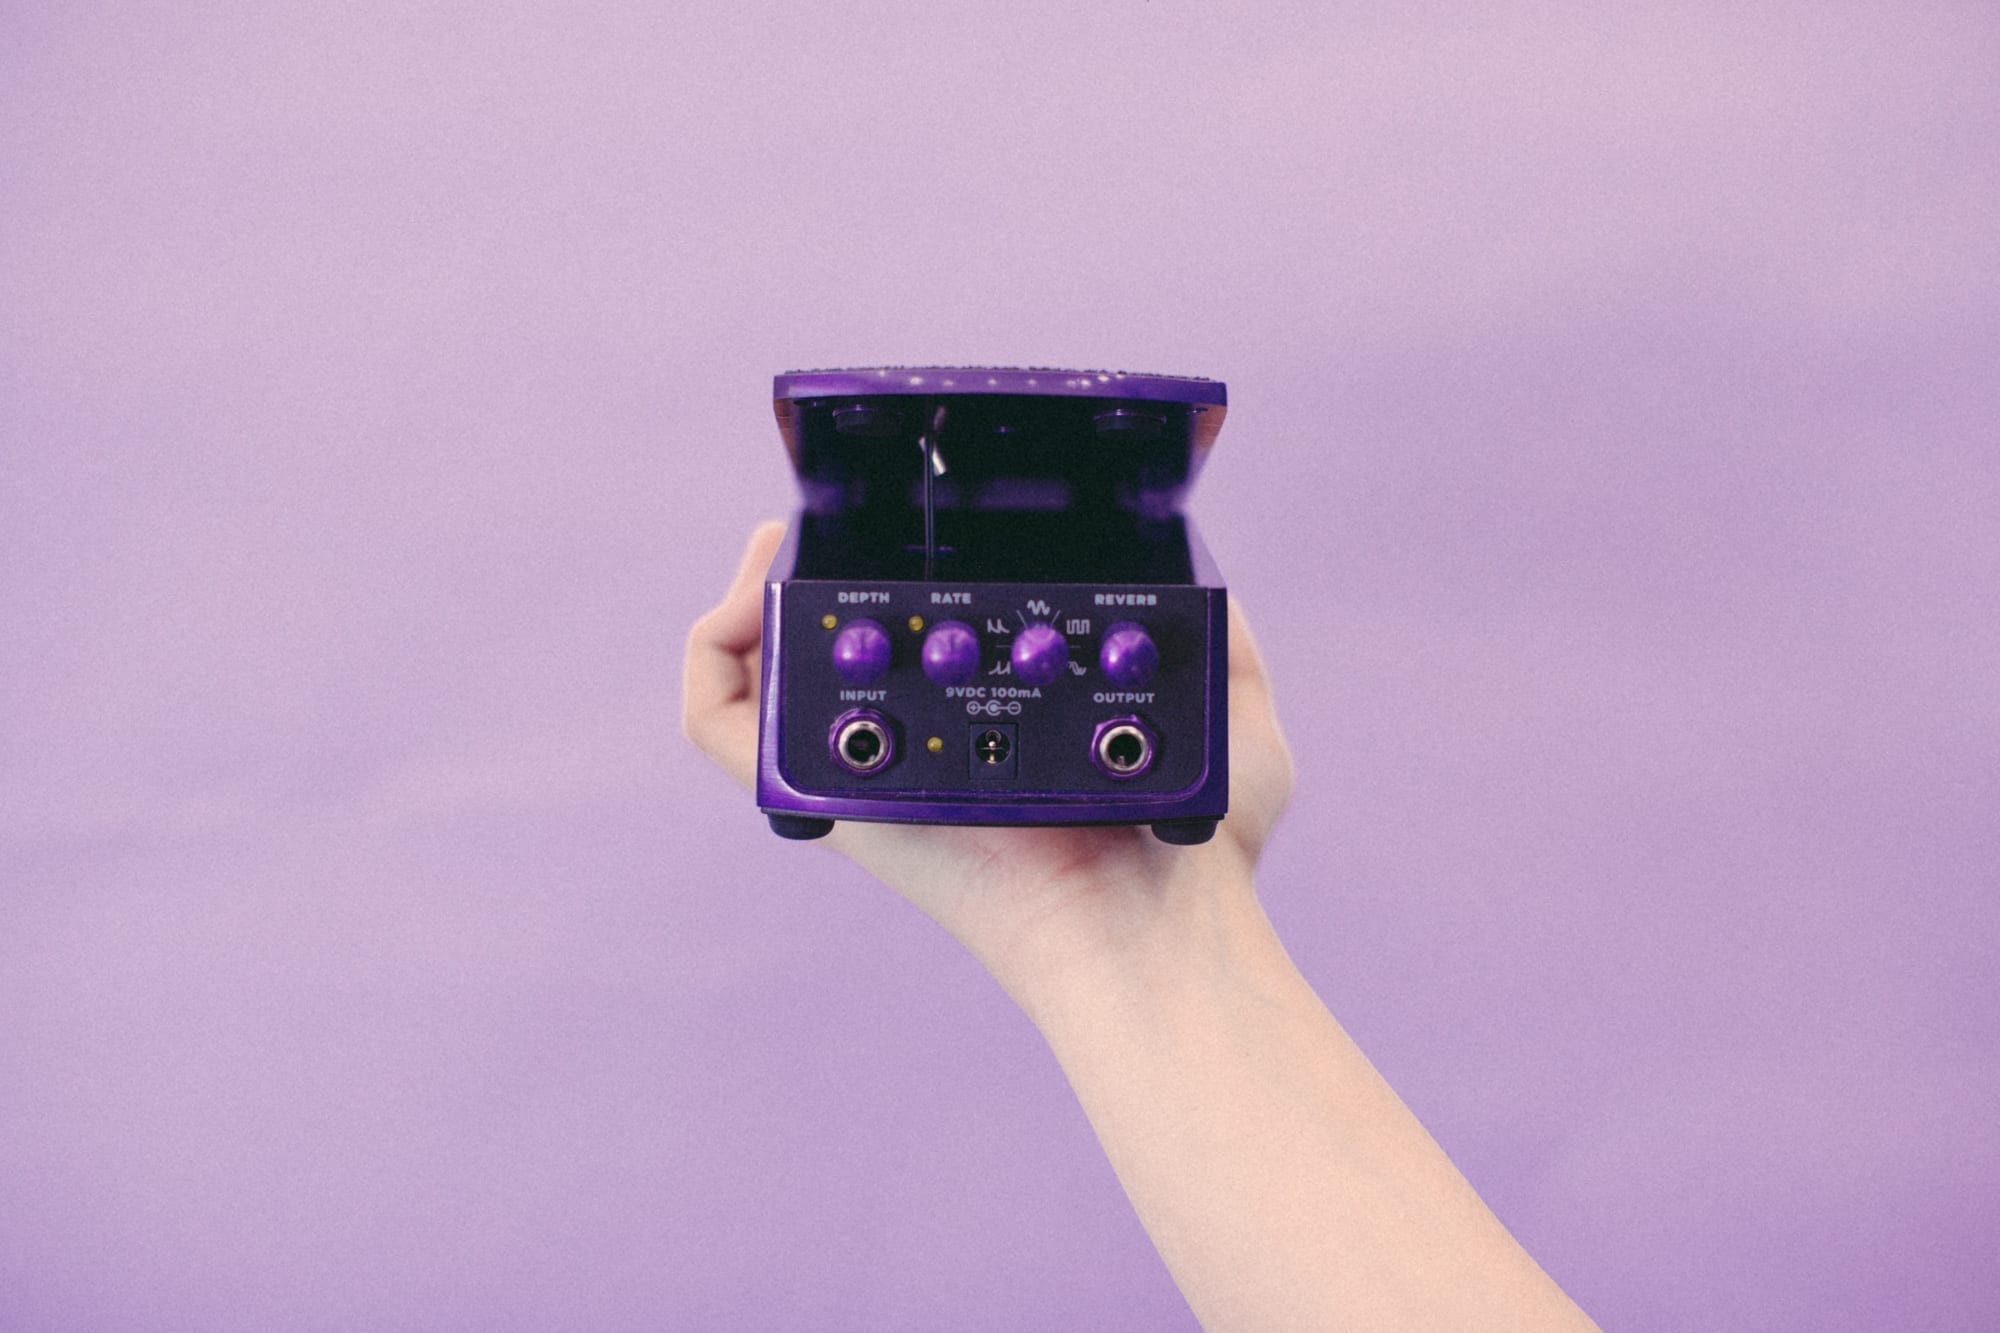
Housed inside of an enclosure similar to that of their volume pedals, the Expression Tremolo features a stunning purple design with a non-slip surface and intuitive controls. Like the rest of the Expression Series, it has an upgraded PVC-coated Kevlar cord that increases its durability. Using the foot treadle itself feels very smooth throughout the entire range of motion. The treadle will also stay in place after you lift your foot from it, allowing you to lock in any expression of tremolo you like.
MSRP: $199.99
High quality classic and modern tremolo sounds
Bonus rotating speaker effect and spring reverb
Hands-free control of depth and rate
May also be used as a stand-alone reverb pedal
Powered by a 9V center negative 100 mA supply (sold separately)
WHAT SETS IT APART:
There is something truly inspiring about the level of control that the Ernie Ball Expression Tremolo offers. The moment the pedal is pushed forward with your foot the effect begins to engage; lean all the way back and it’s bypassed. You may control the rate, depth, and amount of reverb on each selected sound either separately or simultaneously. The reverb can also be used by itself and really nails the classic drippy, almost underwater-like character that great spring reverb units are known for, making it perfect for adding a surf-like or cavernous texture to the signal.
THE WAVEFORMS:
The sine and square waveform settings represent vintage and modern interpretations of tremolo, which can range from a subtle warble to a full-on robotic pulse, respectively. Selecting the slow fall waveform provides a very percussive sound that is quite similar to some of the quirky tremolo circuits that were built into most of the vintage combo organs that dominated the music of the 60s. Slow rise almost seems to introduce a delay into the signal and is perfect for creating some pseudo reverse guitar sounds with its slower settings.Perhaps the best kept secret of the pedal is the harmonic waveform, which beautifully mimics the sounds of a rotating speaker and simply sounds fantastic.
That is quite a bit to offer in a single pedal. With the Ernie Ball Expression Tremolo, I found myself using an effect that I’ve always loved in completely new and thrilling ways.
She Shreds Media: Our mission is to educate, empower, and inspire people through unexplored musical and cultural landscapes. Our vision is to continuously refine, redefine, and reimagine the possibilities of how music connects us, ensuring an inclusive and accessible music community 100% of the time.