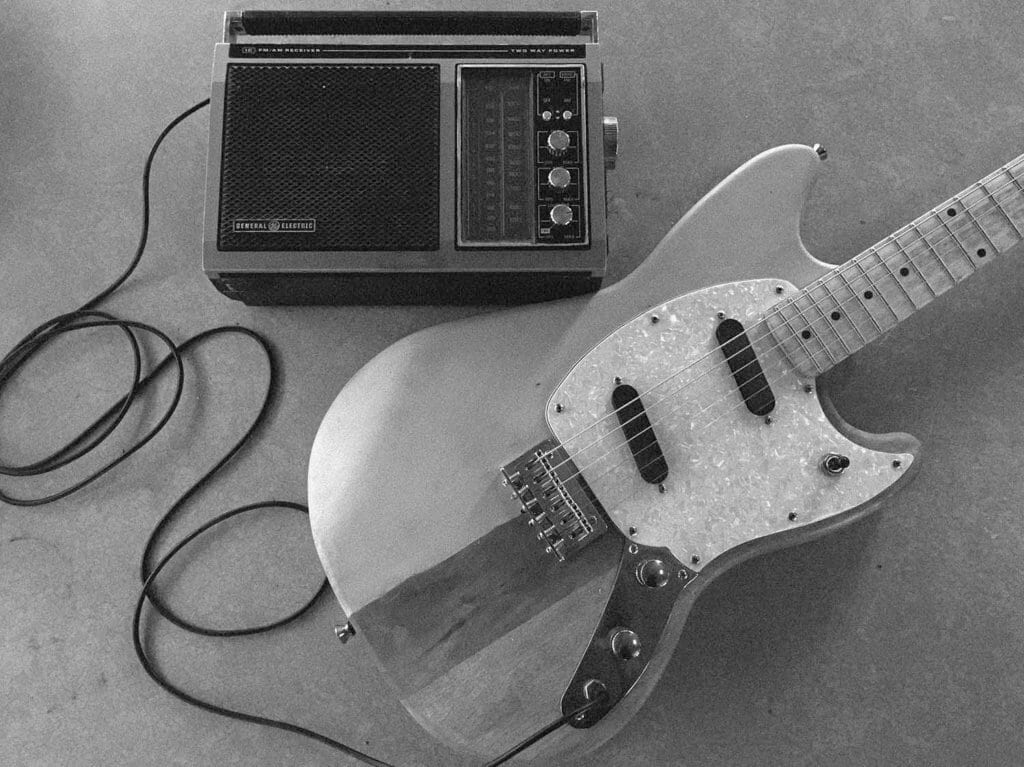
Learning how to build an amp from an old radio is not only a sweet upcycling project, but it’s also so easy that it blew my mind. The coolest thing is how unique each radio can look and sound: an older radio might offer a vintage or low-fidelity tone, while a newer radio might offer more portability or a cleaner sound. Your new amp will be one of a kind!
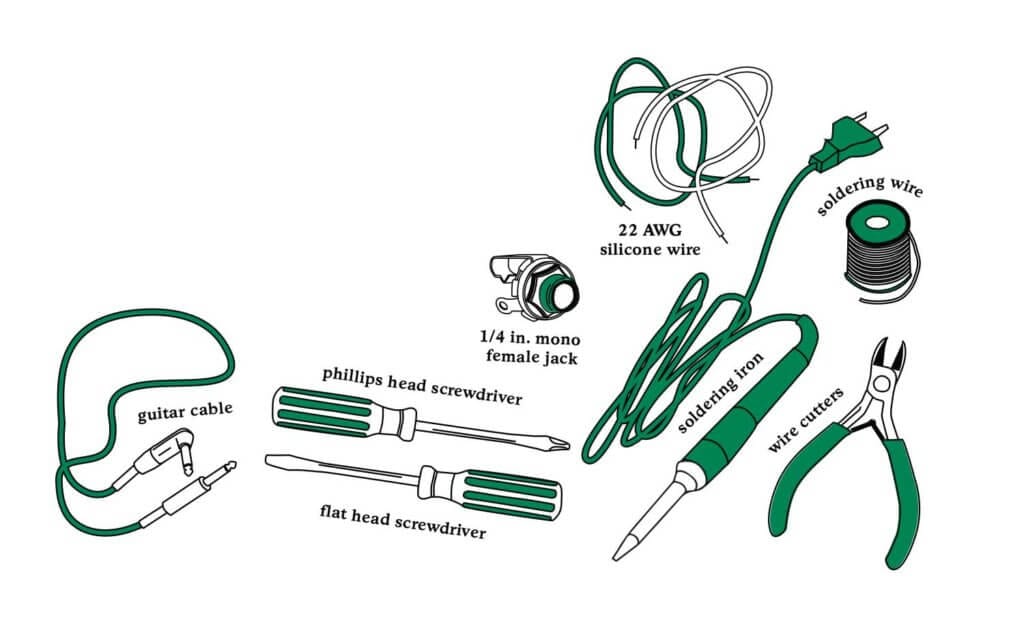
Here’s everything you’ll need to complete this project:
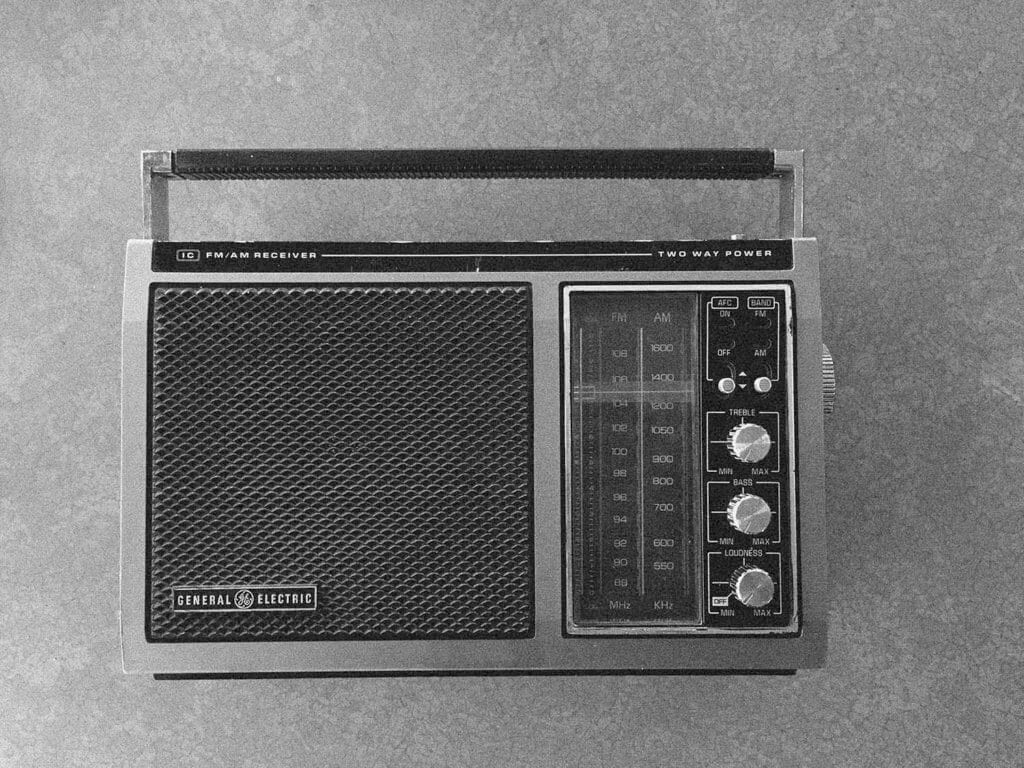
Finding your perfect radio could be as easy as taking a trip to the local thrift store or doing a quick search on eBay. When on the lookout, try keeping in mind which features are most important to you. Some radios have tone, equalizer, or squelch knobs that would allow you to have more control of your final sound. Some are battery-powered, have a built-in handle, or a headphone jack—all of which would make them a sweet travel companion.
Once you’ve found your dream radio, it’s time to rip it open (as gently as possible).
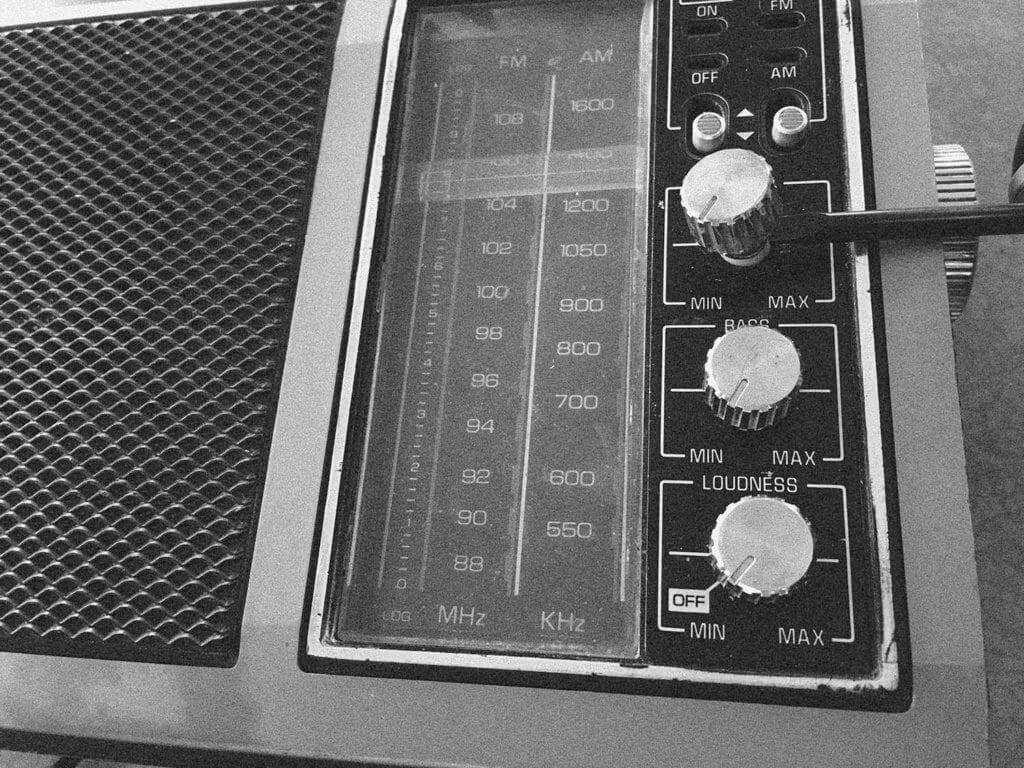
To start, you’ll need to remove any knobs or switches from the radio. This can be done by placing a flathead screwdriver in the space between the knob and body of the radio and lifting it up.
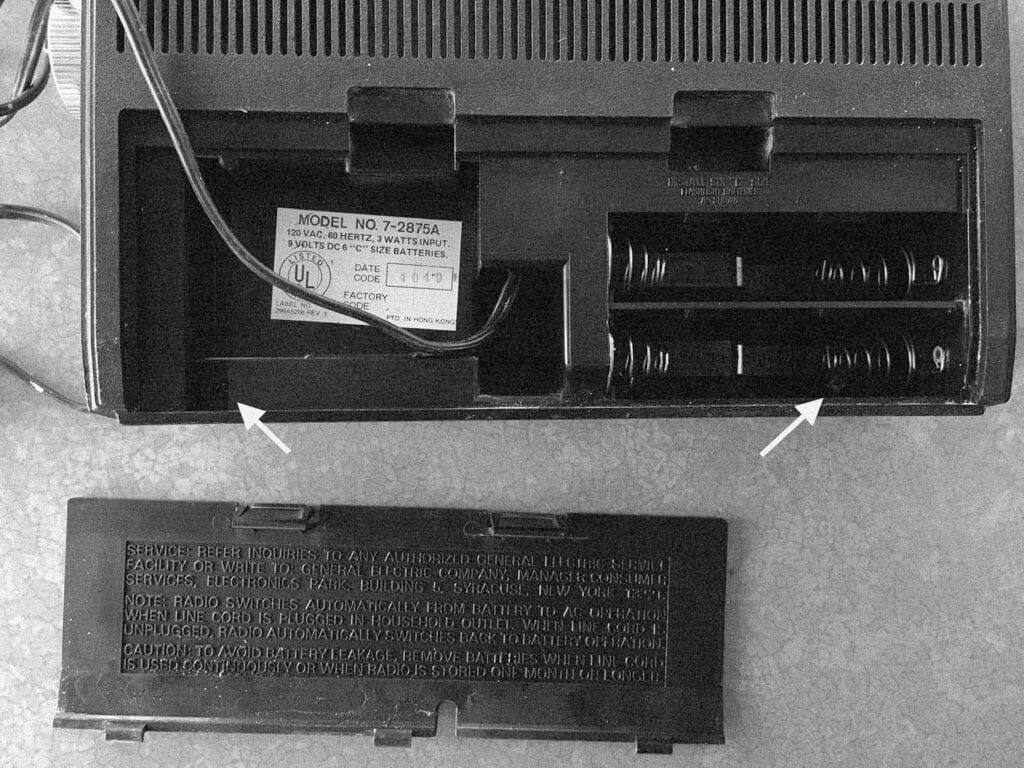
Next, you’ll need to remove any screws holding the outer casing together. These will usually be found in the corners on the back of the radio, and sometimes there may be one or two hidden in the battery tray.
Once you’ve removed all of the screws, opening up your radio could be as simple as pulling one side apart from the other, but you might need to stick your flathead screwdriver in the lip between each side for leverage. (Similar to the knobs.)
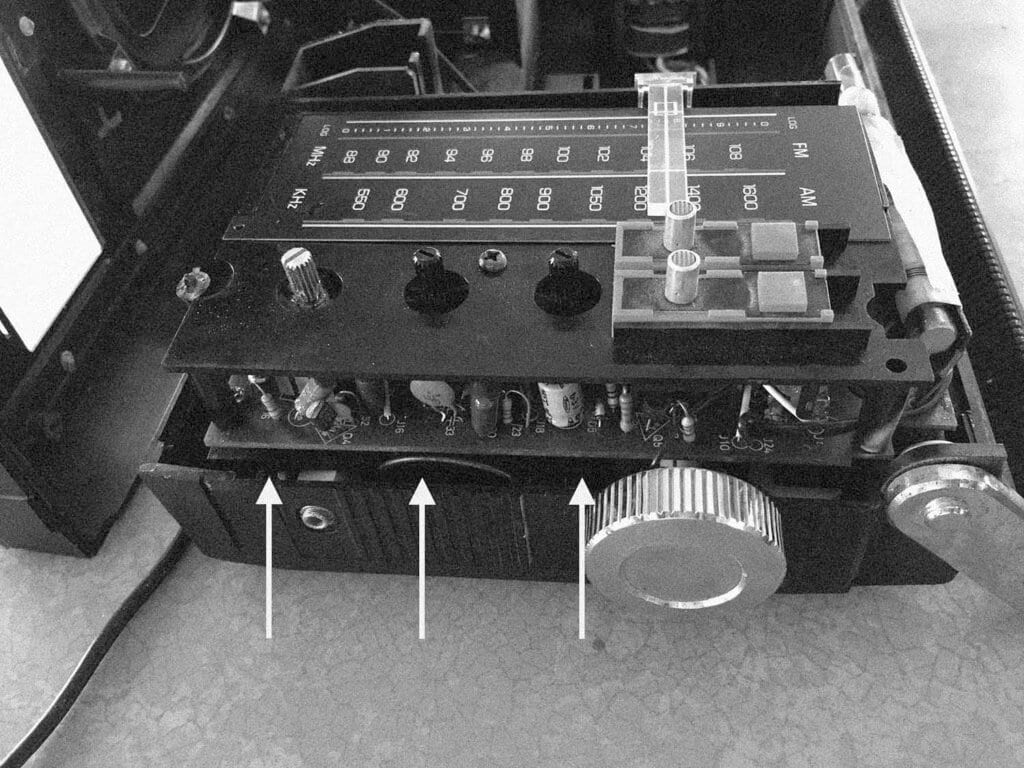
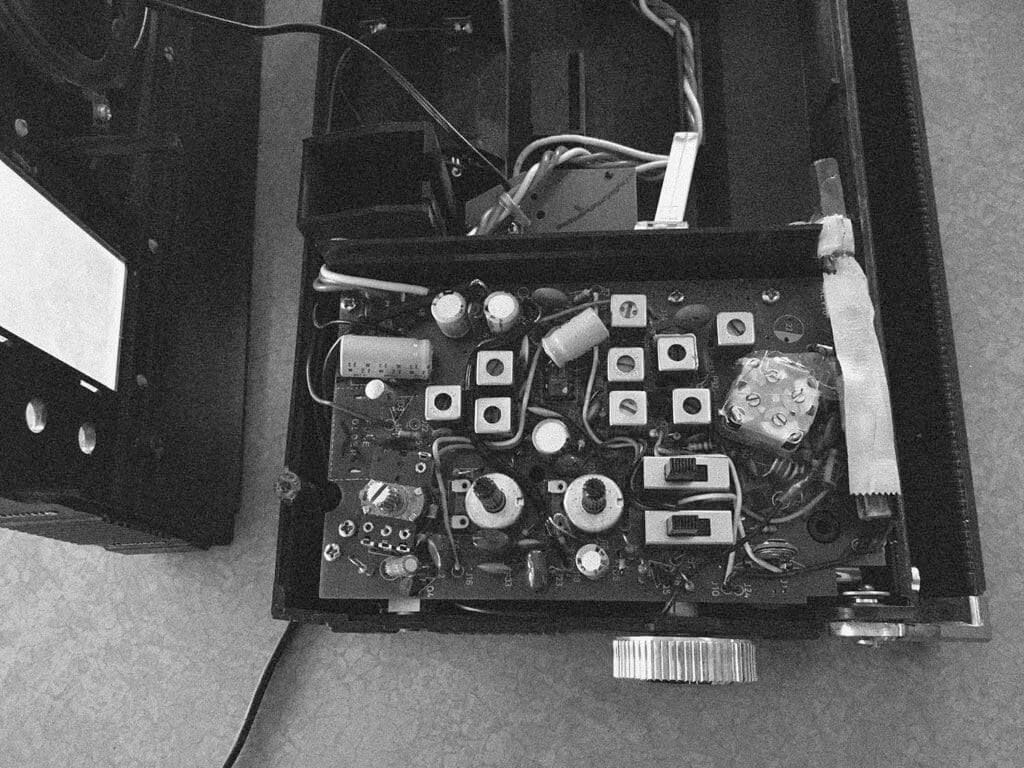
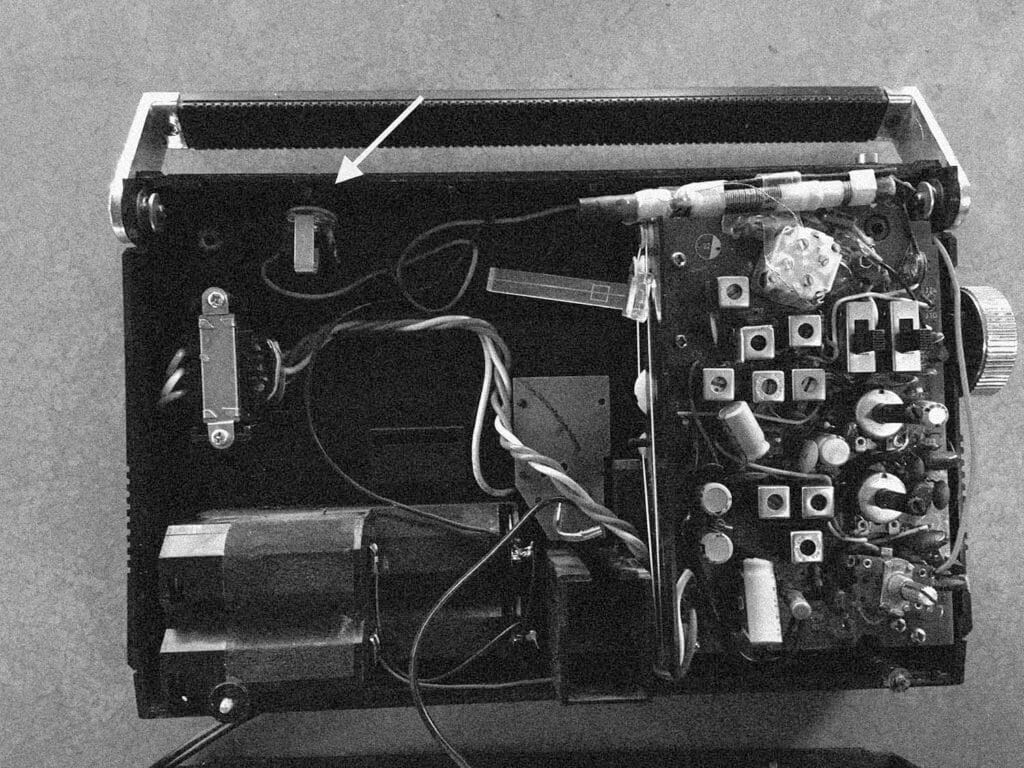
Now that your future amp is ripped open, it’s time to locate the circuit board. Mine was protected under my radio’s control plate. They’re pretty easy to recognize, but yours might be flipped over or protected like mine, so you’ll need to remove any screws holding it or its cover in place to gain access.
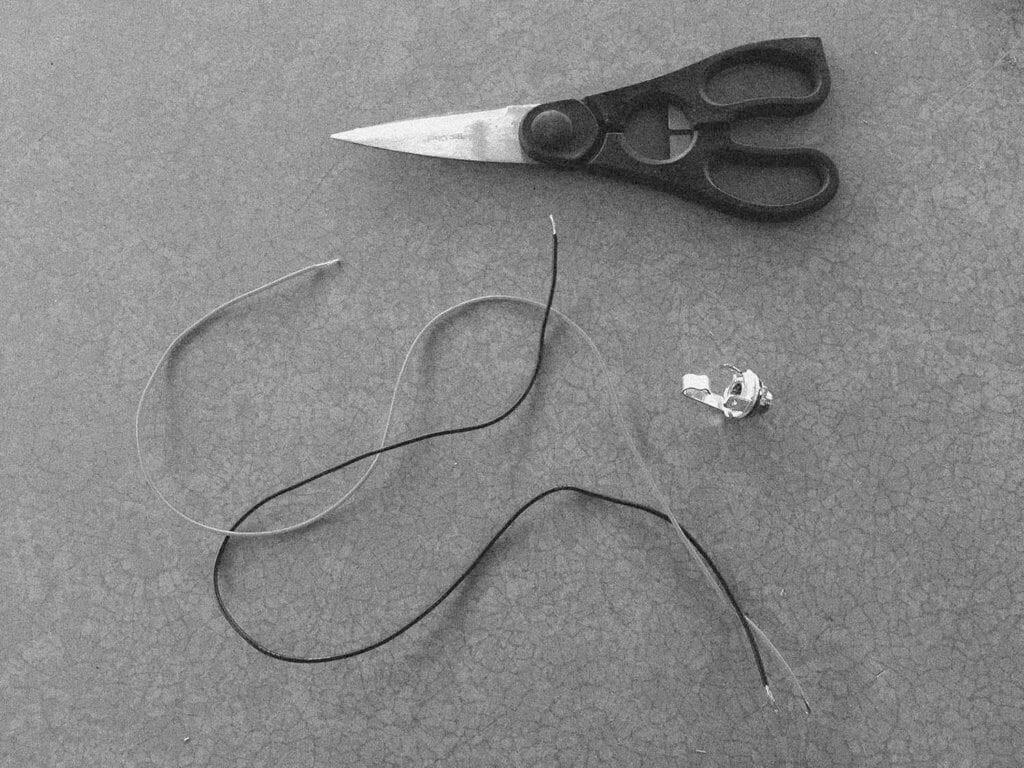
Now you’ll need to get your quarter-inch jack ready for the job of its lifetime… Start by cutting yourself a couple pieces of wire. Make sure to give yourself enough slack for when it’s time to decide where your jack will rest. Next, you’ll need to strip both ends of each wire to expose them. I used scissors to do this, but a wire cutter or wire stripper would be the better option.
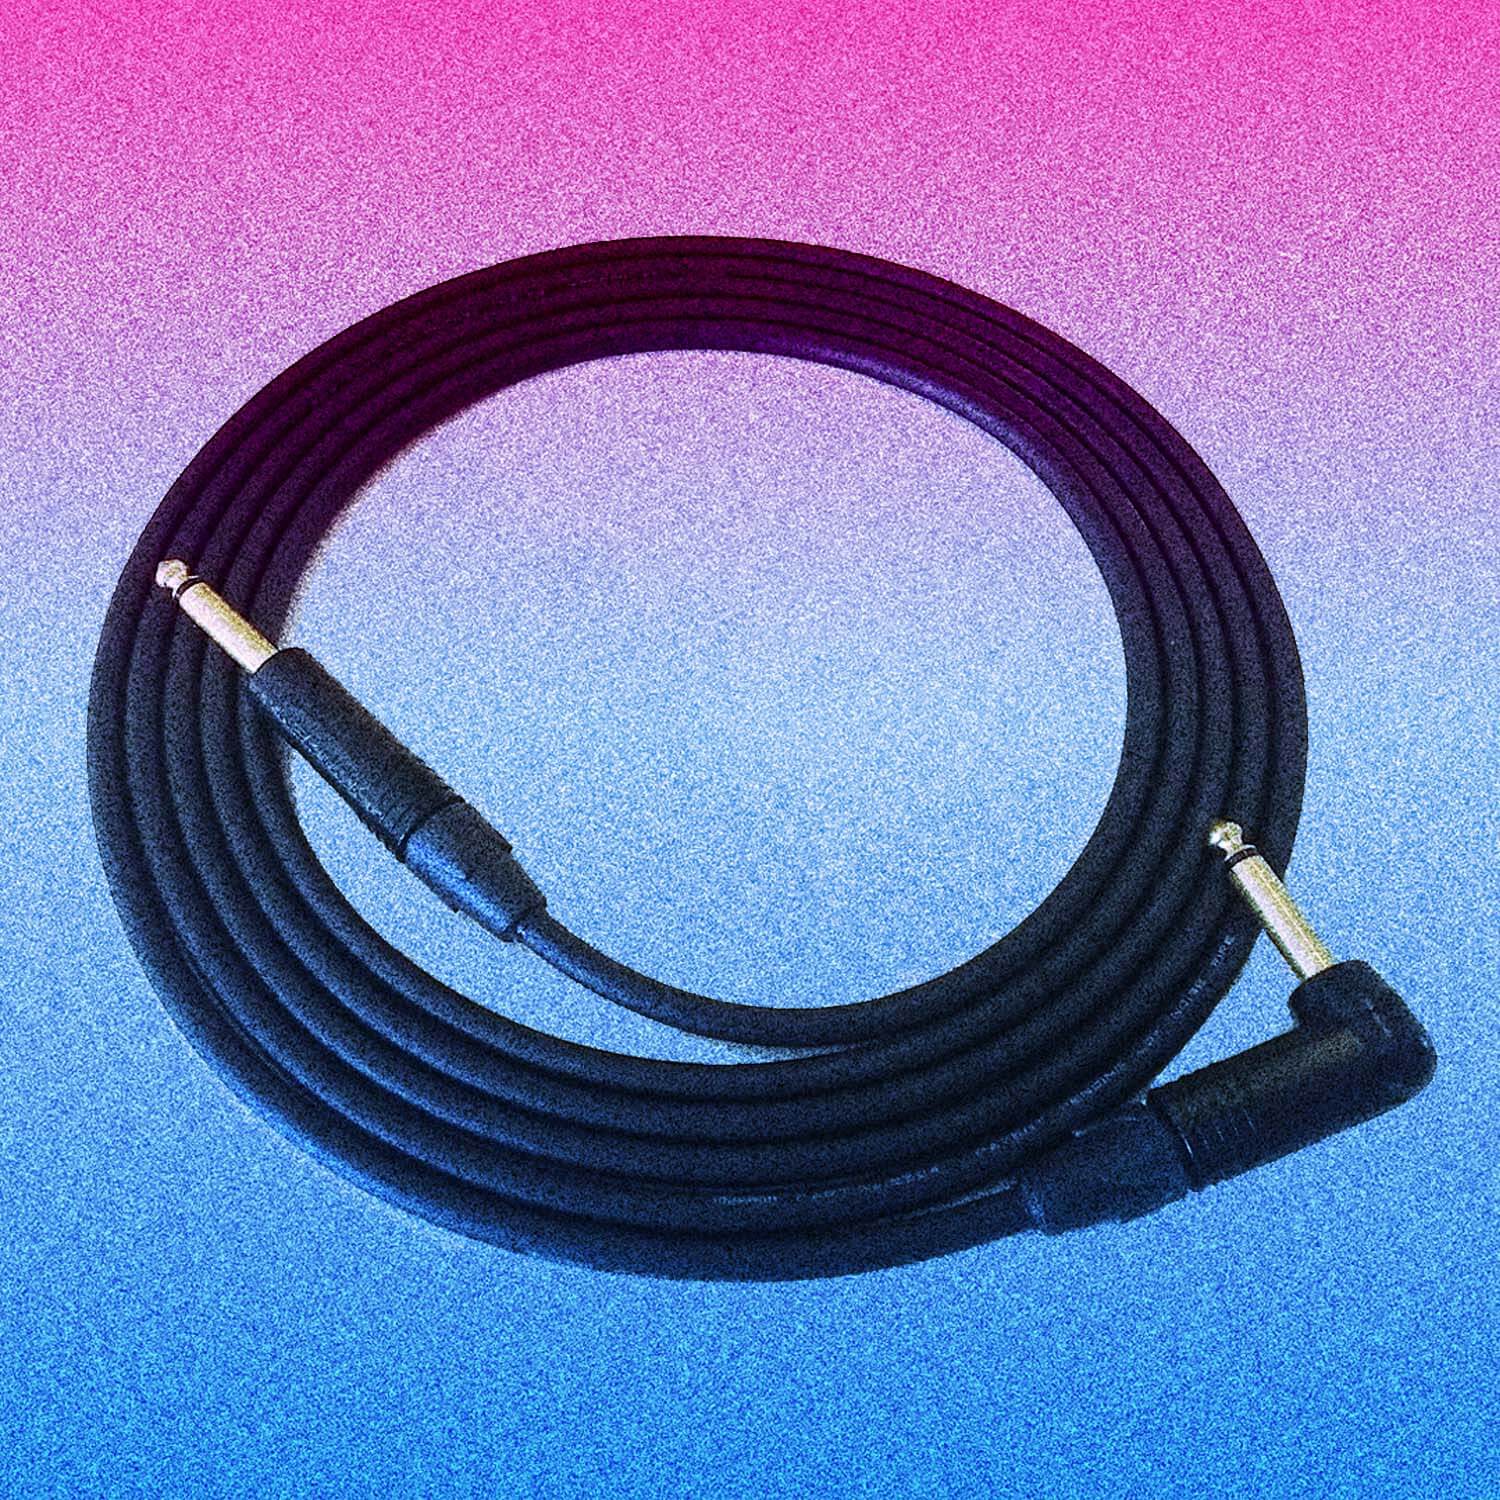
Now that your wires are prepared, you’ll need to solder them onto your jack. When looking at your jack, you’ll notice two small pieces sticking out across from each other. These are called solder lugs. One will be connected to the center of the jack and slightly shorter; this part of the jack is called the sleeve and will be for your ground wire. The other will be more towards the outside and slightly longer; this part of the jack is called the tip and will be for your hot wire. To understand the difference between the tip and the sleeve, take a look at your instrument cable. It also has a tip and sleeve that are usually separated by a thin black line. On the cable, the tip is hot and provides the sound coming from your guitar and the sleeve acts as a ground signal that helps contain any unwanted noise coming from the guitar. The jack conducts these signals when your cable is plugged in.
If you have multi-colored wire, this makes the organization of this step much simpler. I used my black wire as my ground wire and soldered it to the center lug of my jack. Then I used my red wire as my hot wire and soldered it to the outer lug of my jack.

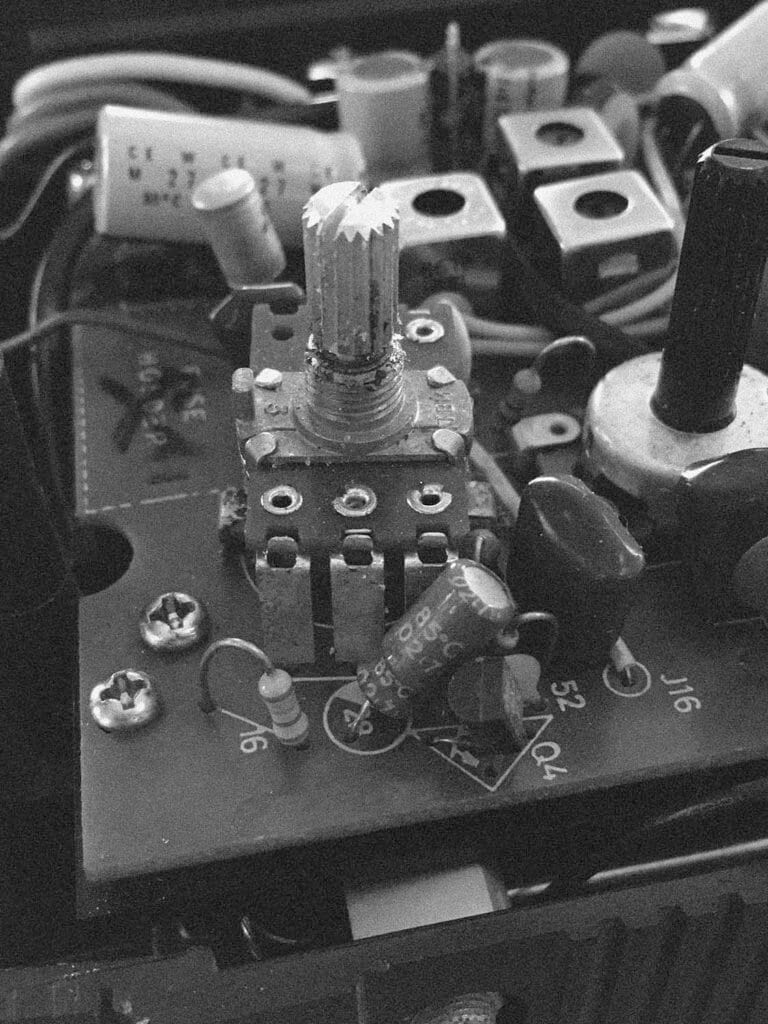
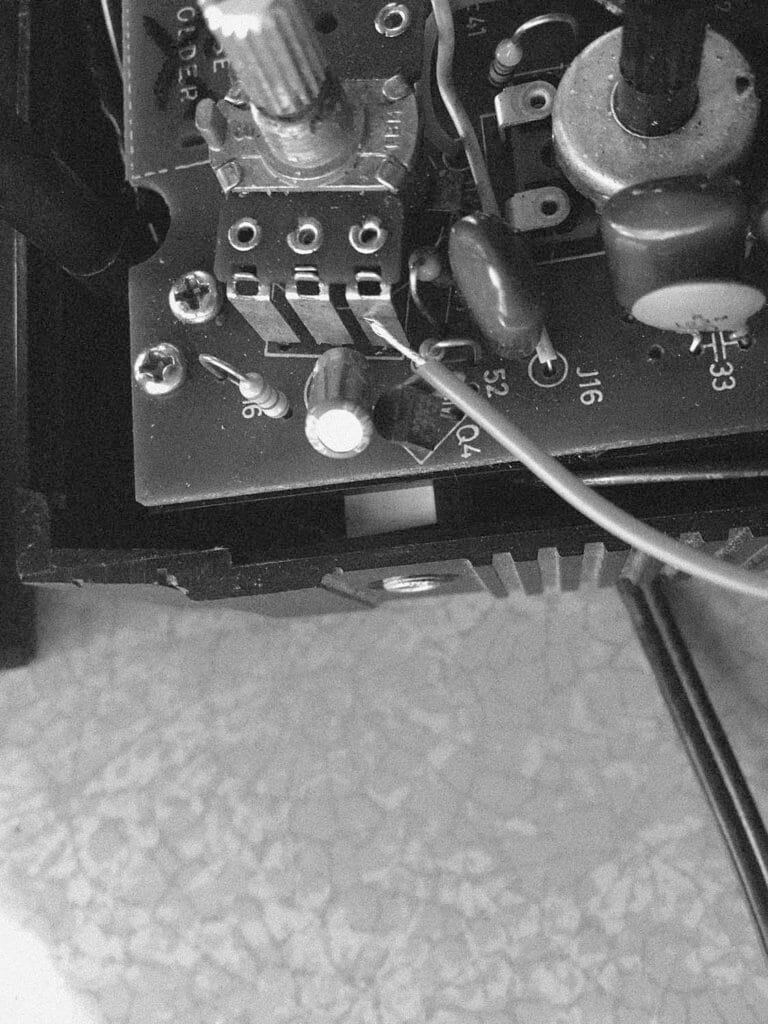
With your jack prepared, it’s time to figure out where to connect it on the circuit board. You’re looking for the piece called the volume pot. It’s pretty easy to find because it’s what your volume knob attaches to. It’s also easily recognizable because it will have multiple solder lugs. Here’s what mine looks like:
To find out which lug you’ll be attaching your wire to, you’ll need to do a little experimenting. Start by plugging your instrument into your jack.
Next, you’ll need to find a negative point on your radio to solder your ground wire to. The easiest spot to find is the negative terminal used for the radio’s battery case. Something should already be soldered there, so you’ll just need to solder your wire to the same spot.

Now you’ll need to power on your radio. With your hot wire in hand, locate the volume knob and start placing the tip of your wire on each lug while strumming your guitar or playing your instrument. You’re looking for the lug that not only amplifies your instrument, but also allows the volume knob on the radio to control your instrument’s volume. Once you’ve found it, turn your radio off and solder your hot wire onto it.
Now that you’ve got the amp working, it’s time to put it back together again.
First, you’ll need to find a home for your jack. Unplug your instrument cable and experiment with different spots on the amp. You’ll need to make sure your jack has enough room to not interfere with the other parts coming from the circuit board, and that you’ll be able to close your radio completely.
Once you’ve found your spot, cut a hole into the casing of the radio that’s big enough to place the tip of your jack into. After removing the washer and nut from your jack, cut your hole using a drill or sharp object. When your jack fits through, reattach the washer and nut to secure your jack in place.
Next, you’ll need to reattach your circuit board and/or cover if you removed them. Following that, close your radio up and reattach the screws and knobs that were removed at the beginning.
If you’ve made it this far, then you should be the proud new owner of a sick guitar amp that you put together yourself! Pretty sweet, right?
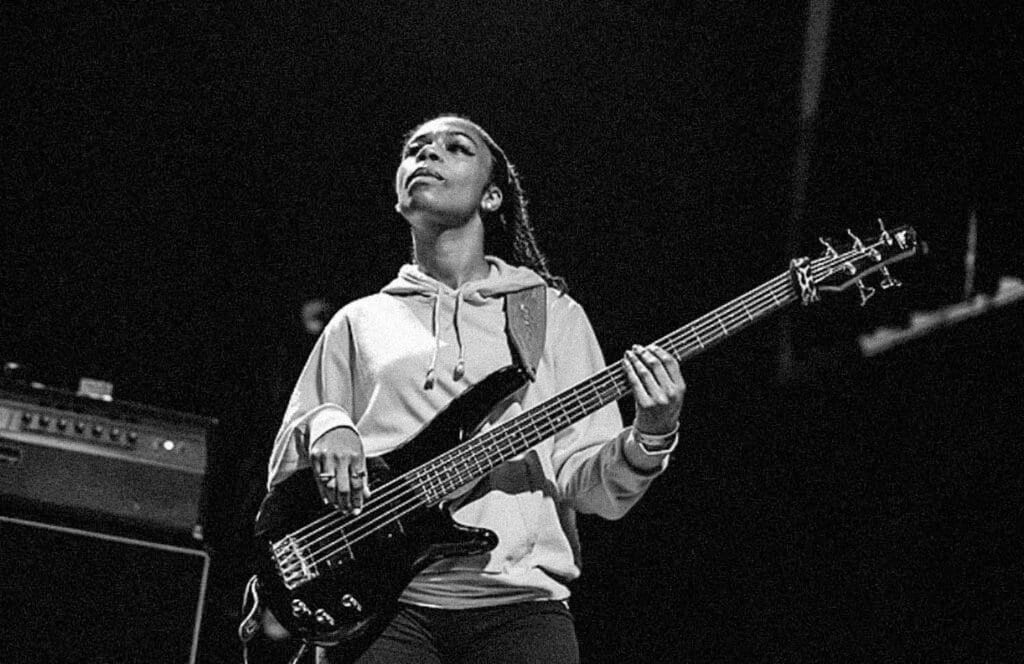
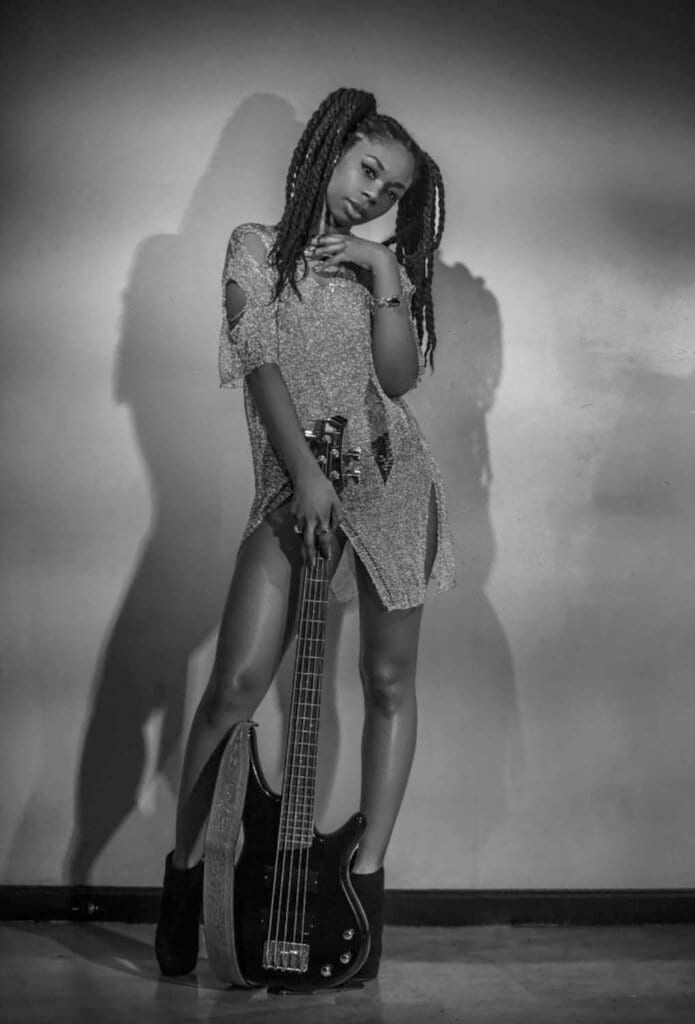
For me, playing bass has always been about “the feel.” Because of that, I’ve been afforded awesome opportunities even though I consider myself a “Bass Baby,” at the beginner/intermediate level.
“Feel” is how you connect with music through time and rhythm. Notes and scales are important, but rhythmic skills are quintessential—you’re able to express yourself in many ways even if you’re only playing two to three notes or chords. I’ve definitely played lines using only three or four notes and had people grooving. Rhythmically, I was killing—but to more trained musicians, they almost always listen for dynamics note-wise. At the end of the day, I continue to receive my blessings in music.
Around 2011, my grandparents gave me an acoustic guitar. I started lessons, but every time I played a song, I was unknowingly trying to play the bass line. I didn’t know it, and I naively bought an electric guitar. When I still couldn’t hit the low notes that I aimed for, a friend told me to get a bass. He later introduced me to his bassist (Hashim Bunch) who became my teacher, along with the help of YouTube videos. Through learning patience, ear training, awesome feel, and belief in myself, it’s been possible to live my dreams of being a badass.

Enjoying different styles of music and learning other people’s bass lines has helped me most in my still-developing sound: funk and hip hop, because their lines were the easiest to learn in the beginning; R&B, because those lines connect to the singers’ vocals and helped me understand how to use my voice better; and gospel, because the musicality has always made me feel connected, and as an artist you want to connect and move people. Across all genres, drums have probably played the biggest part in inspiring my grooves.
The bass lines I play with Sammus are lines that she comes up with. With 79.5 I mainly follow the keys and what the creator would like to hear. My own sound has yet to be featured in the music that I’m mostly known for, but I have a few singles (and unreleased music) that I perform, which allows me to explore my sound. Thankfully, from doing so many shows and touring, I’m a lot more comfortable stepping out on my own, where I have the space to create and express myself more freely.
Gotta stay hydrated, so water, water, water. Something about apple juice makes me feel comforted right now, since I’ve been pregnant and can’t have a beer or my usual shot of whiskey.
Taking the time before a gig to sit, paint my nails, and let them dry is calming for me, whether done at home or in a green room. Also, pretty nails make me feel like I’m dressing up my hands and my strings as I pluck them.
Before rehearsals and gigs, I always need some time to just breathe and be. In the beginning of my bass career I realized that I spent a lot of time not breathing while playing. So if I’m already calm and in my zone, I’ll more easily stay there.
I wouldn’t say I’m religious, but I always keep my spirituality about me. For years, one of the main causes of my stage fright was my fear of messing up in front of people. I’d be so anxious that I would mess up, so I started focusing on playing the right notes instead of worrying about the wrong ones. With that, I started saying a prayer of thanks, and to “play all the right notes.”
After I get my mind quiet and in the right place, I like to get loose by dancing and smiling.
When they’re from people you love, they make you feel loved. The more love I bring on stage, the more love I share.
Rhythm is defined as a repeated pattern of sound. It’s what makes people want to tap their foot, bob their head, and/or dance. In music, the repeated pattern of sound we listen for consists of notes and/or beats, such as those from a bass or drum; however, rhythm is also found outside of music. If someone hears water dripping continuously or the ticking of a loud clock, they might start to dance to it.
I believe great rhythm starts with internalization, and the first step is to listen. It may seem like an easy step, but learning bass taught me that I also had to learn how to listen more intently. Practice internalizing by listening to a song you’re familiar with and singing the bass line (or any other line that sticks out to you). Next, lower the volume of the song all the way down, but keep singing the line. After a few seconds, raise the volume to test that you’re at the same point in the song as the recording. It’s best to try this method on songs with simpler lines or start with songs that you may already know. This can also be done with song lyrics.
As a bassist, having internal rhythm will help your groove as well as help you stay in the pocket. Being in the pocket is when the rhythm section is solidly locked in as one unit within the groove, and the music has a nice feel to it. As long as you’re hitting the downbeats (mainly the first downbeat—the “one”) with the drummer, you will be in the pocket. Another way to know that you’re in the pocket is when you and the drummer share a look of either childlike excitement or deeply approving disgust at how tightly locked you guys are.
While note choice can change the dynamic of a bass line, the rhythm helps establish the groove: the rhythm that creates a song’s pulse. When grooving, the timing doesn’t need to be perfect as long as it’s consistent.
Another aspect of great rhythm and rhythm internalization is being able to identify the “one,” which will enable you to identify other important counts (like the upbeats “two and four”). This is especially helpful once you start playing in more complex time signatures or music that has changes in time. Identifying the “one” will allow you to always establish a groove even if you’re unsure of the exact time signature.
Below are a few exercises in rhythm. Since not everyone reads music, I have also included a few diagrams to help you get started so that you can complete the exercises which contain different note choices and rhythm combinations.
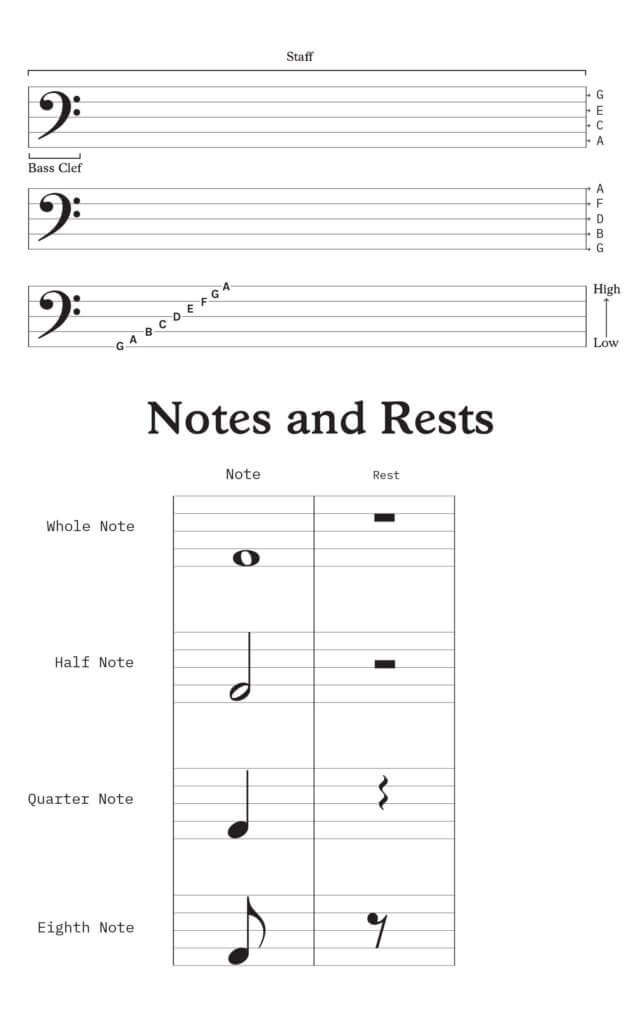
Please note: rests in music are just as important as the notes. In the words of Jay-Z, “Let it breathe.”
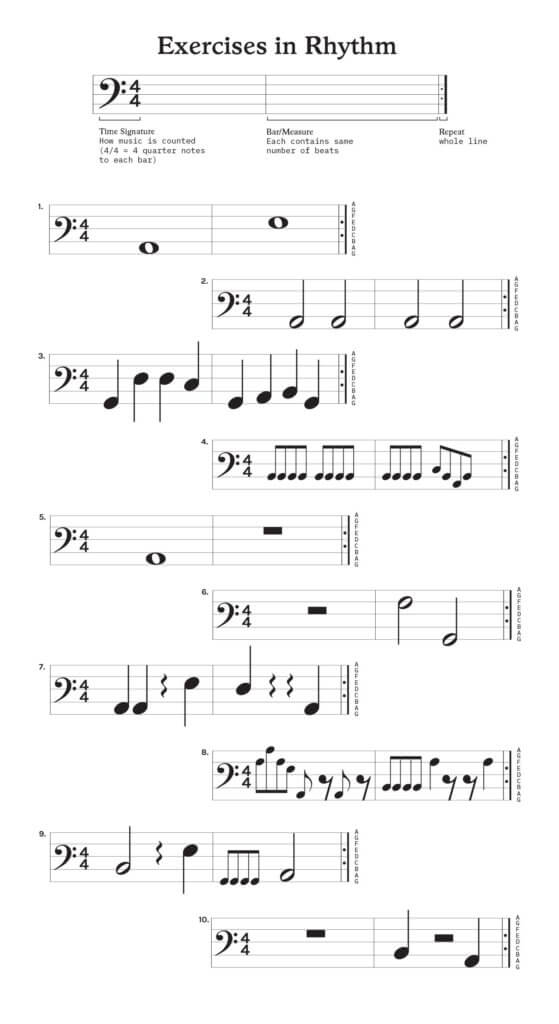
Don’t forget to practice with a metronome or a drum loop. Practice each exercise at different tempos, starting slow and increasing in speed. But mostly, have fun!

In Part One of this series, we discussed some simple steps to get you started in the world of selling musical gear via the internet. In Part Two, we’ll expand on some points we mentioned previously, including making a listing on Reverb, negotiating your price with potential buyers, and getting your gear ready to ship once you’ve sealed the deal.

This is your opportunity to put your best foot forward and make that gear look really good to potential buyers. To create a brand new listing, you can find the ‘Sell’ button in the top right-hand toolbar of Reverb or at the bottom of the Reverb app.
You’ll start by typing in what kind of gear you’re selling into the search bar (just like you would a search engine) and Reverb will search its database for product information. If you find a match, clicking on ‘Sell One Like This’ will autofill any applicable information Reverb has on the backend. And if you don’t find a match, that’s alright! It’s very simple to manually fill in the form. Just click on ‘Can’t Find it? Start a listing from scratch’ under the search bar.
With those main details squared away, let’s move on to what comes next in your listing!
Photos are an integral part of an effective listing. “Nothing helps your gear sell like good photos,” said Dan Orkin, Director of Content and International Marketing at Reverb. “Luckily, all you need is a smartphone and some thoughtful scene-setting to get great pictures. Clear, well-lit photos where the items are centered tend to perform best. Prospective buyers also like to see a lot of photos of the gear from multiple angles.”
When taking photos of the gear you’re selling, it will always benefit you to take a moment to be intentional about your presentation. As buyers scroll through listings, their first impression will be almost entirely visual, and a nice representation of your cool gear will ensure that buyers come knocking.
I can’t emphasize enough how honesty will bring you the most success and the least amount of trouble when forming your product descriptions. Consider what you’d want to know if you were the buyer—this is where a well-rounded and accurate statement can really drive the point home that your gear is “the one.”
“When describing the gear you’re selling, think through every potential question a buyer might have,” says Orkin. “Be detailed and thorough so that anyone reading it can understand just how great the gear is. Start with the most important info first and use bullet points where you can.”
The product description is an excellent place to tell the story of your gear, too: a guitar you’ve taken on the road for years, a pedal that brought your sound to the next level, or a synth that reminds you of the tones on a record you love. We all know how emotional and connective music is; instruments and gear help facilitate your ideas and give them new life—something every musician can relate to. That little extra bit of magic might be just what the buyer needs to commit to purchasing your gear.
It’s critical to keep your wording and text presentation professional. Everyone can spot spam-like text these days; typos, errors, and dramatic emphasis can come off irksome and unappealing, with the potential to drive your buyer away. Again, the representation of your gear is about putting your best foot forward, and taking the time to follow these tips will have you off to a great start!
Last but not least, when you make your listing, there is an entire section dedicated to shipping. You have two options (or both) to choose from: ‘Shipping’ (mail the gear to the buyer), or ‘Local Pickup’ (allow a local buyer to come retrieve the item from you for no shipping charge). The shipping charge is listed separately from the asking price of your gear, but is included in the collective total.
Reverb has your back when it comes to deciding what to charge for shipping. Below the shipping options is a label estimator that can help you more accurately decide what will cover the cost of packaging and mailing your product to your buyer via USPS, FedEx, UPS, or whatever company you prefer. By typing in your zip code, the destination, and the package weight and dimensions, Reverb gives you an estimate to include in your listing. The website even allows for you to select an example measurement of what kind of product you’ll be shipping for convenience and in case you don’t have a scale handy to know exactly what you’re working with.
You have the option of multiple shipping rates depending on whether or not the buyer is in the continental United States. There’s even an option for ‘Everywhere Else’ which can be more specific, such as your expected shipping rates to Europe, South America, or anywhere else.

At this point, if all went according to plan, you now have your item posted on Reverb, with the condition listed as the most accurate assessment while keeping the buyer’s contentment in mind. By using the Reverb Price Guide that we discussed in Part One, your listing should be at a price point both fair to you according to the market in real-time, and (fingers crossed) enticing to the people viewing it.
Negotiating on Reverb is not a necessity, but it’s highly recommended. You have the option to opt-in as you’re creating your listing by clicking on the ‘Accepts Offers’ box. By doing so, you’re opening up a door for more buyers to interact and ask questions— plus, listings that accept offers tend to sell 1.5 to 2x faster than those that don’t. “When it comes to buying and selling used gear, negotiation is generally an expected part of the process,” says Orkin.
If someone sends you an offer that doesn’t quite work for you, you can reference the handy Price Guide and send back a counter-offer that fits. Reverb reports that nearly 40% of counter offers lead to a sale, and both parties involved can walk away feeling satisfied. Knowledge is power when it comes to feeling comfortable in negotiating. Knowing what your gear is worth puts you in a good place to receive what you hoped for, and flexibility aids in completing the sale. Reverb puts some great tools into the hands of both the buyer and the seller—use them to your advantage!
For an additional boost, Reverb also allows you to ‘bump’ your listing in the search queue, maximizing its potential to sell. You can set your own rate with this by adjusting the percentage (up to an additional 5%) that Reverb receives in the event that your gear sells. You’ll know the exact amount you’ll be paying, and you’ll only pay when the sale of your item is processed. The higher the rate, the more people that see your listing.

Hooray, your gear has sold! Reverb is processing the payment and you’ve got the green light to ship your item. But before we drop it in the mail, let’s touch on shipping methods.
If you’re wondering how you’re gonna fit your whole drum set into a post-friendly package, or how to properly pack a guitar without a hard-shell case, once again Reverb makes it really simple to get started with their Shipping Guide and International Shipping Guide. There are outlines and instructional videos for all sorts of commonly traded instruments and gear to help you safely and confidently prepare your product for its journey, as well as FAQs for shipping internationally. Hope you’ve got your tape and bubble wrap on hand!
In the past I’ve used other websites to print shipping labels from home to avoid the boredom of the post office, but Reverb gives you the option to purchase and print Reverb Shipping Labels directly from their site. These labels help you save time, money, and protect your gear!
In fact, by printing labels through Reverb, you can also take advantage of their Safe Shipping system that protects you and your gear from any damage your gear might endure en route. Safe Shipping will cover the cost of any necessary repairs or even reimburse you for the sale amount if your package is lost—all for a fraction of the price of the gear you’ve sold. If anything is lost or damaged during shipping, Reverb’s support team will help resolve the issue quickly.
When the time comes, congratulations on your first sale! Reverb keeps the process incredibly simple and helps you be informed throughout each step, and I don’t doubt you’ll quickly become fluent in buying and selling used gear. Catch you on the search page, and be careful you don’t get too good at listing your used gear—I’m a sucker for fun toys and will buy all your stuff!
In a perfect world, our brand new guitars would stay perfectly calibrated, leaving only room for perfect intonation, quick and clean fret action, and a crisp tone. However, over time, a simple neck adjustment might be necessary to assure your neck is as strong, playable, and straight as can be. Fortunately, the mystery behind properly adjusting your own guitar neck becomes less and less daunting the more you know about the overall process.
This year, PRS Guitars is celebrating their 35 year anniversary of manufacturing high-quality instruments out of Stevensville, Maryland, and they have taken great pride in honing their wood and necks over the years. The company dries the wood used in each of their guitars to under 10% moisture content (which varies by wood species), the natural balance wood eventually comes to if given decades to dry out—aka the level that the oldest, sweetest sounding wood maintains.
PRS also employs their own patented Double Action Truss Rod—the industry’s most fully adjustable neck system. The patented double action of the PRS truss rod allows for tightening or loosening to compensate for climatic conditions, giving your strings more or less relief, removing fret buzz, and tightening up your overall intonation.
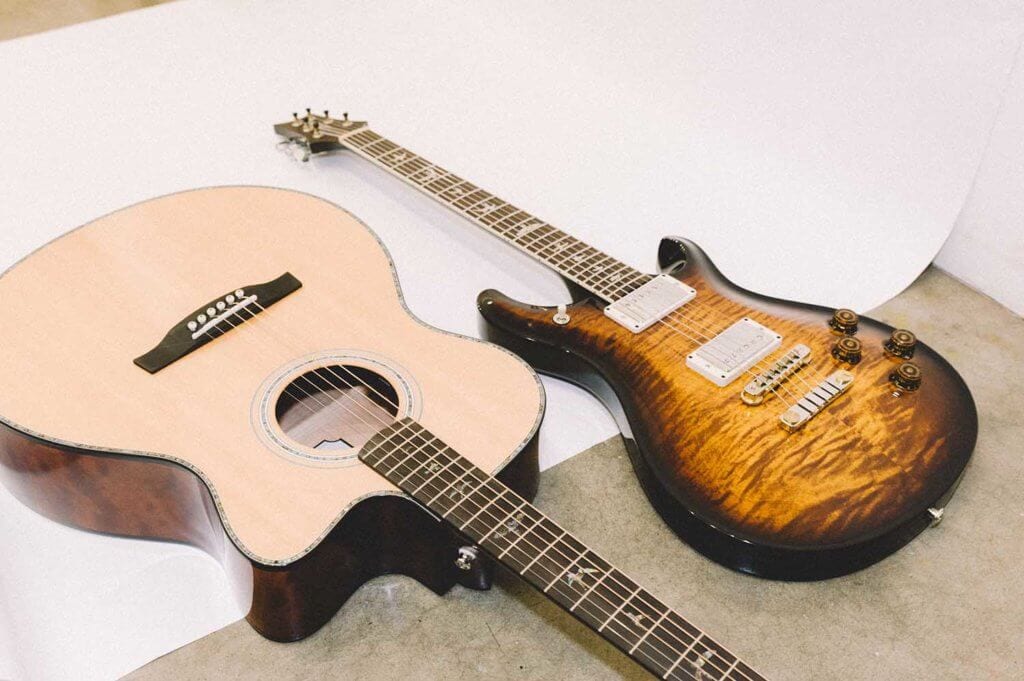
Setting up your own guitar has never been more accessible, thanks to PRS’s user-friendly platform. We’ll be using a McCarty 594 electric guitar and a SE A55E acoustic for this tutorial, and these new PRS guitars come with instructions, all the gadgets you may need for the job, and clear visuals to accompany you on your neck adjustment journey! Here’s to a company always striving to break the mold, who go above and beyond when it comes to quality and user-friendly craftsmanship.
First things first: one should know that a truss rod is simply a singular steel rod running the length of your guitar, beneath the fret-board. It’s there to ensure the overall integrity and strength of your guitar’s neck, and to help with the effects of string pull and climate.
If you’ve been experiencing buzzing or other intonation problems, you most likely need to adjust your neck. Humidity and temperature changes are the primary causes for a bowed neck, and any piece of wood will be affected. A bowed neck will have unusually high action, coupled with awful intonation problems (like buzzing), especially higher up on the neck (5th fret and higher).
Here are two issues you might be dealing with:
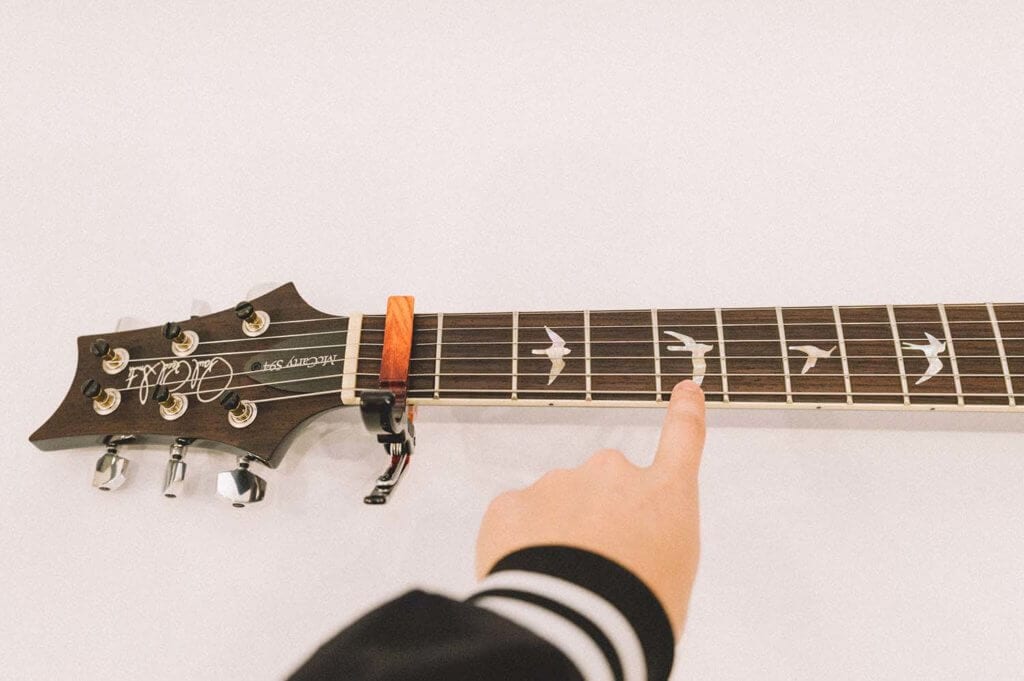
Hold down the strings at the first and last fret. (Pro tip: Use a capo to hold down the strings on the first fret so you have one free hand). Now, using your free hand, tap the string on the fifth fret to gauge how much bounce it has.

To access and make adjustments to the truss rod, keep the capo on the first fret and remove the truss rod cover located behind the string nut at the headstock. A simple turn in one direction or the other using the appropriately sized wrench will dramatically change the tonality and overall playability of your guitar. For our adjustment on our PRS guitar, we will be using a hex socket wrench, but different guitars need different truss rod wrenches. Be sure to check that you have the correct wrench for your guitar!
Tip: The smallest tweak can dramatically alter your guitar’s neck tension, so being very observant when making adjustments is key. Your truss rod will never need a full turn—more likely a ¼ to ½ turn will do the trick!
Leave your strings on and in your desired tuning so that the tension is “normal,” and then adjust according to your neck issues:
Back bow – Starting with a quarter turn, push the wrench away from your body (to the right) to increase the neck bow.
Front Bow – Pull the wrench ¼ to ½ turn towards yourself (to the left).

Now, make tiny adjustments in either direction until your strings sit properly when tested. Use a feeler gauge to achieve an exact gap of .007” between the bottom of your string and the 8th fret.
And don’t forget to tune your guitar around your new setup, as things are bound to have shifted after a successful adjustment!
Imagine a world where everyone has the resources and education to play music. She Shreds has teamed up with Yousician, an interactive educational music app, with the hopes to continue creating a world where musical knowledge is widely available—and fun.
With the mission statement, “Making musicality as common as literacy,” Yousician shares music education with players of any skill level who have access to a smartphone, tablet, or computer. The app offers lessons on how to read music, build skills, and play popular songs. With no cables needed (and a built-in tuner), you can learn guitar, bass, ukulele, piano, and voice wherever you have access to a device, making it easier than ever to learn in a comfortable environment at an affordable price, on your own schedule.
In other words, Yousician is as addictive and entertaining as playing Guitar Hero, but with the added ability to adjust it based on your skill level, actually learn how to play an instrument, and take it with you wherever you go.

The Yousician service is built on audio signal processing technology that recognizes notes and chords through a device’s microphone. When you first begin, you are asked a few questions to assess your skill level and match you with an appropriate curriculum. The setup is similar to Guitar Hero: a ball bouncing on tabs, “cowboy” chords, or sheet music. You pick or strum along to the backing tracks of popular songs or new ones created by the Yousician team, and the program gives you real-time feedback on accuracy and timing while you play through thousands of lessons, workouts, and challenges. There are also video tutorials and a ‘practice mode’ to help you along the way. You also have the ability to control the tempo of the songs—slow it down while you learn, and speed it up as you progress.
Choose from two learning routes:
With the Yousician freemium model, one lesson per day is offered for free, but there is a limit on what songs you can play and how much you can do. With a paid subscription, unlimited lessons are available. However, the cost of the subscription depends on whether you’re looking to pay for one instrument or if you want the option to learn all of the offered instruments. If you’re interested in learning just a single instrument, there are monthly, quarterly, and annual subscription plans. If you’d like the option to learn all instruments, and learn popular songs by your favorite artists, the all-access price is $179.99 annually.
When compared to private music lessons, the program is an extremely affordable option. And right now, exclusively for She Shreds readers, Yousician is offering an extended free trial of their premium plus package for 14 days, which gives you access to unlimited lessons and songs on as many instruments as you want.
When I was 13, I taught myself how to play guitar by using only the internet and a System of a Down tab book—working with Yousician is definitely an upgrade for those looking to learn an instrument on their own terms. I enjoyed following the tab along, and controlling the tempo to slowly build up and practice finger placement. My favorite thing to practice was the arpeggios and sweeps in the workout mode. The interactive tab is color-coded so you know which finger to use, which is helpful when trying to figure out where to put your fingers with only numbered frets. The notes are shown next to the numbers, so you can learn what fret is what note. They also have a colorblind mode, which speaks to their statement of accessibility.
All in all, Yousician is a great resource for beginners to step into an instrument. Learning through an app is a good option for people with mobility issues, or those living in places that may be remote, unsupportive, and under-resourced. If you enjoy video games, learning at your own pace without the stress of getting to your lesson on time, or challenging yourself to practice, then this is a great app to try out. With an offering of a free two-week trial version for She Shreds readers, I definitely suggest giving it a shot to see if it’s right for you!
The world of buying and selling gear once felt a little inaccessible to me. In my head, it was going to take a big chunk of change to get the sound I was hoping for. Money was tight (cheers to your 20s!) and as much as I wanted to put a couple hundred bucks into my favorite hobby, other things tended to be more of a priority.
As time went on, I came to realize that investing in gear wasn’t quite as financially daunting as I thought it would be. It’s exactly that—an investment! For me, it started with a used $100 Fulltone OCD pedal; I didn’t have to break the bank to find something really awesome. Then I bought a compression pedal for $50 that I hated, so it sat on the shelf. What I didn’t realize at the time was that I could have easily resold that pedal for close to the same amount I’d spent for it and recouped the cost (or more likely, bought something new). Buying gear is an upfront cost, but unlike most other things you buy, it generally doesn’t decrease in value.
In a way, the gear you own becomes assets, and by selling the gear you’re not using, you might not even have to touch your bank account to buy some new pieces. “For a lot of musicians, there’s nothing more inspiring than a new instrument or piece of gear,” says Dan Orkin, Director of Content at Reverb. “By landing on a regular pattern of out with the old and in with the new, you can keep yourself stocked with new sounds and ideas in a much more budget-friendly way.”
In this two-part series, we’ll lay out the basics of how to sell your gear, starting with where and what to sell, how to assess condition, and where to research.

There are a lot of decent and completely functional avenues to sell your gear, but Reverb is very much worth checking out. When I sell gear, I use Reverb out of pure convenience. It’s incredibly easy: everything I’ve listed has sold. There are tons of tools and resources to help you understand how to pack and ship your gear, and if you do happen to run into an issue, they have an entire team of musicians that you can speak to.
If you can use Google, you can list an item on Reverb. To get started, you simply start typing what you’re selling, like “TC Electronic Ditto Looper.” When you see the item you’re trying to sell, simply click “Sell one like this” and the selling form pre-fills with all of the info Reverb has about the gear. You also have the option to start a listing from scratch, but even then, the form makes it easy to see what info and details are needed.
Once your listing is posted, potential buyers can communicate directly with you to ask any questions they may have regarding your product. Having the opportunity to provide clarity to your buyers via the Reverb app as opposed to encrypted email addresses or text messages keeps it personal and much more organized. Altogether, this system feels more professional than other avenues of selling your gear; the attention to detail makes me feel much less likely to wind up with an unhappy customer. I get a notification on the Reverb app when someone decides to purchase something I’ve listed, I pop it in a box, take it to either the post office or print the label right at home, and slap it on my porch. They get the sweet gear I no longer want, and my budget towards something I’ve had my eye on is closer to the finish line.
First things first: you’ll need to pinpoint the gear you’re no longer using, looking to upgrade, or just not that into. This can be hard, especially if you’re like me and tend to be sentimental—but don’t get in your own way here! If you haven’t touched something in six months or so, it’s probably safe to say that money could be better used for something else more exciting to you.
“Keep in mind: If you sell a piece of gear and you find that you’re really missing that particular piece, you can always re-buy it without losing too much, if any, money in the process,” Orkin says.
Most of the gear we buy and use to make music will still retain much of its value, especially if you’ve taken good care of it. Depending on what condition it’s in, even if it’s just functional enough, it’s possible to sell almost anything somewhere. Of course, you might not always get an impressive amount of money for your old mic stand, but things like boutique pedals or vintage instruments (with a higher demand as a result of their limited quantity and unique characteristics or effects) can fetch a price close to what they cost brand new if you keep them clean and in good repair.
“Some gear is truly timeless and universal, which means that there will always be a buyer for it. Think classic guitar models from Fender or Gibson, solid all-around acoustics like Taylor, or practical items that everyone needs like Shure SM-58 microphones,” says Orkin, who also edits the Reverb Price Guide which provides real-time data on what items are being bought and sold for on Reverb. “These sort of items tend to retain value relatively consistently as people are always seeking them out. That said, some rare and niche effects and boutique guitar brands might sell for even higher than their original new price tags.”
In some cases, if the gear needs slight repair, it might be worth paying someone to fix any issues before selling, as the additional amount you’d be able to get selling a working piece may be greater than the cost of fixing it.
The next thing to do is decide what kind of condition the gear is in. When you sell a piece of gear on Reverb, you’re asked to select from a list of “condition” options, ranging from “Brand New” (still in package, never used) to “Poor.” This is one of the first things that appears on your listing, even before someone clicks on it. Depending on what condition you choose, a handy tool appears on the Reverb app to tell you what the average price your gear sells for in the condition it’s in.
As a seller, I’ve made myself a rule to always round down what I feel the condition is, as I want customers to be pleasantly surprised with the shape it’s in, never underwhelmed or disappointed. It doesn’t have to be drastic, but that tiny ding on the pedal face might take it from “Mint” to “Excellent,” even though I know everything else about this pedal is squeaky clean. To me, this creates an element of trust, especially since buyers can write a public review about their experience purchasing from you. In being as honest as possible, you’re increasing the possibility that people will be happy with their purchase, and in turn the people who view your future listings will feel more inclined to work with someone with good rapport.
Deciding what to price your gear can feel tricky, or maybe you aren’t quite sure of the value of the gear you have. As I’ve mentioned above, the Reverb Price Guide can help with this. In addition to the tool that appears as you’re creating your listing to help find your average price, the price guide catalogs price estimates based on previous transactions to see what your gear has sold for in the past.
You can also search “sold listings” on Reverb, which gives some additional insight on what prices products have sold for in the past. From here, you can compare to other sites and stores to find the most well-rounded and accurate price point that feels fair to you and the buyer. Staying knowledgeable and having access to this information can put you in a more confident place when it comes to negotiating a price with a buyer, which we’ll touch base on in the second part of this series.
“The great thing about music gear—particularly guitars—is that with some exceptions, the technology doesn’t change too much. That means a Stratocaster from 1996 that has been well cared for is worth about as much as one from 2014,” Orkin says. “Compare that to things like televisions and cars, and it’s clear that the gear industry is especially friendly for folks who are plugged into buying and selling to fund their ability to try new gear and sounds.”
New toys keep music really fun and exciting, and hopefully keeps you writing and playing. You don’t need a ton of money or all of the best gear to make cool tones and tunes—just gear that works for you. And if you find yourself with something you’re not a fan of, these tips can help you sell it back into the gear ecosystem and put that money toward something you’ll love.
Stay tuned for Intro to Selling Your Gear: Part 2 where we will address making a listing, negotiating, and shipping!
The life of an artist can feel like a beautiful yet vicious cycle of intensive creating, recording, and touring. It requires an ambitiously determined spirit; the artists who reach a comfortable coasting status through their work’s recognition can finally breathe a little easier. But what if the road to “success” wasn’t such a straight line? It’s not, especially for artists capitalizing on sync licensing.

A music synchronization license means an artist can “sell” the usage of their music to be used in media, like TV shows, films, movie trailers, video games, and more. Musicians like Lelia Broussard (SKLLY, Amico Mio) have tapped sync opportunities along the route of becoming an established, touring artist. A collaborator of Marmoset’s original music team, while also being featured on their roster of artists, Broussard is no novice to music licensing.
“I first became aware of licensing a long time ago, when the Grey’s Anatomy thing was happening,” says Broussard of the hit show’s reputation for using indie music throughout its episodes. “It gave a voice or platform to a lot of artists and singer-songwriters, and a lot of people were discovering music that way. And to get your song on a show could kind of change your career.”
Broussard has worked with many different licensing and publishing companies throughout the years, creating original songs or curating music to picture. Utilizing sync opportunities not only meant getting paid for her musical work, but being a proactive, working musician who had a higher potential of being heard and, most importantly, discovered.

Sync licensing is an evolving territory within the music industry that has made huge strides in past decades; the lingering dark cloud of ‘selling out’ has pretty much dissipated. For a lot of earlier iconic artists, licensing wasn’t even a permissible thought, but today artists have figuratively stormed the gates, claiming sync licensing as their own. It’s become an empowering tool; a means of taking more ownership of one’s work, and getting paid for the fruit of their labor.
“Bands used to be super hesitant to license their music,” says Broussard. “Obviously this has changed so much now. A big part of this is because our revenue streams are going down, there are not as many places to make money, and this is one of those few places that you can actually make money as a musician these days.”
In the era of online streaming platforms and declining physical music sales, sync paves the way for musicians and bands to earn a livelihood in music; it’s also a field where artists are changing their approach toward making music. When CD and record sales were once a prominent focus, musicians set their sights on creating an entire album of hits, whereas now syncing a single song under the right distribution terms could guarantee a hefty payout.
But taking this leap toward capitalizing licensing opportunities requires staying sharp and diligent, as any artist should be when stepping into the business side of a competitive industry.
“There are a lot of people and companies out there looking to take advantage of young artists,” says Broussard. “It’s important to be careful entering into any kind of agreement because this can be a lucrative income stream and a passive income stream. You can also make money owning your own publishing and working with companies like Marmoset. Just be wary of what kind of publishing you’re getting into and have a good lawyer because you can always get out of it.”

Once identifying which publishing or music licensing agency to work with, get to know the team who’s pitching the music. Places like Marmoset have an onsite A&R (artists and repertoire) team who will answer any questions during the on-boarding to roster process. This team also works alongside music licensing coordinators who are doing the actual pitching to clients; they’re on the front lines of music trends and what clients seek in relation to music needs. Essentially, music licensing agencies and music supervisors exist to pitch an artist’s music to big brand campaigns, TV shows, and even film soundtracks; they’re in the trenches of music licensing catalogs, Soundcloud, Spotify, and other corners of the internet to find that perfect song their client is requesting.

For other artists like Sarah DiMuzio (Allebasi, Whim) who divides her time between creating music for herself/fans while fostering her expanding roster of licensable music, she acknowledges there’s a harmony she strives to maintain between the two.
“It can be pretty stressful. Sometimes everything will kind of converge in one week but then things will straighten out,” says DiMuzio. “Getting that balance is key for me, to keep going but stay present so you’re not signing onto too many projects at once.”
Apart from the music she has on Marmoset’s music catalog, DiMuzio often receives creative briefs from music producers and publishers. While it might take hours or days to perfect a song and album under standard recording studio settings, collaborators like DiMuzio endure a quick two day deadline once equipped with the project’s brief. If the first round is well received, it’s common for another round of edits or fine-tuning. And so the cycle repeats.
“Everytime I get a brief, I have to wait and read it at the right time because as soon as I read it, my brain explodes with hundreds of ideas,” says DiMuzio. “If I have two days to write and produce, I love it. It’s almost like a creative high.”

Acknowledging that there’s an undeniable creative side to the sync process, DiMuzio notes her analytical side is what guides her along scoring to picture. “My dad calls me a hybrid because while I’m totally an artist, I’m also really punctual and super organized. I try to pull the best from both and just keep going.”
If artists are up for the enduring, fast-paced nature of the sync beast, they should also keep in mind that it’s important to create authentic content. Creative agencies are often on the hunt for music that carries high production value that still sustains artistic integrity. When submitting music to licensing platforms like Marmoset, providing a lyrical version and strictly instrumental version of a song can hold great benefit—instrumental versions are frequently requested over lyrical due to union laws, or in some cases instrumental is easier to cut to picture in terms of shorter ad placements.
While sync licensing is one way to generate a steady stream of revenue, musicians should approach opportunities as they would any business venture by understanding there will be successes and failures along the way.
“You just have to keep writing. You never know what a song will do, you can’t be attached to the outcome because it’s really not up to the artist,” says Broussard. “Look at Lizzo’s ‘Truth Hurts’—it’s a great example of a song that came out and went to radio like two years ago but didn’t do anything. Now it’s incredible with what’s happened to that song. So learn to let things go, keep writing, don’t stay attached to previous things you’ve written. Even if it feels like no one’s paying attention, keep creating and find the right business people or a good licensing company that believes in what you do.”

Chances are, you’ve seen a headline or watched a video which perfectly embodies one of your worst fears (see: “United Breaks Guitar.”) Every musician who’s ever even thought about flying with a guitar has had anxiety about all the things you can’t control when traveling with your instrument. After all, when you fly, you’re putting your guitar in the airlines’ hands.
The truth is, you have rights when flying with a guitar. There are steps you can take to minimize the likelihood that you’re going to need to beeline to a repair shop when you land.
Your best bargaining chip when it comes to flying with a guitar is knowing your rights. And yes, you do have real-deal legal rights when flying with a guitar in the United States (flying abroad is a different story). Per the FAA Modernization and Reform Act of 2012 (thanks, Obama!), airlines have to let you bring your guitar on board as a carry on if it fits in a closet or in an overhead bin when you board.
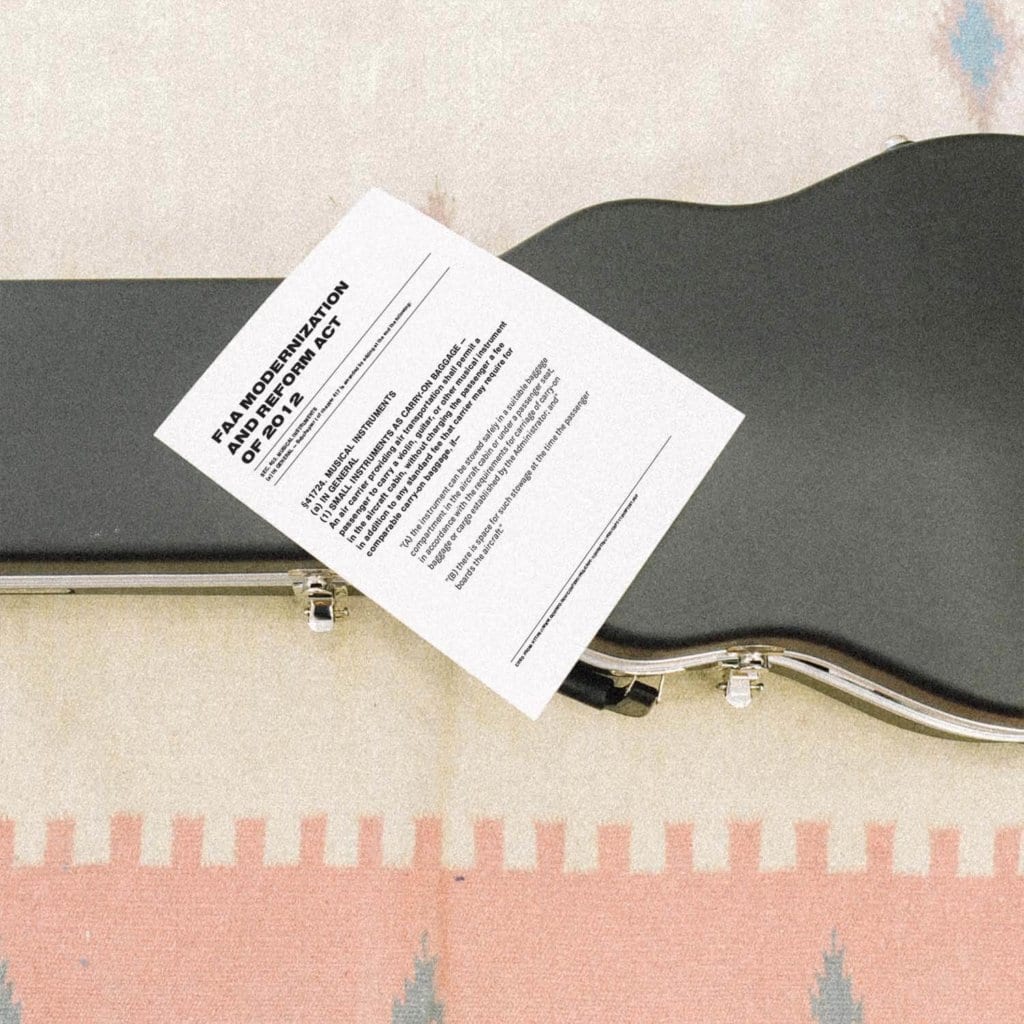
Here’s that exact text:
An air carrier providing air transportation shall permit a passenger to carry a violin, guitar, or other musical instrument in the aircraft cabin, without charging the passenger a fee in addition to any standard fee that carrier may require for comparable carry-on baggage, if—
‘‘(A) the instrument can be stowed safely in a suitable baggage compartment in the aircraft cabin or under a passenger seat, in accordance with the requirements for carriage of carry-on baggage or cargo established by the Administrator; and
‘‘(B) there is space for such stowage at the time the passenger boards the aircraft.
Point B is pretty key in terms of function. If you’re last to board on a full flight and the airline is gate-checking every bag in your boarding group, the odds are lower that your guitar is going to fly in the main cabin with you. If that’s the case, your best bet is to politely plea with the flight attendants to keep your guitar in one of the on-board closets that are usually reserved for coats.
There are plenty of things you can do to ensure a better boarding position (and thus get on the plane when there’s more overhead space available), usually for an added fee.
If you’re flying Southwest, you can pay an extra $15 in advance or $30-60 at the gate to get a better boarding number. For other airlines, upgrading to “premium” seats or an exit row seat will get you a better boarding position. Some airlines board by row, so reserving a seat that gets boarded sooner (for example, Alaska Airlines boards the back half of the plane first) can increase your odds of fitting your guitar on the plane.
You might want to even consider committing to one airline, and even getting a credit card with one. Airlines tend to reward their frequent customers, sometimes in the form of a better boarding number.
One last thing about knowing your rights: just because you know the law doesn’t mean the people working at the airport will. They can’t possibly know every single policy off the top of their heads, so we highly recommend printing off a few copies of the law or the policy as listed on their website to show employees at the airport if they try to get you to check your guitar at check-in (we know a few people who have laminated copies in each of their cases and gig bags). Be polite, but firm.
Although every airline that operates in the United States has to follow the law, different airlines sometimes have slightly different policies.
Possibly due to some negative press, the United Airlines guitar policy requires your instrument be in a hard case rather than a gig bag, even a reinforced one like the Mono 80, as does the JetBlue guitar policy. The Southwest Airlines guitar policy doesn’t require a hard case, but it does stipulate that if you do use a soft case or gig bag, they’re not liable for damages to your guitar.
The American Airlines musical instrument policy doesn’t have this stipulation, and neither does the Alaska Airlines guitar policy, the Spirit Airlines guitar policy, nor the Delta guitar policy (though they do highly recommend a hard case). The Air Canada guitar policy allows those flying with musical instruments to board in advance of general boarding if you’re there early enough.
Some airlines encourage you to buy a seat for larger instruments, sometimes at a discount. Air Canada offers 50% off regular fares, and American offers seats at the child rate or less. This normally applies to much larger instruments, i.e. a guitar that would not fit in an overhead compartment (such as one on a smaller plane) or a double bass.
[table id=5 /]
We’ve already talked about the importance of boarding early and knowing your specific airline’s rules, but it’s also important to know what plane you’re flying on for one big reason: overhead bin space.
Typically, your boarding pass or reservation will have your plane type on it. Be aware that this can change, so check again the day of your flight to make sure your case will still fit in your overhead bin.
While most airlines don’t publish exact information on their overhead bin space, you will be able to see if you’re flying on a Dreamliner or a prop plane. The bigger the plane, the more likely it is you’ll be able to fit your guitar. If you’re on a smaller plane, the odds are lower. After all, some prop planes can’t even accommodate a roller bag in their overhead compartments.
Even if you manage to bring your guitar onto the plane with you, you’re going to need to pack your guitar with care.
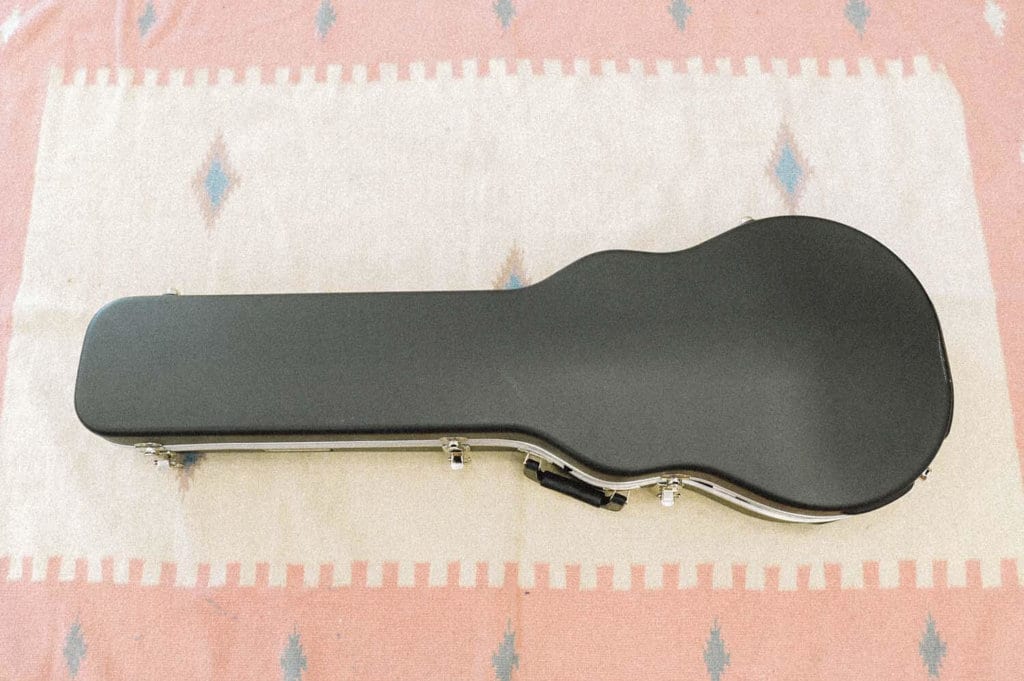
You typically have three case options for planes: a true guitar flight case, a standard hard case, and a reinforced gig bag. Though we’d respect the optimism of someone traveling with a standard gig bag, we wouldn’t recommend it.
First things first: your airline might require you to use a hard case. Check above to see which airlines those are.
Flight cases are virtually indestructible, but can be expensive. When we’re talking about flight cases or road cases, what we mostly mean are cases molded to fit your instrument and are made of a mix of metal and wood (and sometimes plastic or fiberglass).
A standard hard case is more economical (and might have even come with your guitar) but offer a little less protection. And not all hard cases are created equal—if you have an old cardboard case for your acoustic, you might as well not have a case at all. Most electrics come with hard cases that are made of wood or plastic, and some are even molded to fit your guitar specifically, but aren’t reinforced the same way that flight cases are.
Some brands offer what’s called “TSA-Approved” hard cases and flight cases. This doesn’t mean that the TSA can guarantee that your guitar will survive a flight, it just means that it’s a TSA-Approved lock. Federal guidelines require bags only be locked with approved locks in case a TSA agent needs to look inside your bag (or in this case, case).
Now let’s talk about reinforced gig bags. These aren’t reinforced the same way flight cases or hard cases are, but it does mean the sides have a little more structure to them. The biggest benefit of gig bags is that they’re easier to carry in the airport, and they’re probably easier to fit in an overhead bin, but they offer less protection than a hard or flight case.
There are theories about flight crews taking mercy on you and your poor, underprotected instrument, but this is an enormous risk to take. We wouldn’t recommend it at all for instruments that are known for having weaker headstocks, or an acoustic.
Putting your guitar into someone else’s hands is inherently stressful, but the truth is that people fly every day without catastrophic consequences. You can’t ever guarantee that you’ll have a perfect flight with your guitar, but knowing your rights, paying for a little upgrade if you can, and taking precaution with your instrument can help your odds.
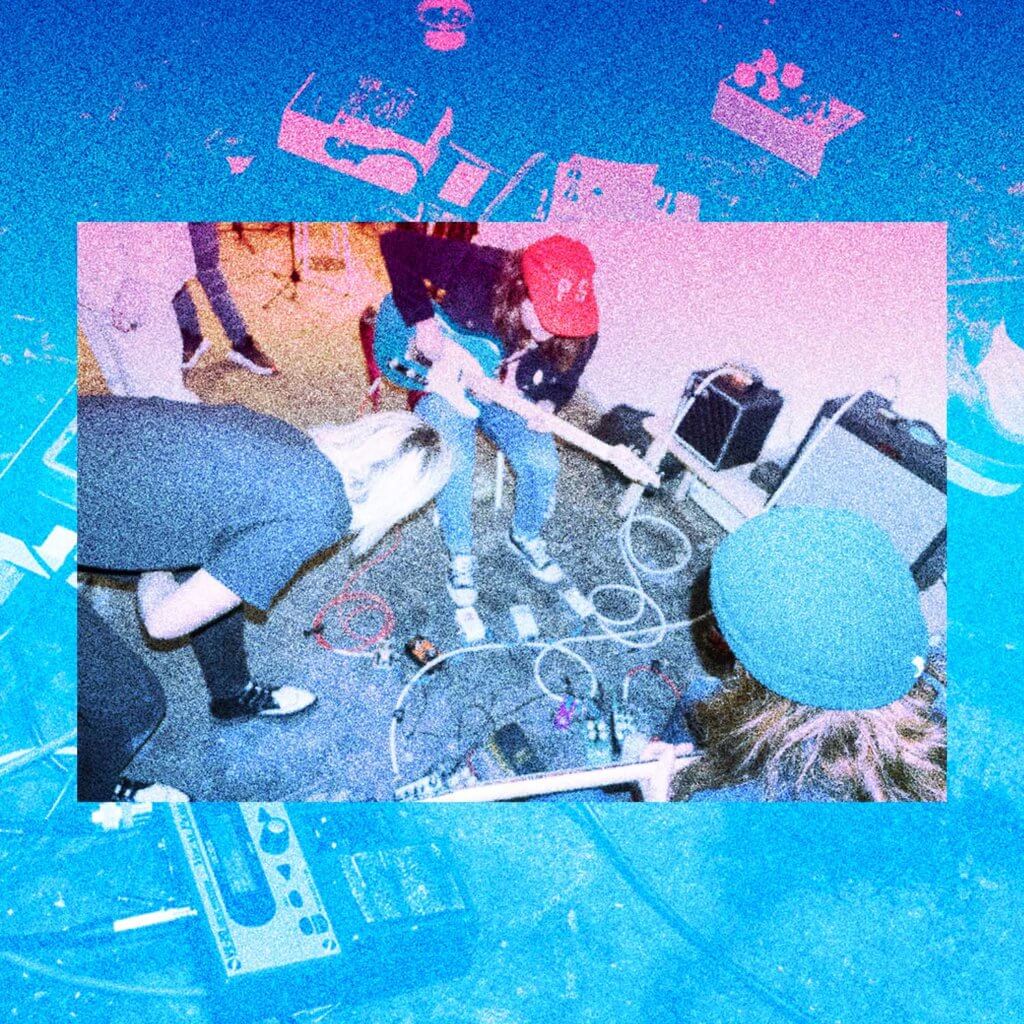
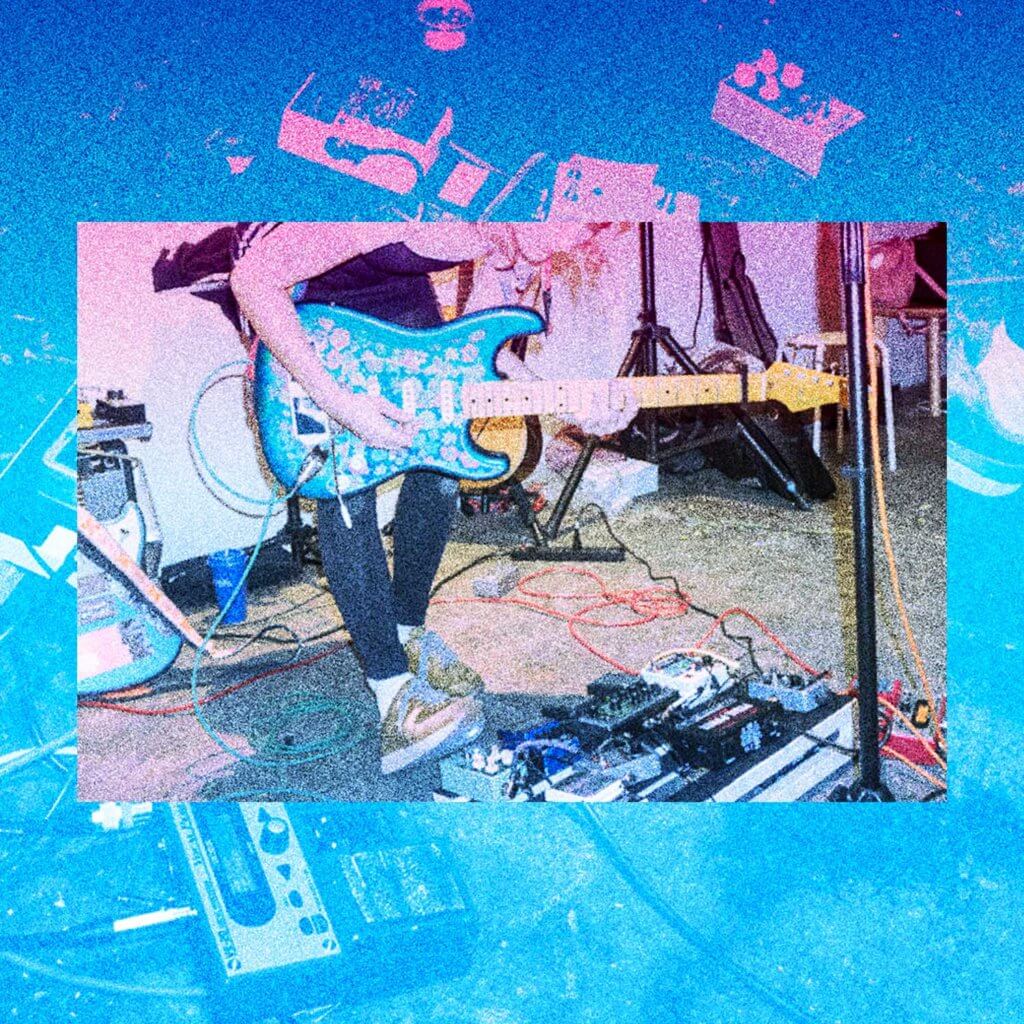
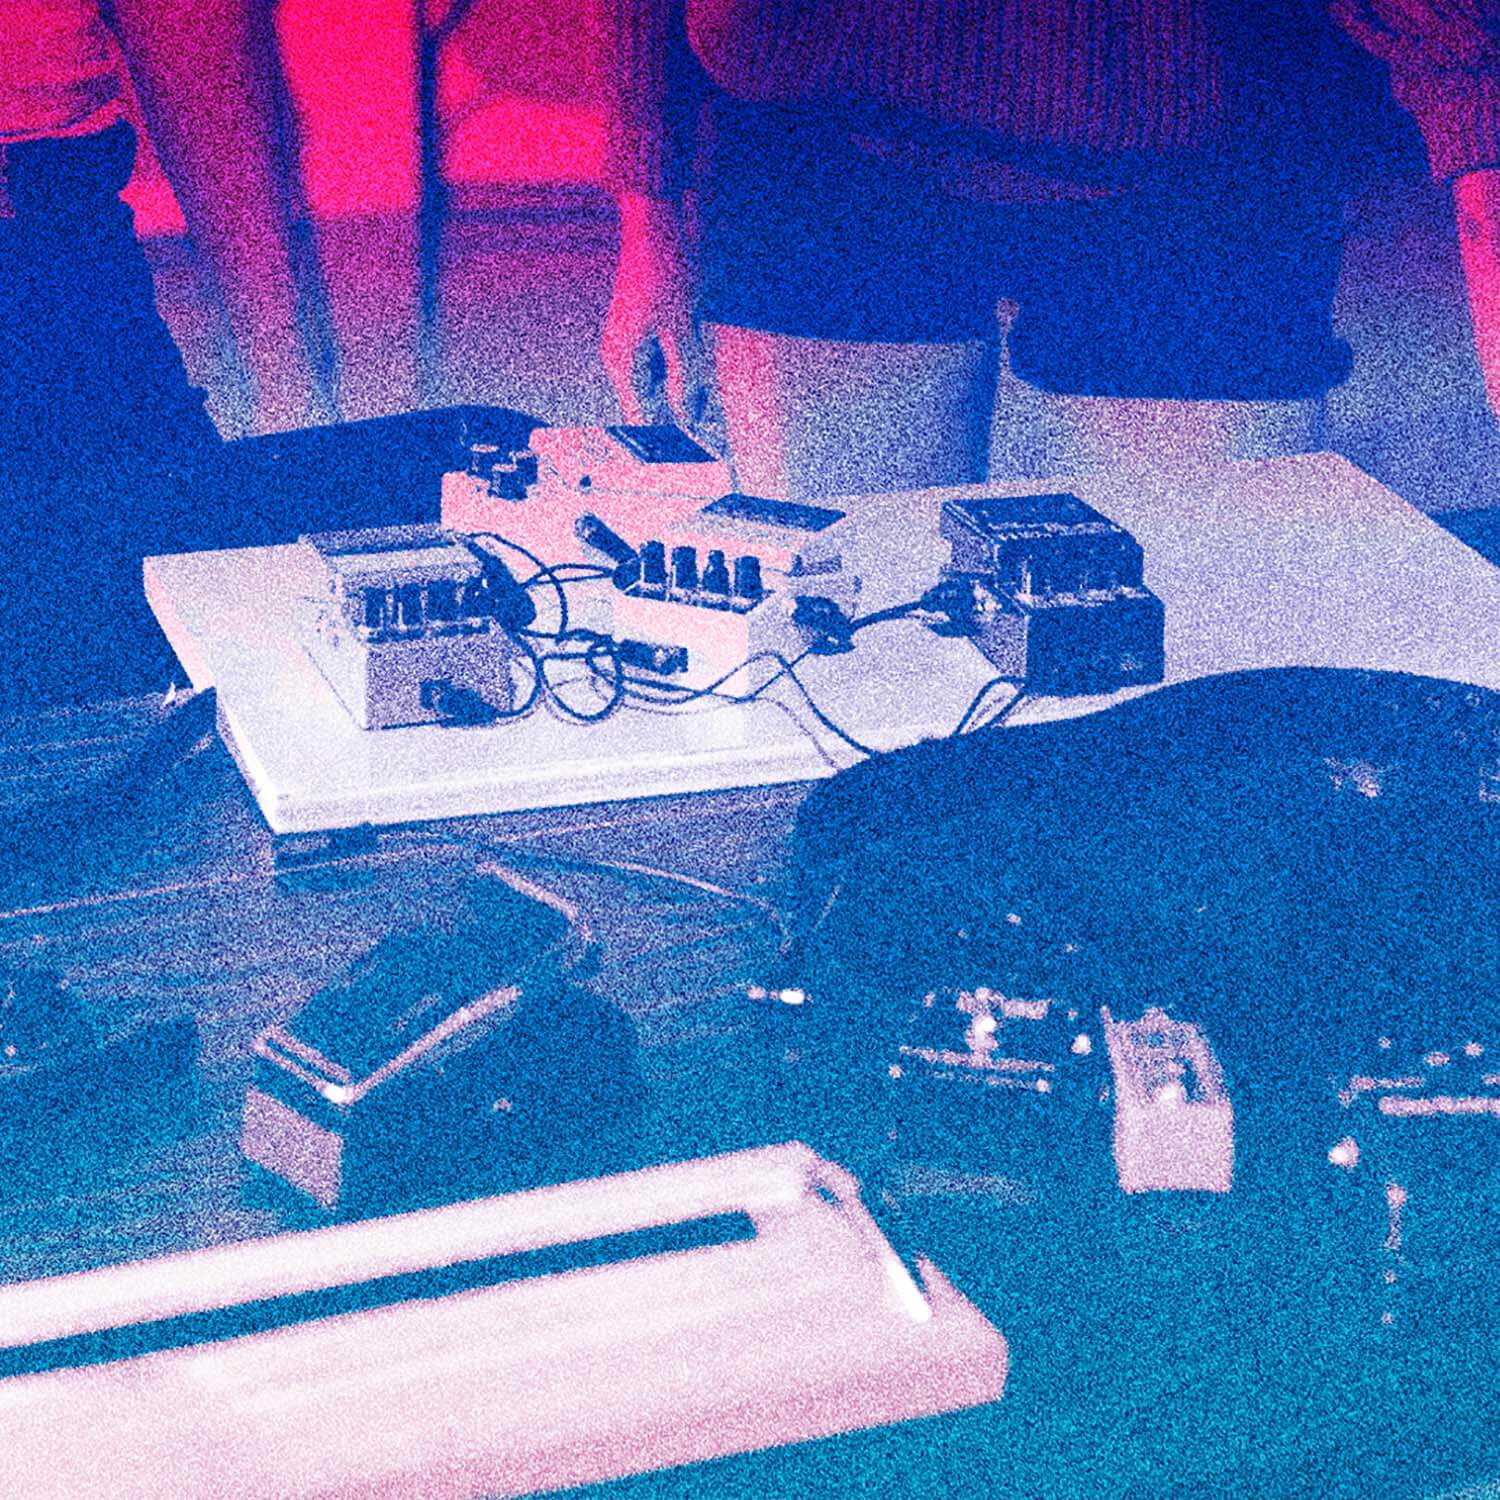
Building a great pedal board requires a little bit of planning and patience, but once you understand the basics, it becomes easier to put together the perfect rig for your needs. The defining qualities of a reliable pedal board go beyond just providing a better way to store your pedals: they make your setup time much faster, and keep your tone free of excess noise and interference. In this guide, we’re here to lay down the foundation that you’ll need to take the mystery out of putting together your first pedal board.
Size
Whether you’re buying your first pedal board or building from scratch, you’ll need to think about the pedals you’ll want to use in terms of space (don’t worry, we’ll get into specific pedals, too). Be sure to factor in room for at least one extra pedal; it might be a bigger investment, but having that extra space will be helpful when it comes to setting up everything neatly and adding wiring and a power supply. The extra space also comes in handy if you decide to add on extra pedals in the future, or if you just want to swap around pedals.
Dimensions
Now, consider the angle and height of the board in relation to how easy it will be to reach the pedals while playing standing up. If you already own the tools required in the plethora of DIY templates available online (including this tutorial we posted last year), then building your own board can be quite an affordable and rewarding experience. Over the years I have seen pedal boards made of everything from plain slabs of plywood, vintage suitcases, repurposed pieces of Ikea furniture, and the like. In every case, the owner had exactly just what they needed.
With that being said, if you’re not the handy type and prefer to buy a board, the Pedaltrain Nano+ is 18” and can be found for under $75 new (and even less) on Reverb. It’s just large enough to accommodate about five pedals and also comes with its own case.
While most pedals can run on 9-volt batteries, doing so should only be a last resort or as a backup at a gig if your other power supply craps out. Replacing batteries is unsustainable, and a quick way to lose money if they’re not rechargeable. The two most popular power supplies for a pedal board are daisy chains and isolated power supplies.
Daisy chains like the TrueTone 1Spot adapter are very affordable (on average about $20-35) but they offer the least resistance to noise because every pedal shares a ground. Isolated power supplies like the Voodoo Labs Pedal Power 2 Plus are more expensive (around $100 and up) but are popular in professional setups because they’re less noisy than daisy chains—and there’s nothing more frustrating than a disorderly rig that ruins a performance!
The trick to keeping a pedal board as noise-free as possible is to understand what causes noise and signal degradation in the first place. Power is roughly half of the equation, while the other half relies on cables.
Not all cables are created equal, and the cheap ones won’t do you any favors when it comes to performance. Mogami cables are not cheap, but they’ve become the industry standard because they are extremely durable and have a lifetime warranty in which you can exchange a broken one for a new one at any of their retailers or by mailing them back. If you’re on a tighter budget, bigger chain stores will offer lifetime warranties on their house brand cables, which tend to be cheaper. Be sure to equip your entire rig with the same type of cable, as mixing and matching brands and qualities is not ideal; the weakest cable will effectively cancel out the benefits of better cables, such as lower noise floors and better durability (since they all share the same signal path).
The ends of the connectors themselves can make a large impact on the amount of space taken up on the board. There are 3 types of connecters:
The first step to building a pedal board is obtaining the pedals themselves, and shopping second-hand at places like Reverb is a great way to save money on used pedals (and in some cases, it can even be the spot to find rare and/or vintage pedals that are no longer in production). You may even find that it’s a great place to sell your own pedals when you grow tired of them and want to essentially flip them for something else you’ve been eyeing.
Listed below are some of the most popular and essential effects. Many guitar pedals hold their value, which makes it easy to trade them around and experiment without spending tons of money. Buying used saves you, on average, about 27-35% off the price of a new pedal, and most sellers on Reverb report getting around 85% of their initial investment on a used pedal after they sell it.
Tuner
I would suggest getting a good tuner with a display that you can easily see in both high and low lighting. On average, tuners go for $100 new and $60 used. Since they’re often first in line on most rigs, you’ll want to get one that’s known for keeping your tone pure and unaffected, such as a Boss TU-3, TC Polytune, or Peterson Strobe. Some tuners offer both buffered and true bypass switching, and in some cases may even have outputs for powering more pedals. It’s worth noting that if you’re visually impaired, you may want to consider a headstock tuner, which is a bit closer to the eyes.
Overdrive
The Ibanez TS9 Tubescreamer, which goes for an average of $60 on Reverb, is one of the most popular overdrive pedals of all time. Initially, these were popular with blues guitarists who favored the ability to send any clean amp into a smooth overdrive, rich with sustain. This not only allowed players to achieve a cranked up tube amp sound at lower volumes, but it also enhanced the sound of amps that were already on the verge of breakup. Although the pedal on its own will not provide enough gain to push an amp into full on distortion (aka hi-gain), surprisingly, it’s very common to find these pedals on the rigs of modern metal guitarists. Taking advantage of the Tubescreamer’s ability to maintain its clarity, a lot of these players are using this pedal to tighten up the low end frequency response that sometimes causes a guitar to get lost in a mix. Typically this is done by turning the level of the pedal all the way up and the drive all the way down. The tone knob is dialed in the most pleasing spot to the players ears. The resulting sound is quite subtle on its own, but using this setting with a cranked up hi-gain amp like a Peavey 6505 and the effect is immediately felt—and this, along with a noise gate, is what practically defines today’s modern metal sound. The secret to getting a good sound with a Tubescreamer is to get an idea of how the level and tone knobs interact with each other; in general, the pedal will sound better with the output cranked higher than the drive knob. The position of the tone knob itself plays a large impact in the overall character of the sound which can range from thick and syrupy to quite bright but not quite ice picky.
Fuzz vs. Distortion (If You Can’t Have Both)
Unless you only want to play clean (or rely solely on what you can get out of your amp), getting a distortion pedal is practically mandatory. The type of distortion pedal you choose has a huge impact on your sound. Fuzz is a bit more retro and perfect for capturing the wild electric guitar sounds of most ‘60s and ‘70s rock. In some cases, fuzz pedals are popular with players who are drawn to the bold wave-like sound that the Nano Big Muff Pi (average at $60 used on Reverb) provides, whereas players that are seeking a tighter sound might go for something like a Boss DS-1, which can be found used for an amazingly affordable average of $35.
Reverb & Delay
These two effects are used to add a sense of depth to guitar tone. Reverb emulates a sense of space, like a concert hall, while delay simply repeats the signal from your guitar for a short period of time. Used together, you can get some stunning results, but some players may feel they only need or the other.
The MXR Carbon Copy is an analog delay that is extremely popular due to its warm, lush sound. On average, they go for around $95 used, which is a great price. Delay can also be used to add a more rhythmic feel to single note passages or giving a guitar solo a little something extra to stand out.
The Electro Harmonix Nano Holy Grail Reverb is a natural choice for someone looking for a simple yet versatile reverb. These pedals sell for around $70 on Reverb and offer emulations of both spring and hall reverbs, as well as a unique setting called “flerb,” which introduces a slight flanging effect.
Modulation
Modulation effects—otherwise known as chorus, phasers, flangers, and tremolo—can be used to add a little bit of movement to both clean and distorted tones. Usually, just having one of these types of pedals can add a lot of variety. I would recommend trying each of the following before purchasing to see what you like: the Boss Super Chorus ($50 used), the MXR Phase 90 ($45 used), the MXR Micro Flanger ($65 used), and the Boss TR-2 Tremolo ($65).
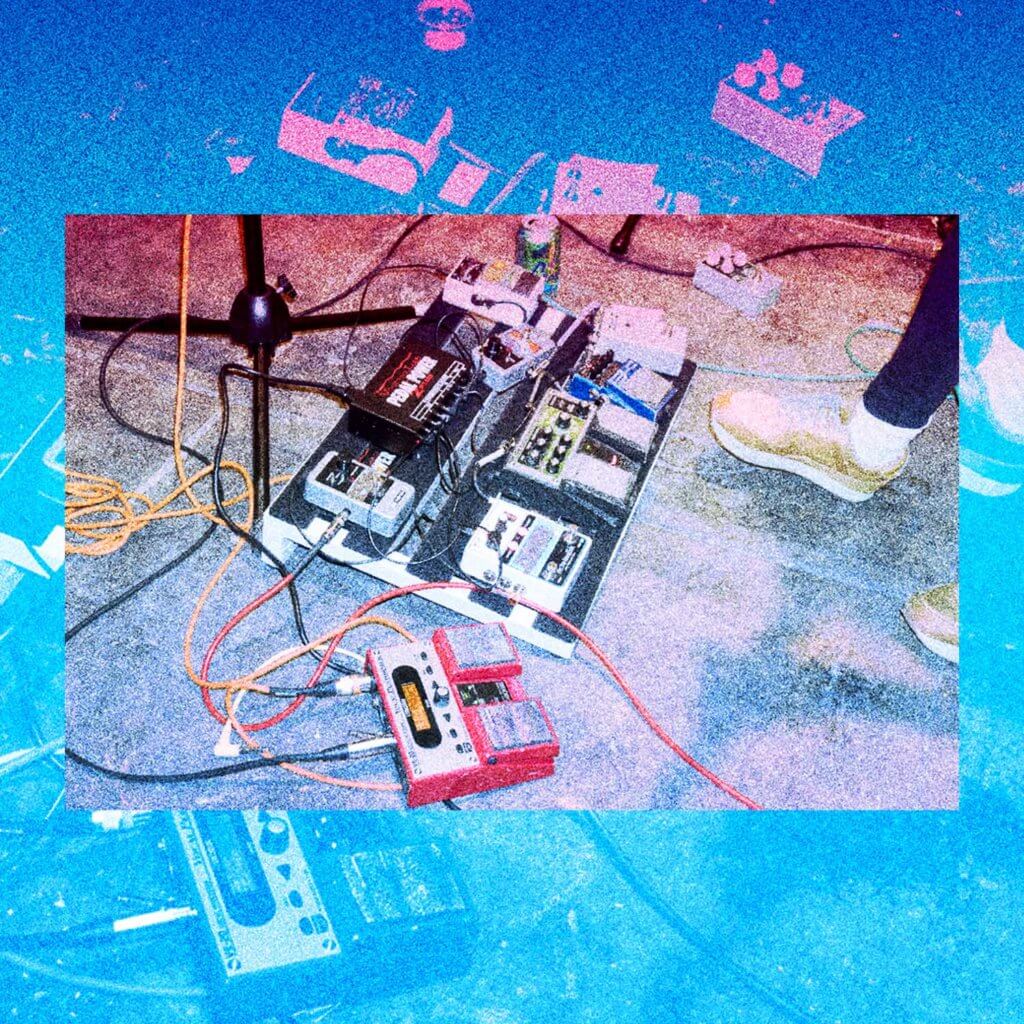
The final thing to consider when putting your board together is the layout of the pedals. Industrial strength Velcro from your local hardware store is both affordable and practical, allowing you to quickly move things around as needed while still safely securing the pedals in place. You’ll want to experiment with your pedals in different configurations to find out what sounds best in what order, but generally, effects that alter the gain are placed early in the chain, and effects like modulation are placed last. There is no right or wrong way to go about doing this, so you’ll want to trust your ear on this one, but you may find better results by following this order (from right to left):
Be sure to check out Reverb for all your used gear on their Facebook, Instagram, Twitter, and LinkedIn! #foundonreverb
In my experience, learning to play the guitar was a battle of wills between myself and my dad’s acoustic. It felt massive compared to my size, and I struggled to pull off anything other than open-string chords. I tried and failed with bar chords—my hands could never make it work, and I hate doing things I’m not good at. I happily resigned myself to the first three frets or so, and from there I tried my best to figure out how to write a song using the catalog of chords I already knew, or how to learn my favorite songs via the internet.
As I continued learning, I kept seeing the word capo. I wasn’t sure what it meant, and I’d never seen one let alone used one. It wasn’t until a friend bestowed one upon me for my birthday that I realized what it was used for. I jumped right in and all of a sudden the rest of my guitar became accessible to me, and it blew my dang mind.
Owning a capo opened a creative door for me. I didn’t know what a key was or how to write in one (I still don’t, really) but if I placed my capo on different frets to play my songs, they had a tendency to feel totally new. I found keys that felt more comfortable for my voice, and my sad songs actually felt sad too—I was hooked.

If you’re interested in playing with a capo, there are some things to consider to make sure you have the right fit. First, what are you playing? Capos are used on many different instruments that are typically fretted, such as ukuleles, mandolins, and guitars. A good next step is to check out your fretboard—is it flat or does it curve? Some capos are shaped to fit curved or flat fretboards so that they exert even pressure across the strings. An incorrectly shaped capo for your guitar could result in some frustration. If there isn’t enough tension on a string, it might not resonate and instead sound more muted or create buzzing. With too much tension, the strings begin to bend out of tune.
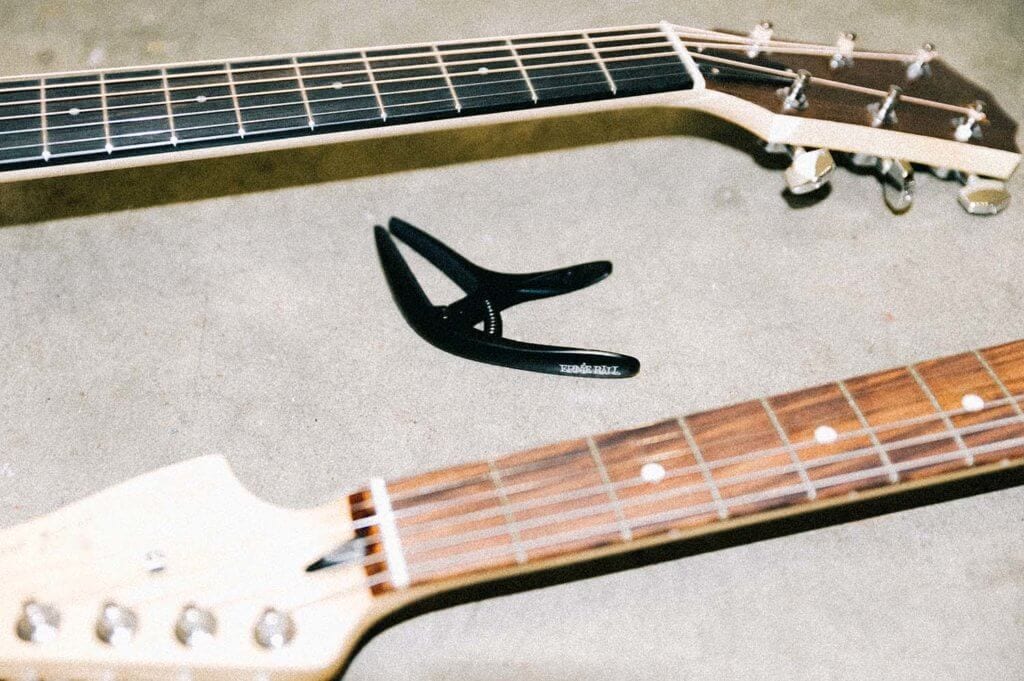
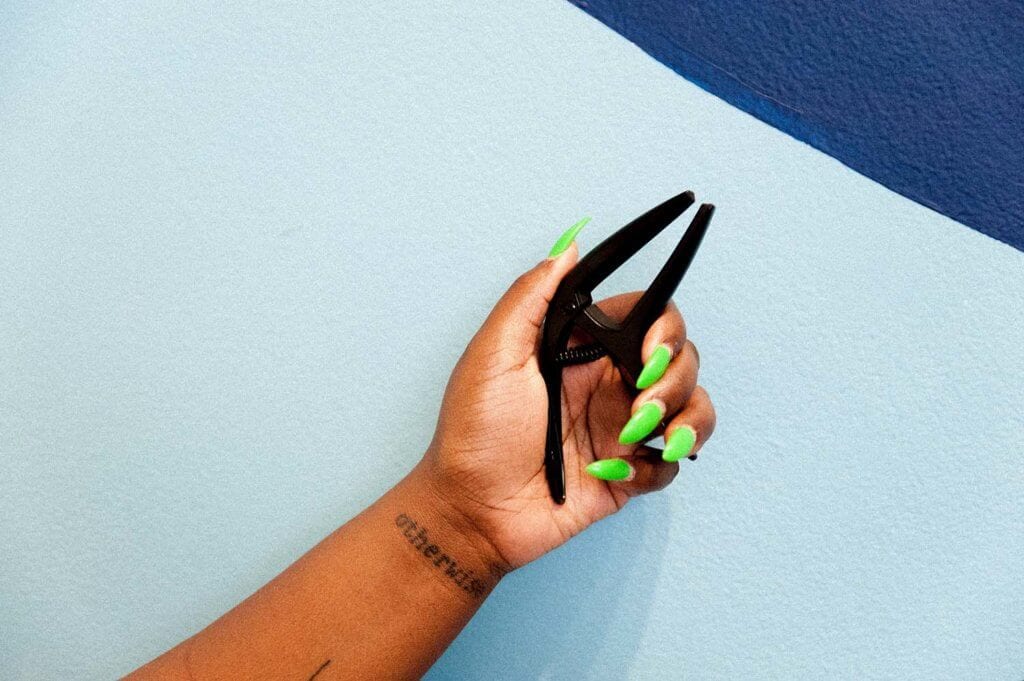
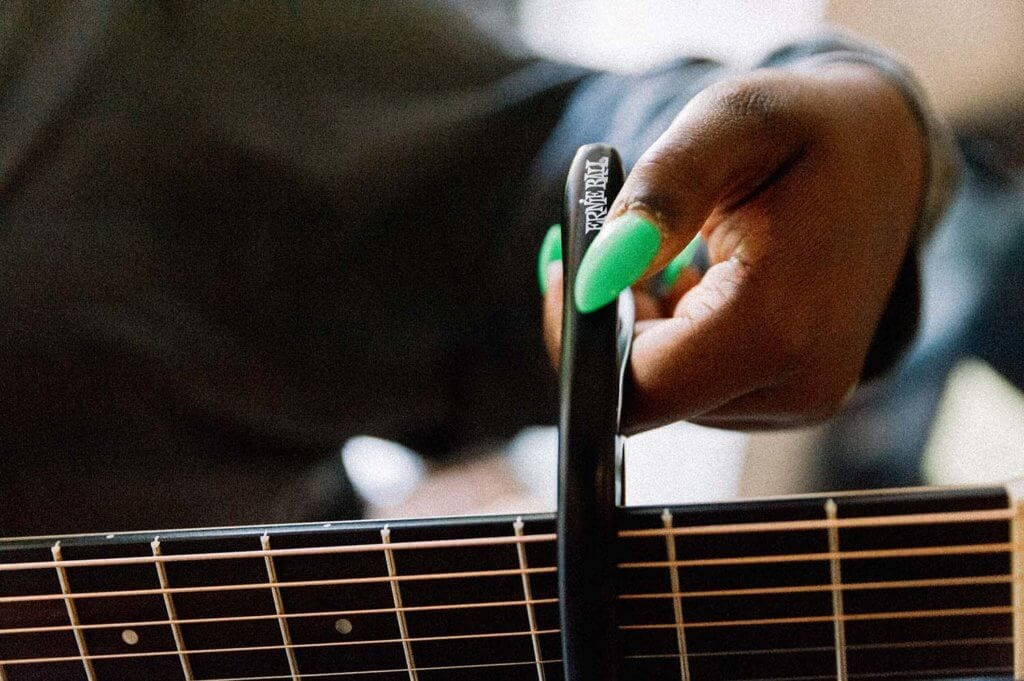
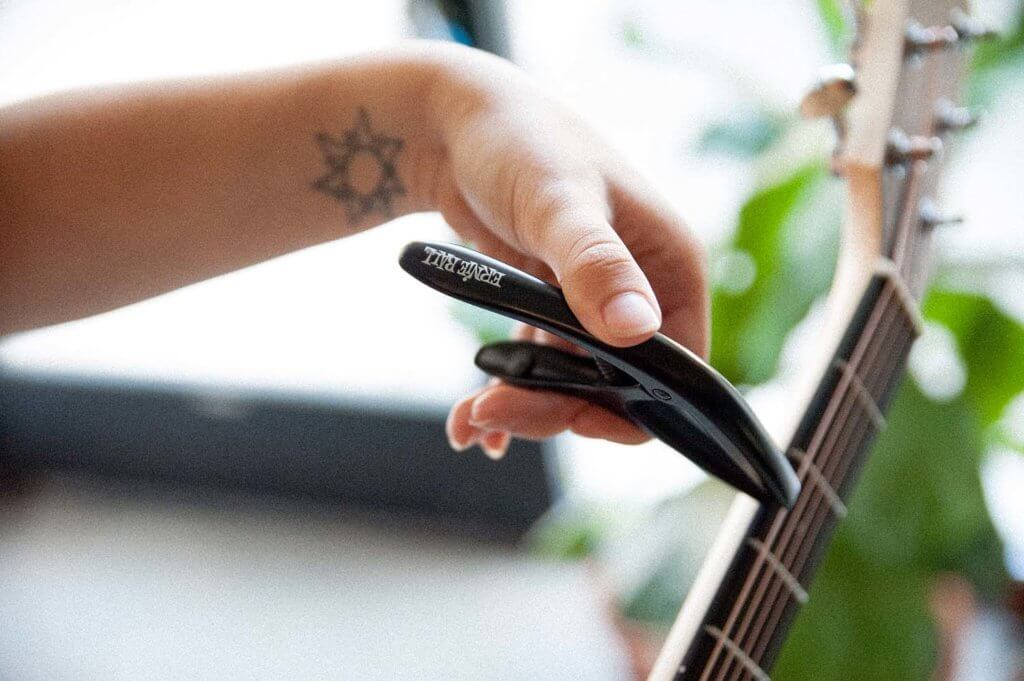
You’ll hear everyone swear by the kind of capo they use, such as trigger, strap, or spring (I’ve even used a pencil and a hair tie, it’s up to you). For beginners, a trigger or spring capo are great options. They’re very common, easy to find, and affordable. I’ve found these work great for me. You just need to use one hand to remove or reposition it, and the hardware stays well out of the way of my hand while I play. For this lesson we’re using the Axis Capo from Ernie Ball. The design is genius: it’s capable of being used with either a flat or curved fretboard simply by turning it around, which means you could use it on essentially any guitar you encounter—electric, acoustic, and even seven string guitars. Plus it’s simple and discreet, as opposed to my shiny gold capo, which, while endearing, looks a little dramatic in comparison.
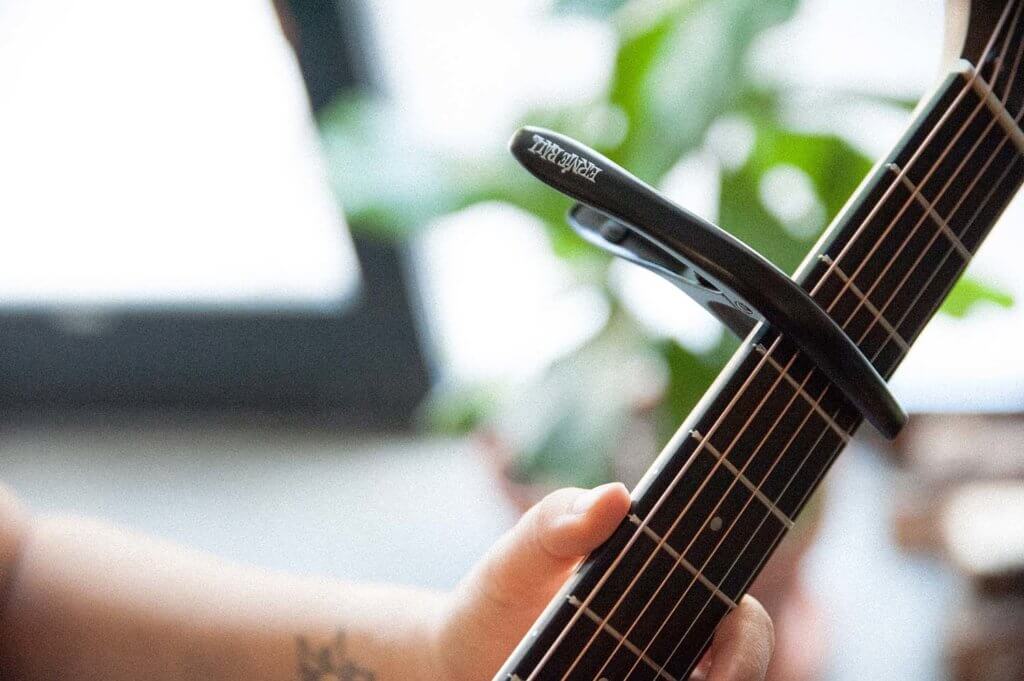
A capo acts as a clamp, pressing down every string at your desired fret to change the pitch of the open string. If you play the chords you know as though the capo acted as the end of your guitar, they’ll be in a new key. For every fret you move the capo up from zero, you’re raising the pitch of the string by a half step. Your E string becomes a G when capoed at the third fret, and so on. If you ever encounter a song that feels just out of your vocal range, adjusting the key with a capo will help pitch the guitar up to a place that feels more comfortable to sing along.

Say you’re playing a song in the key of E on your instrument. If you were to place your capo on the second fret, and play the same chords relative to the capo, you’re now playing that same song a whole step up, in the key of F# (or Gb). Guitars are often played in the keys of C, D, G, A, and E because it’s more easily tuned to do so, and since not all chords are available in an open position, capos are useful to access those other keys for any reason you see fit.
Now that you know what a capo is, I’m sure you’ll realize you see them everywhere. Loved by every kind of guitar player, it’s a useful tool regardless of your playing ability, and anything that inspires you to keep playing and writing is a very good idea!
Capos aren’t just reserved for songs played with open string chords, either. They also allow for some variety with alternate tunings and voicings. When multiple guitars are played together, using a capo gives different voicings of the same chord and adds a tasteful variety of notes that gives the chord more dimension and resonance. Open tunings (when all six strings are tuned to a note in a certain chord) and alternate tunings (as weird and adventurous as you please) are excellent reasons to use a capo, making it possible to play different songs with the same tuning but in a different key, without having to switch guitars or adjust tuning for the sake of timeliness.
For example: In the past, I’ve used open D tuning on a guitar, which means that the guitar is tuned to use the three notes to form a D major chord without having to touch a fret (D A D F# A D). Playing in open tuning sounds beautiful and resonant, with every string adding to the fullness and tonality. Open tunings come with their own voicings and shapes to play chords, but most importantly, you can now play every major chord by barring a finger across all six strings on one fret in this open D tuning. By barring the second fret, you have an open E major chord, and the third fret would be an F major. With your capo serving that exact same purpose, you can barre your instrument at the 5th fret and play in open G, which would otherwise be awkward, very tense, or mostly not possible if you had tried to tune up or down to those notes. The same notion can be applied to alternate tunings: having the freedom to adjust the pitch anywhere without the restrictions of string tension (or time for tuning in a live setting) to play your song the way you’d intended.
Capos are an awesome and simple creative tool, and hopefully one you revisit often. As you continue to learn and grow as a player, you may find that you use your capo less when bar chords become easier and voicings enable you to play in other keys without one. After breaking out my Axis Capo recently, I realized I’m pretty overdue for experimenting with a capo and actually very much looking forward to playing with one again as a more confident player and writer.
This article originally appeared in She Shreds Magazine Issue #17, released April 2019.
Players of all levels can benefit from lessons focused on speed and agility—whether you’re completely new to guitar, or an experienced player looking for some new exercises. Or maybe you’re someone like me, who daydreams of ripping solos on top of a grand piano in the middle of the desert while donning a top hat. Regardless of how fast you can currently play or your big-picture goals, here are some universal tips and techniques on this magazine’s namesake: shredding.
Tips on Practicing
Practicing is not about how fast you can play; it’s about how well you can play. Start off slow and focus on accuracy, which will increase your muscle memory and clarity. Once these exercises feel effortless to play slowly, you can increase your speed. Be patient with yourself. Speed will come.
Practice consistently. That’s easier said than done, given the fact that life can be busy and demanding, but try practicing these patterns and techniques for at least 30 minutes per day. At first, you’ll want to learn these exercises without any distractions nearby. But once you have them memorized, you can get in the habit of mindlessly letting your fingers practice while watching your favorite TV show, looking at your dog, waiting for your pie to bake, whatever. That’s your muscle memory kicking in.
Chromatic Exercises
Chromatic scales are not exactly the most musical exercises, but they’re great ways to get your left and right hands better coordinated, and to build your finger strength and dexterity. Unlike other scales, you can start and end anywhere on the fretboard, on any note. And because these drills are so mechanic, they’re perfect for practicing mindlessly to get in your daily 30 minutes of finger exercise.
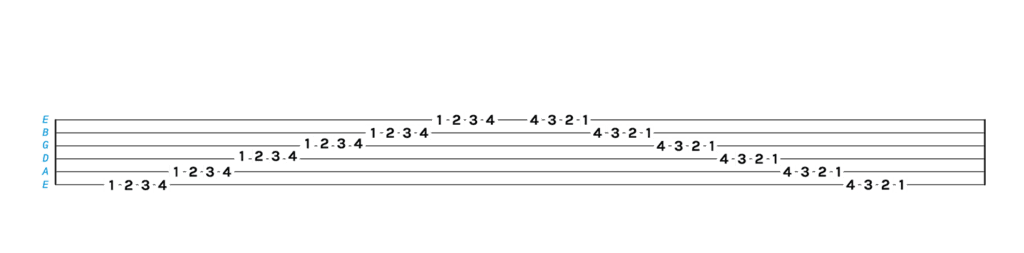
Below is a basic finger warm-up exercise. Try going up and down the entire neck, using this pattern on every fret. Use the first finger for the first fret, second finger for the second fret, third finger for the third fret, and the fourth finger for the fourth fret. When you get to the fourth fret of the highest string with your fourth finger, go backwards to end up back at the lowest string with your first finger. Make sure your fingers stay on each fret until you move on to the next string. Maintain this pattern as you move up each fret along the neck. It’s a long journey, but your fingers will be well-exercised by the time you get to the highest fret of the guitar.
Once you have this basic pattern down and can cycle through the scale up and down without stopping, you can try out some other patterns. Using the pattern, work your way up the strings while shifting positions and exercising the pinky.

You can also practice different patterns up and down the strings. Instead of using tabs, try using the pattern below. Here’s what the numbers indicate: 1 = first finger; 2 = second finger; 3 = third finger; 4 = fourth finger. Each set of four notes is to be played on one string. Start with the lowest string on any fret and work your way up each string until you end on the highest string.
1234, 1423, 4132, 1324, 1432, 1342
Scales
Practicing scales is a great way to increase your speed and agility. One of my favorite scale exercises is below, using the E harmonic minor scale. It’s a favorite because it sounds kind of “evil” and is perfect for metal riffing.

Work That Pinky
Chances are, your pinky finger (or your fourth finger) is the weakest link. The only way to build pinky strength and independence is to practice purposefully with various drills. It takes time and patience, but when your pinky catches up to the rest of your fingers, you’ll gain the rewards of faster and more fluid playing.
In addition to the chromatic drill shown earlier, below is one of my favorite exercises that helps with pinky finger dexterity. It’s one of the first patterns I learned when I first started playing guitar 20 years ago, and it’s still one of the first practices I dive into when I pick up my guitar today. In this exercise, your pinky gets the biggest workout while your first finger moves the least. You can start on any fret, but the tabs below will start on the seventh fret for the purposes of showing the pattern.

Variations
Styles of picking
Alternate picking is the most common way to build speed, but trying out other variations helps to diversify your abilities. This includes creating different patterns, such as down / up / up / down; down / up / down / down; and so on. You can try strumming two strokes per note, three strokes per note, four strokes per note, etc.
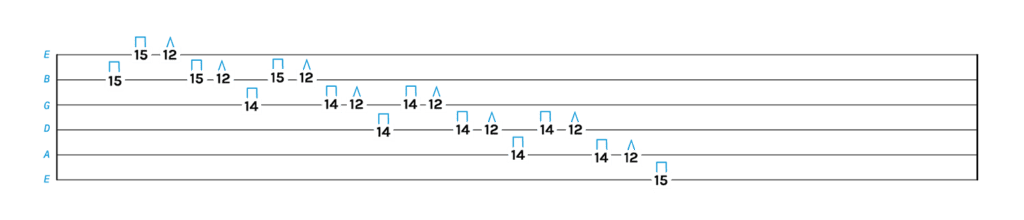
Economy picking is great way to combine alternate picking and sweep picking (a downward or upwards motion across strings). When notes are played on the same string, alternate picking is used. When notes are spread across different strings in a sequence, the downward or upward direction of picking motion is maintained while crossing strings. Practicing this technique will result in a faster and more controlled way of picking, and will eventually send you on your way to sweeping arpeggios.
Try this economy picking pattern through an E minor pentatonic:
V = downstroke
^ = upstroke
Metronome
Playing with a metronome can help improve your timing and speed. Start with a comfortable, easy pace—around 80 beats per minute (bpm). Increase your speed gradually as you become comfortable with each pace, moving on to 100 bpm, 120 bpm, and 140 bpm. When you’re first starting out, play around with the number of notes you hit per click. Start with one note per click, two notes per click, three notes per click, and then four notes per click. What you’re able to master at 80 bpm will eventually feel seamless at 120 bpm.
Vary notes within a scale
Once you have basic scale patterns down, try varying the notes. Using the E harmonic minor scale as an example, try this:

Skip strings within a scale
Try skipping strings to enhance your right hand’s agility. Using the B minor pentatonic, try this exercise:

Final Thoughts
Practice and be patient. Aside from the self-discipline required to practice regularly, patience will prove to be the most important part of your process. Once you get the hang of these drills, it’s fun to see your fingers fly across your fretboard. If you keep at it, you’ll see the results you’re aiming for. Build that callous, get that muscle memory in place, and you’ll be shredding in no time!
The first thing Laura Jane Grace, founder and frontwoman of Against Me! and solo project Laura Jane Grace & The Devouring Mothers, asks me is—is this article is exclusively about moms? “I’m still very much my daughter’s dad, but I’m female identifying transgender,” she says. “We’re not traditional at all.” And traditionality is not to be found in any of the stories featured in this piece; but rather, the realities of parenthood as a touring musician.
Grace has been touring since the late ‘90s, so with the birth of her daughter, Evelyn, in 2009, it was a matter of working parenthood into her schedule rather than giving up music. (By the way, the birth was perfectly scheduled around making Against Me!’s fifth studio album, White Crosses.) Grace’s life has always revolved around a musician’s cycle of work: write an album, record it, go on tour. But those early years when Evelyn was still a baby weren’t easy. “It was excruciating, such a sacrifice,” she says. “You’re gone and missing such formative years. But at the same time, with it being the reality of how you support your family and pay the bills, that’s the toss up.”

Before Evelyn attended school, Grace would bring her on tour as much as possible, hiring friends to come along as nannies. Grace and Evelyn had plenty of time alone, but as every touring musician knows, figuring out what to do with your free time can often be a challenge. “Most of the time you’re at a venue that’s not in a convenient part of town, so you’re limited to what’s in walking distance,” Grace says. “You make games up in the venue, and explore around that.”
Today, tour is the everyday reality of both of their lives—Evelyn’s mother, artist Heather Gabel, tours as well. But when Grace isn’t touring, she is unconditionally at home: “I wake up at 5 a.m. so I have an hour to myself before I wake my daughter up, make her breakfast, and drive her to school. I have a little studio space around the corner from her school that I work at all day. And then I pick her up from school, drive her home, make her dinner, and we do it all over again. And then I go on tour.”
While on the road, Grace is sure to stay organized and in touch with her daughter. She’s found that making short calls often works best for them, instead of having really long conversations. The two also write letters, send packages for fun, and FaceTime. And opposed to touring 10 years ago, new technology makes it much easier for Grace to be connected to her daughter’s daily loop. She places an order for Evelyn’s pizza lunch on Wednesdays, and knows what lessons she has and when. “Kids are really routine-based,” says Grace. “So having it where the tour is also part of that routine and they are accustomed to it, then it’s nothing out of the ordinary.”
Similarly, Canadian musician of Afro-Colombian and Indigenous descent Lido Pimienta needs balance. She finds that staying organized and finding a supportive community has made touring with children much easier. As a mother of three, she’s had to get creative with childcare: her close friends have moved into her house to watch her children, she has a budget for caretakers, and she creates a shared Google calendar so everyone knows her children’s schedules.
Pimienta gave birth to her 11-year old son Lucian when she was 21, followed by taking in her 8-year-old nephew Orlando, and then she gave birth to her 8-month-old daughter Martina last year. With her first child, she knew she wanted a baby but without fully understanding what that would entail. “You can’t do this by yourself,” she says. “You need a tight community that you can trust, who are able to either stay home with your kids or go to the shows with you and stay side stage or in the greenroom. You need to have really good friends, and you need to be a good friend yourself, because these aren’t just favors people are going to give you.”
Following her 2010 debut, Color, and her 2016 album, La Papessa, that won the Polaris Music Prize in 2017, Pimienta will be releasing her third album, Miss Colombia, later this year, and plans to bring someone trustworthy on tour to watch Martina. “When you make this decision to bring life into the world, you need to be someone who understands healthy choices,” she says. “Not just smoking or drinking, but surrounding yourself with people who only have good intentions and the best interest for you. And you for them.”
While venues consider lighting, sound, drinks, and environment, Pimienta points out that they don’t often consider their booked artists bringing children along, and that musicians are often unaware of the power they have in asking for what they need. “We are afraid of burning bridges, and asking for too much,” she says.
“Especially if you’re a woman.”
Pimienta lets venues know ahead of time that she’ll be coming with her family. While she assumes all of her needs can’t always be met, she does expect that the venue takes care of some of the accommodations that she requires. And in return, she can provide her uppermost performance.
“In an ideal world, all venues would cater to regular people,” Pimienta says. “A lot of us have families, and it would be great if there was a safe space for them to hang out while we’re performing. And we shouldn’t have to get to this upper echelon of fame to have all of these accommodations. But we should expect it, demand it, and at least normalize it.”

Jacki Warren, singer and bassist in the Grand Rapid’s band Major Murphy, stresses the importance of all-ages venues, especially for touring parents—she once had an experience where her son Benji was not allowed in the very venue Major Murphy was playing that night.
In her career thus far, Warren has had a much different experience than Grace or Pimienta. In 2015, neither Warren nor her partner (and father of Benji), Jacob Bullard, had jobs when they first met. Phasing out of her previous band, The Soil and the Sun, Warren started Major Murphy with Bullard that same year, followed by Benji’s birth a year after their first show. With the parallel birth and growth of her band and child, Warren hasn’t had a particularly easy time: “I’ve struggled with my identity as a parent. It hasn’t been an easy transition. I struggle to know where I fit in the music community, but also in the mom community.”
Touring with Benji was easier for Warren when he was younger. Following the release of their 2018 debut album, No. 1, Benji slept a lot of the time while on tour, and friends would watch him in his stroller (wearing sound-protecting headphones) while Major Murphy played. But now that Benji is almost three years old, Warren has to navigate his changing needs. “As soon as we figure something out, like what kind of rhythm he needs, Benji changes,” she says. “It’s constant adapting.” And related to Warren’s experience, Pimienta learned the importance in acknowledging your child’s needs as they grow: “The baby’s not a baby forever, you’re going to cross this threshold. It’s up to you how to integrate this childhood in your work. You need to have this openness in your heart; you cannot be selfish. And that’s very hard, because artists are narcissistic.”
Warren is still breastfeeding her son, but realizes that in order to do longer tours she will have to start weaning him. “If there was a Buzzfeed quiz, ‘What Parenting Style Are You?’ we’d be classified as attachment parenting,” laughs Warren. While breastfeeding has enabled her to provide her son with a constant in an ever-changing environment, saying that it’s a safe space she can create for him in a green room or dive bar, Major Murphy recently had to turn down a European tour. “I’ve never stayed a night away from Benji,” she says. “One day at a time.”
This one-day-at-a-time mentality is also being followed by soon-to-be and new mothers, respectively, Shana Cleveland and Mirah. Cleveland was on tour with her band La Luz shortly after finding out she was pregnant and is due this June; Mirah gave birth to her son at the end of last year, after the release of and tours surrounding her 2018 album, Understanding. Currently, Cleveland is on tour supporting her solo debut, Night of the Worm Moon, released in April, and is highly focused on finding healthy food options while on the road, while Mirah is using her first two shows since giving birth as a trial for the future. “It’s the test run of, ‘What is this going to look like? How do you do bedtime?” Mirah laughs. “How does that fit in?”
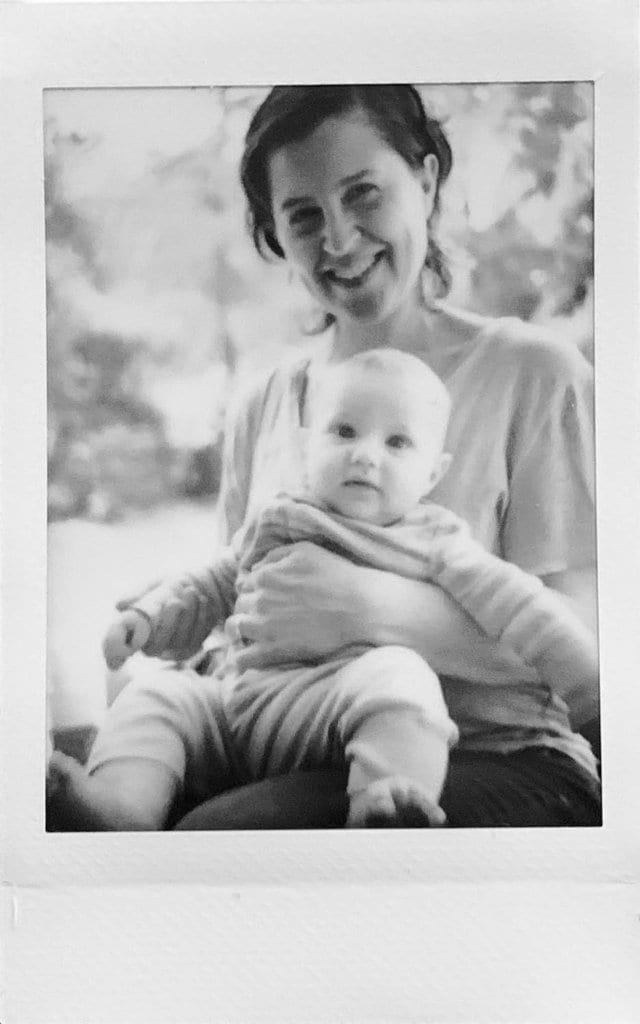
Mirah feels lucky that she can ease back into touring with a baby, since she’s not in the middle of an album cycle. She plans on asking advice from friends like Kimya Dawson and Laura Veirs about their own experiences, and she also plans to remain realistic about her resources. “For those of us who are still renting minivans and just trying to piece things together so that the shows can happen, it takes maybe just a little more creativity to figure out how it’s going to work.”
While there are many factors that go into being a touring parent—including so many more than we could fit here—finding a supportive community seems to be one of the key elements that weaves together the experiences of Grace, Pimienta, and Warren, and is something being seriously considered by Cleveland and Mirah. However, Warren would love to see more spaces where she could connect with other touring parents for advice and resources: “I’m craving conversations with other people who are in this new wave of, ‘We can still have families, we can still be musicians in our 30s, we can do whatever the fuck we want.’ But how do we connect with each other?”
Our hope at She Shreds is that this article, and these experiences, will spark more dialogue and opportunities surrounding the personal stories of parents, the support they need, and necessary changes the music industry needs to make in order to show up for those who are bringing future shredders into this world.